The Process Pending Donations (sometimes displayed as Gifts) feature provides three important benefits:
-
Ensures gifts appear on your reports
-
Prevents duplicate donor records
-
Connects giving for donors who prefer to give as a guest and not create an account
Donors who login to give will not appear in this list. As a best practice, it is good to Process Pending Donations before pulling giving reports.
Please note the actual transaction is processing or has already processed. This is just the record of the transaction you need to process for it to be tied to a Donor’s account.
Tying a Donation to an Existing Donor
-
From the welcome window, click Process Pending Donations.

-
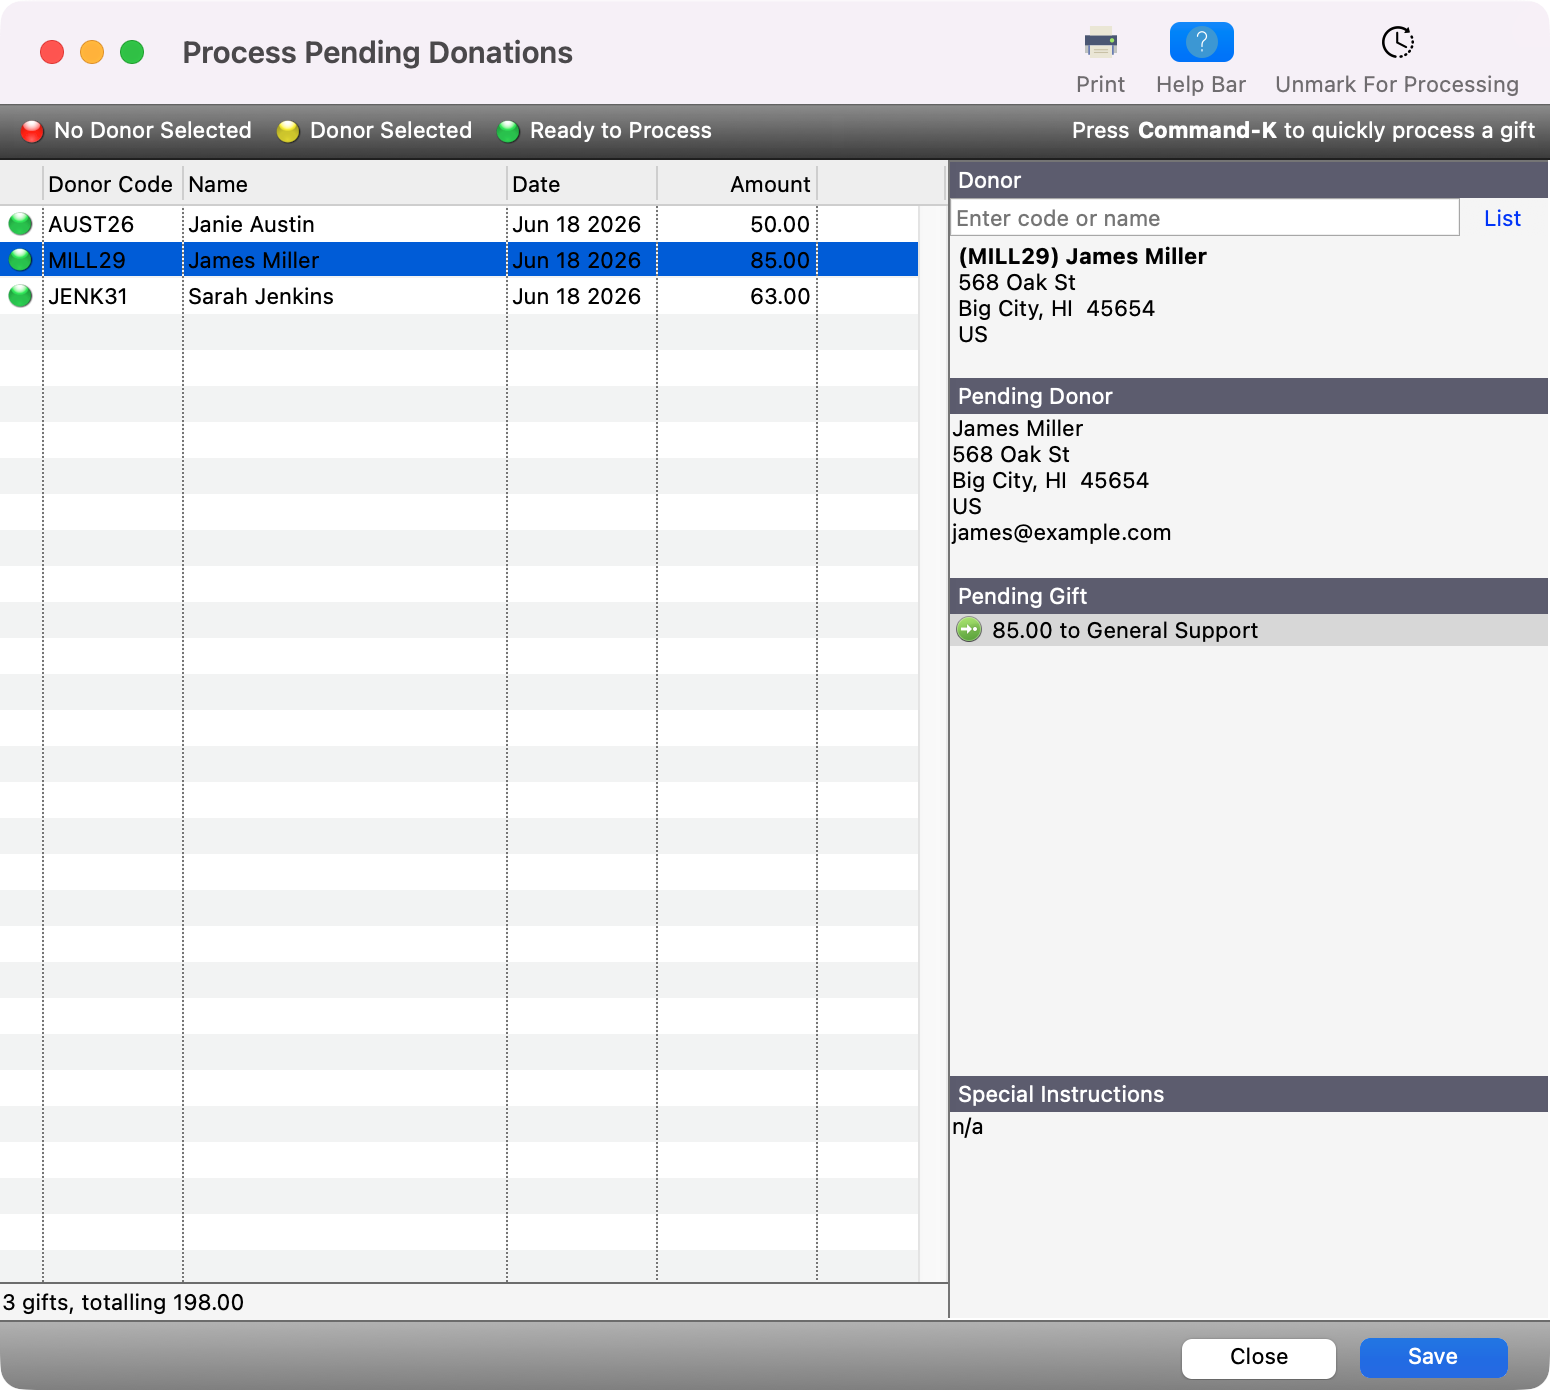
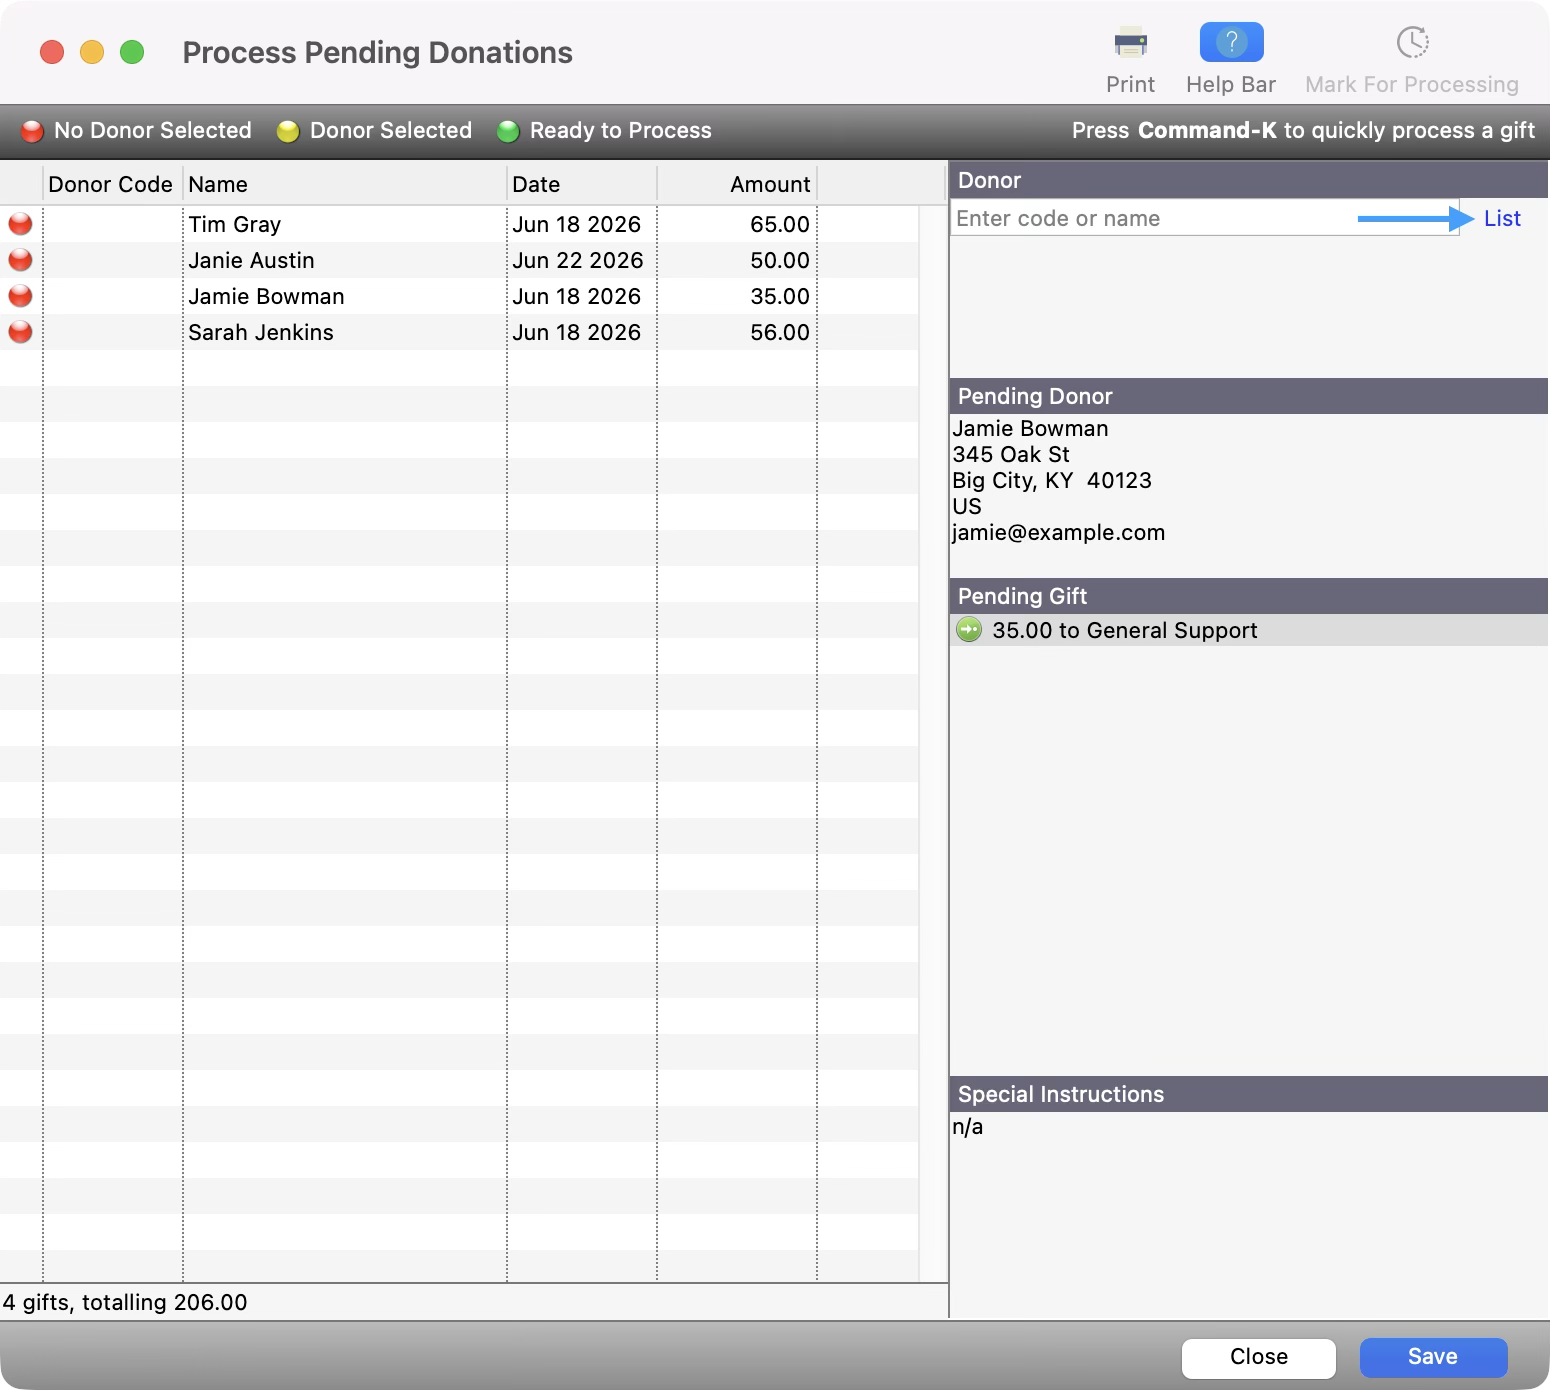
You will see a window that will list all of your recent donations where someone has given as a guest. You will see a dot next to each donation record that represents a different status.
-
🔴 No Donor Record Selected
-
🟡 CDM+ has matched a potential Donor record, please review match to confirm
-
🟢 Ready to Process
Initially, all gifts in this list will either have a red or a yellow dot. CDM+ will attempt to match an incoming gift to an existing Donor record in CDM+ by the record’s last name and address. If it can, that gift will have a yellow dot. If it cannot, the gift will have a red dot.
-
When you select a donation for which CDM+ cannot easily identify the source (red dot), you can either select a Donor Record to tie the donations to or create a new record.
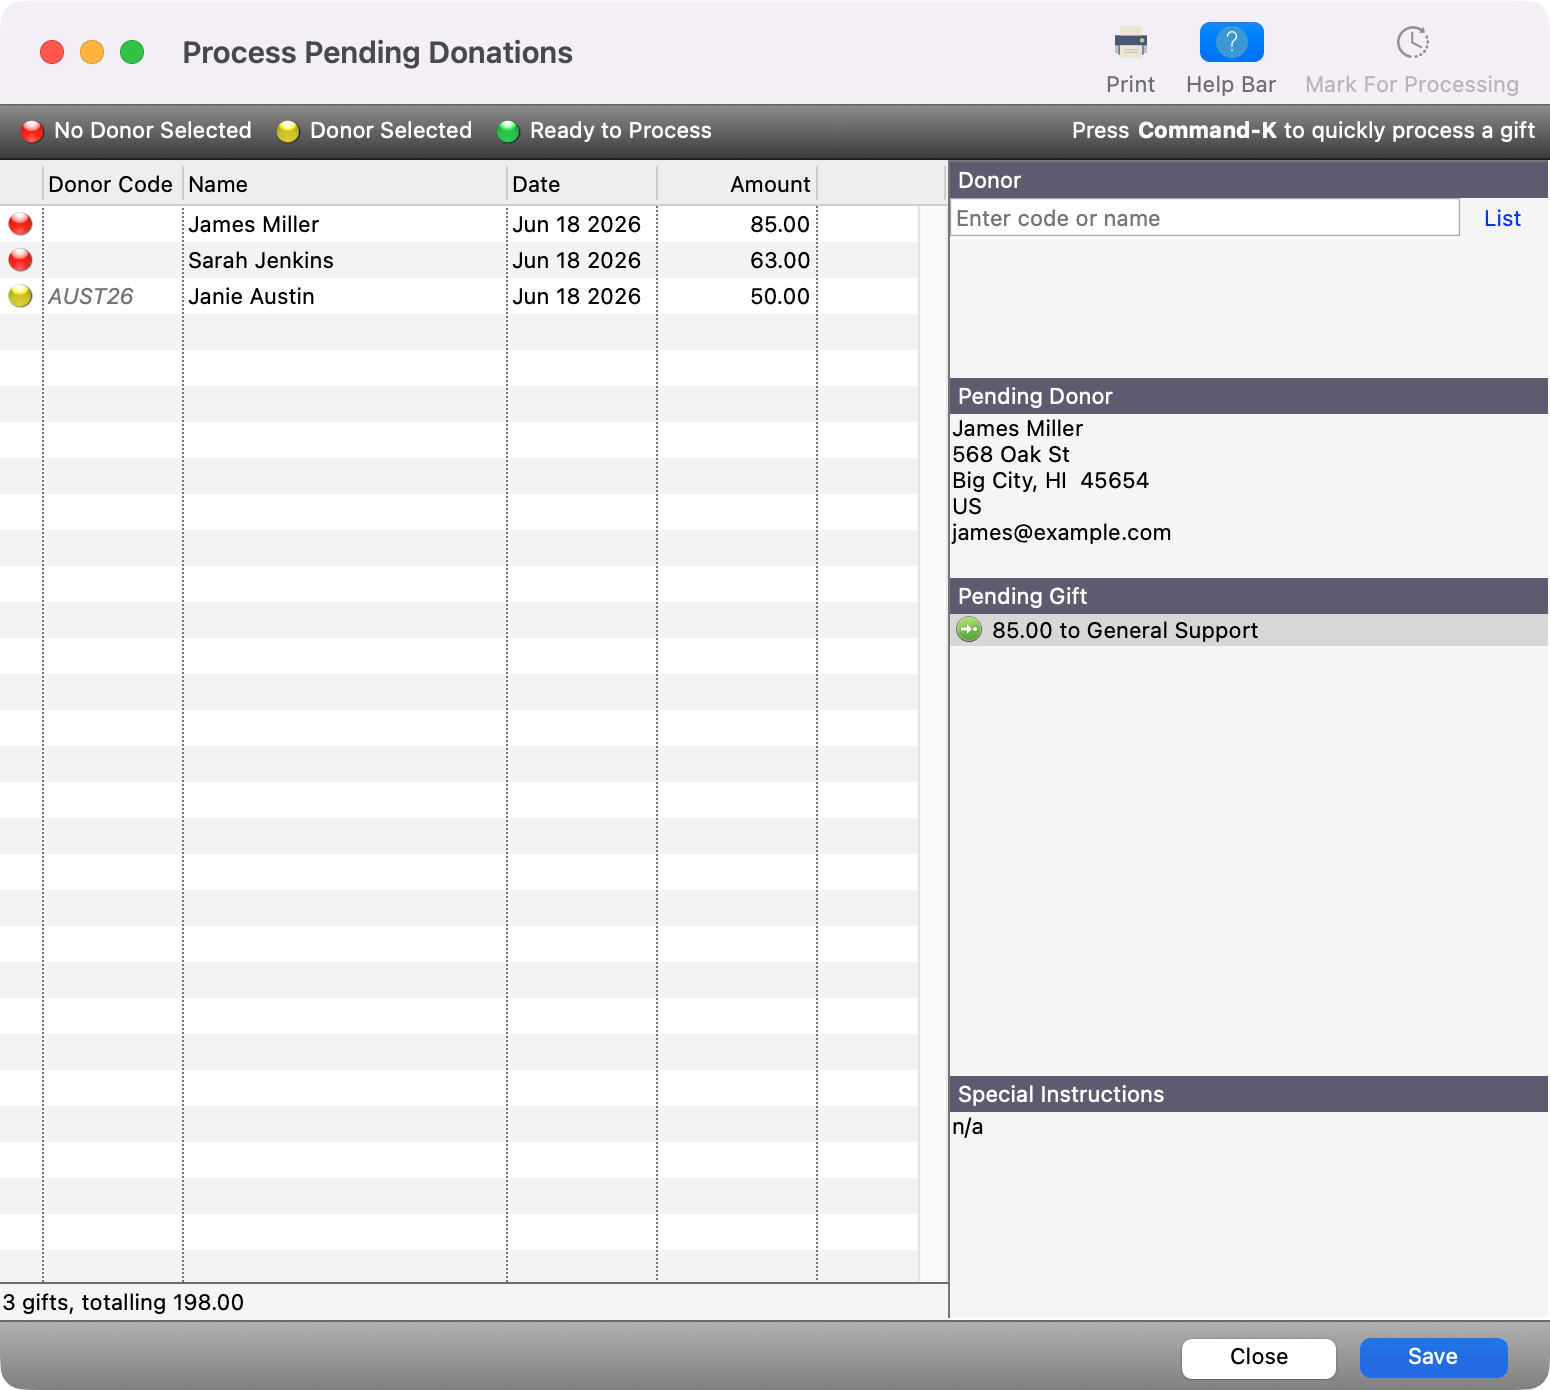
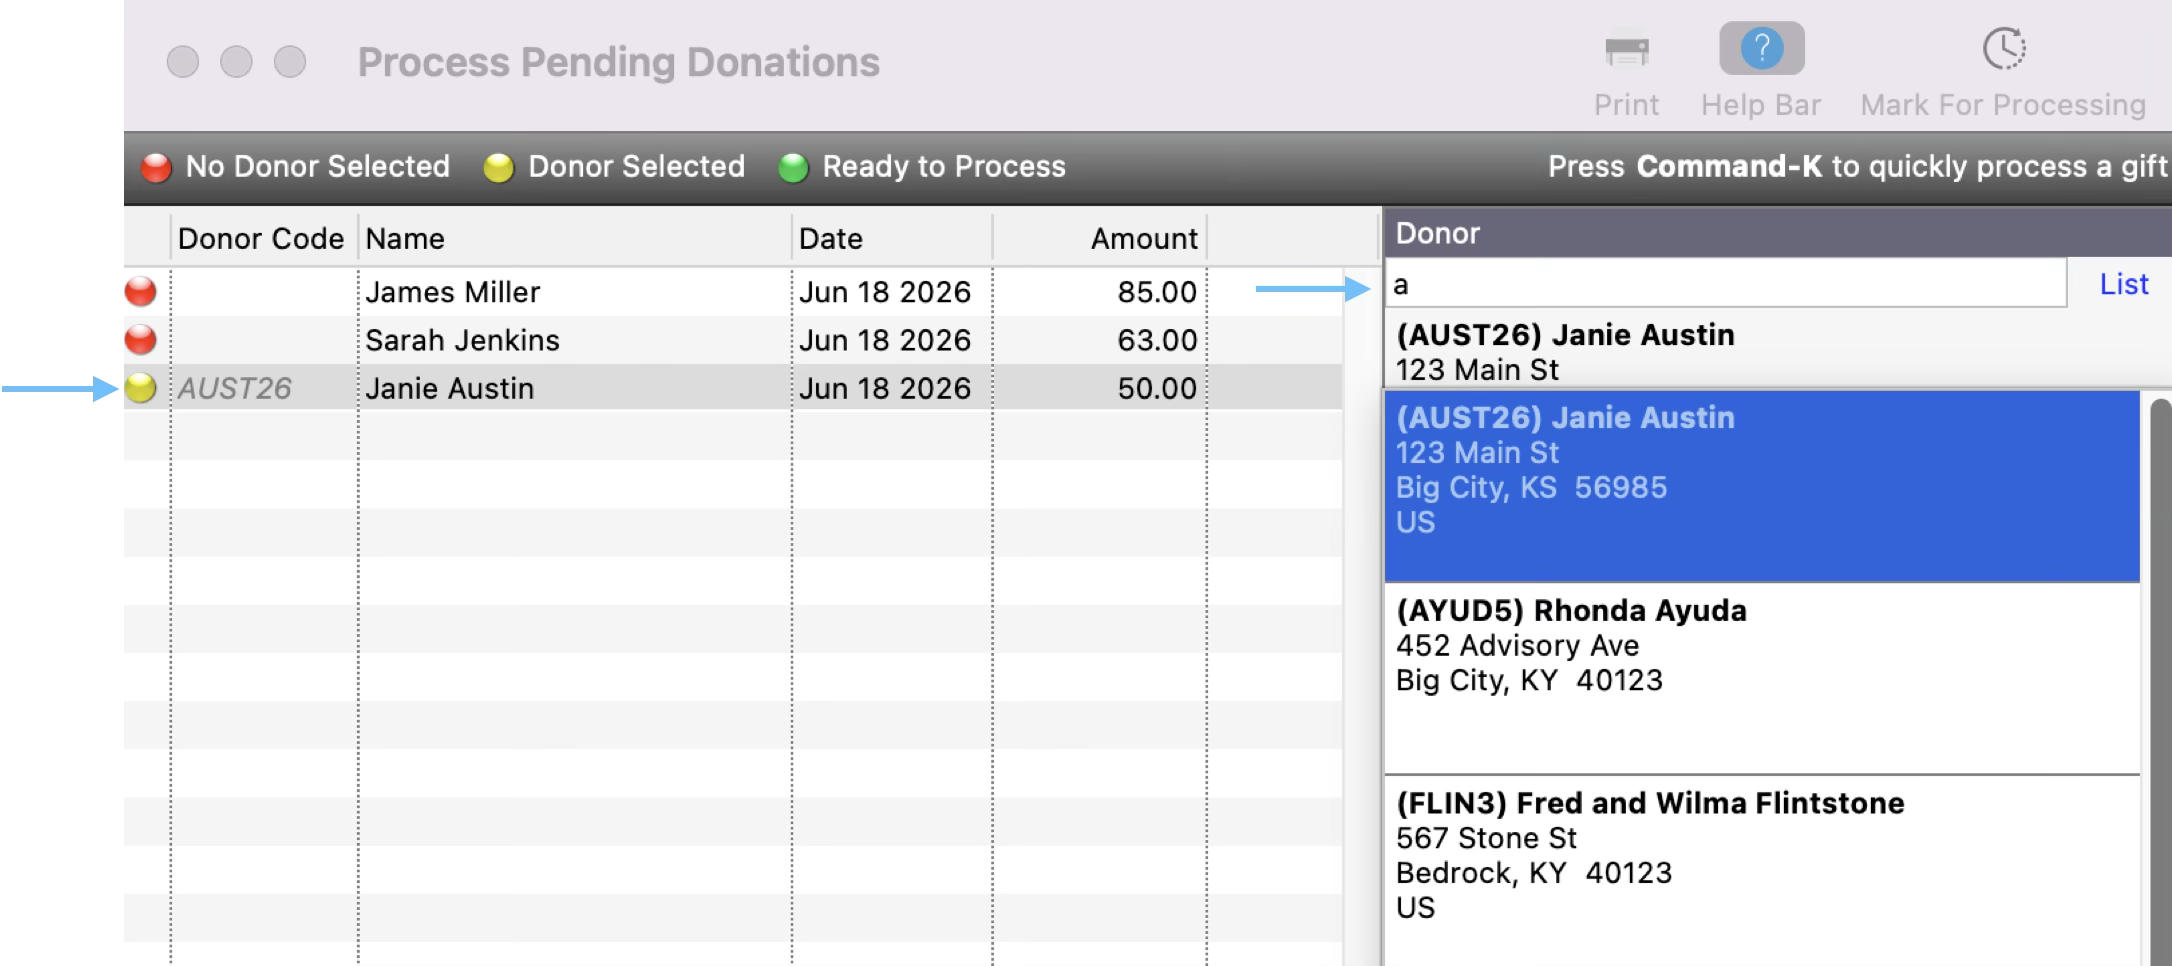
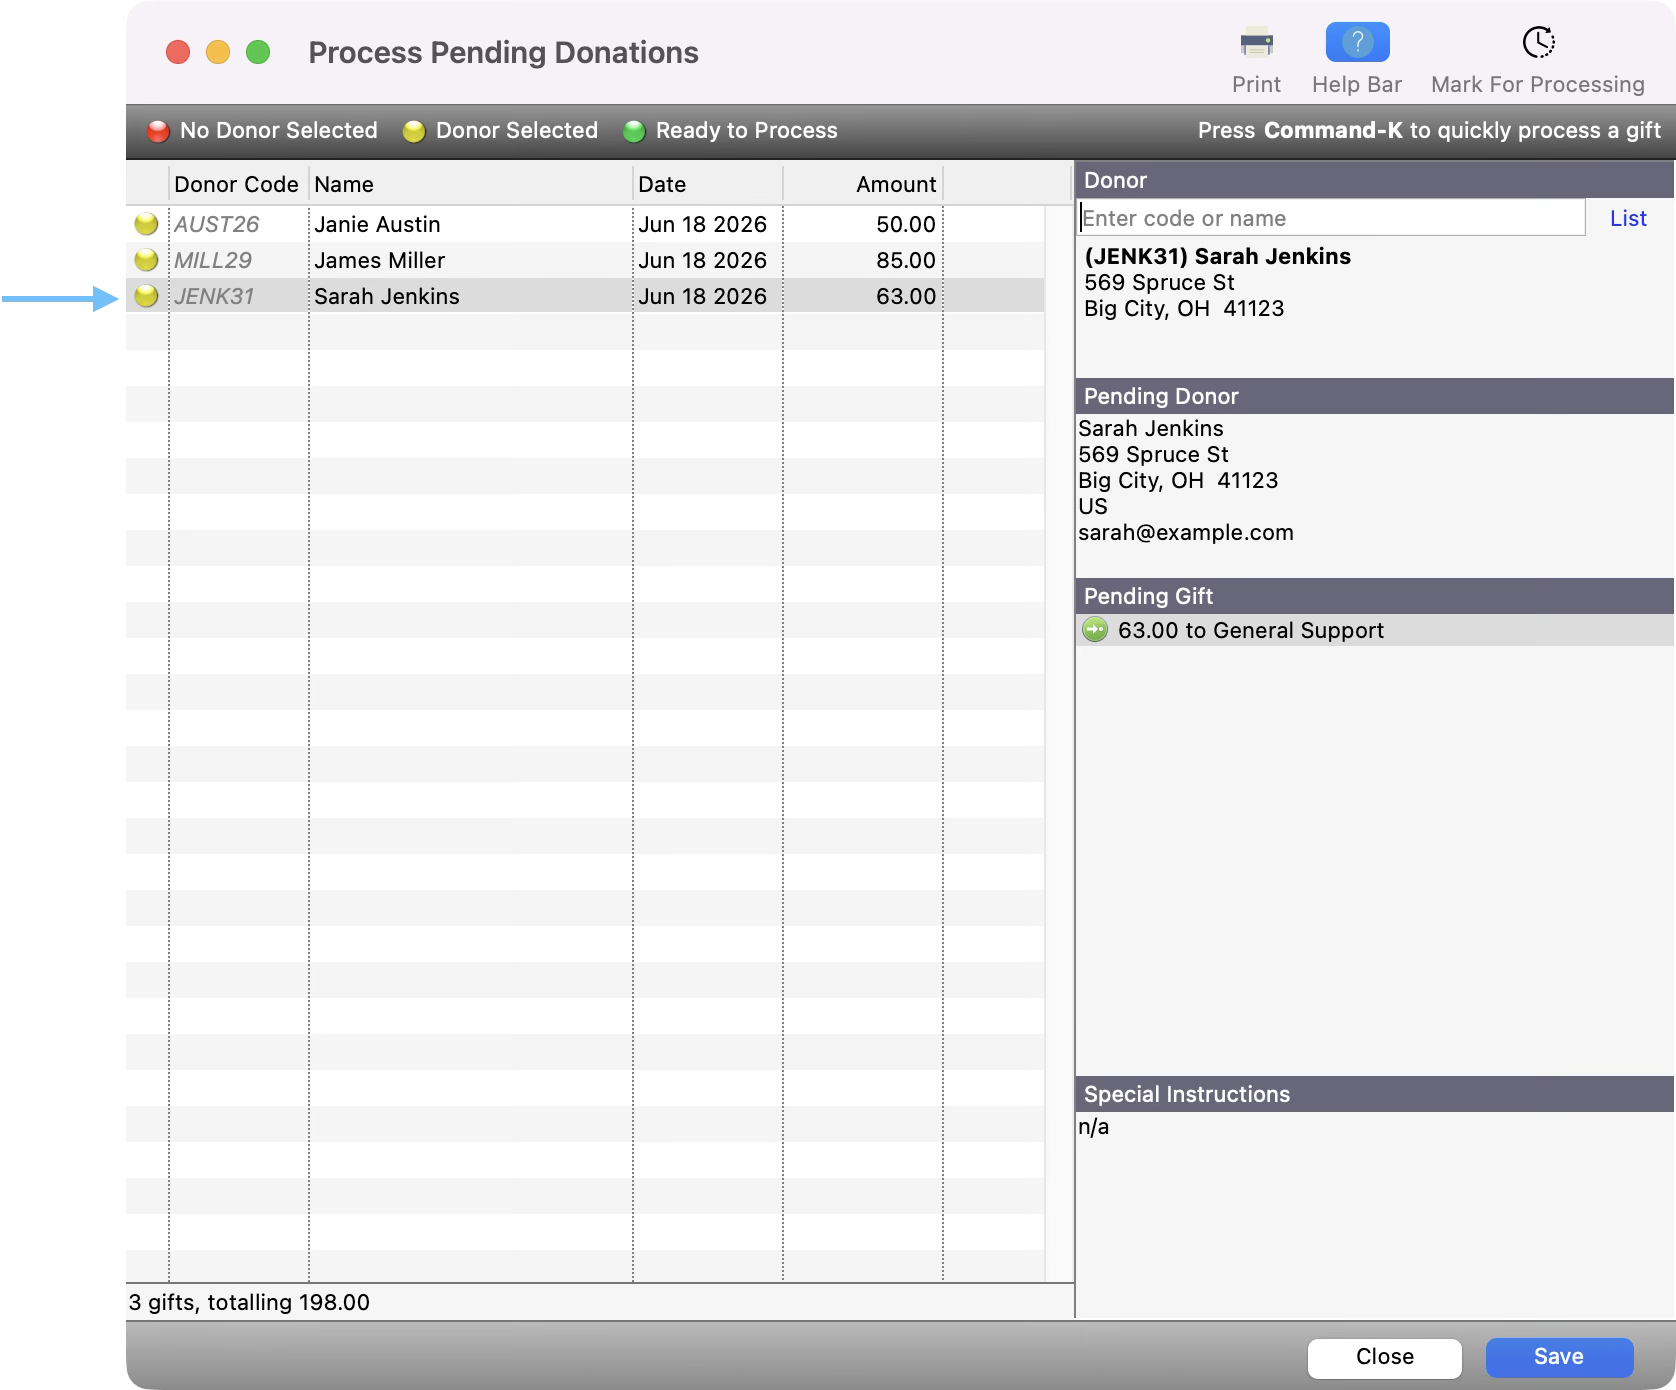
To tie a donation to an existing Donor record, first click to select a donation that has a red dot. For this donation, you can see the details about the donor's address and about their pending gift.
-
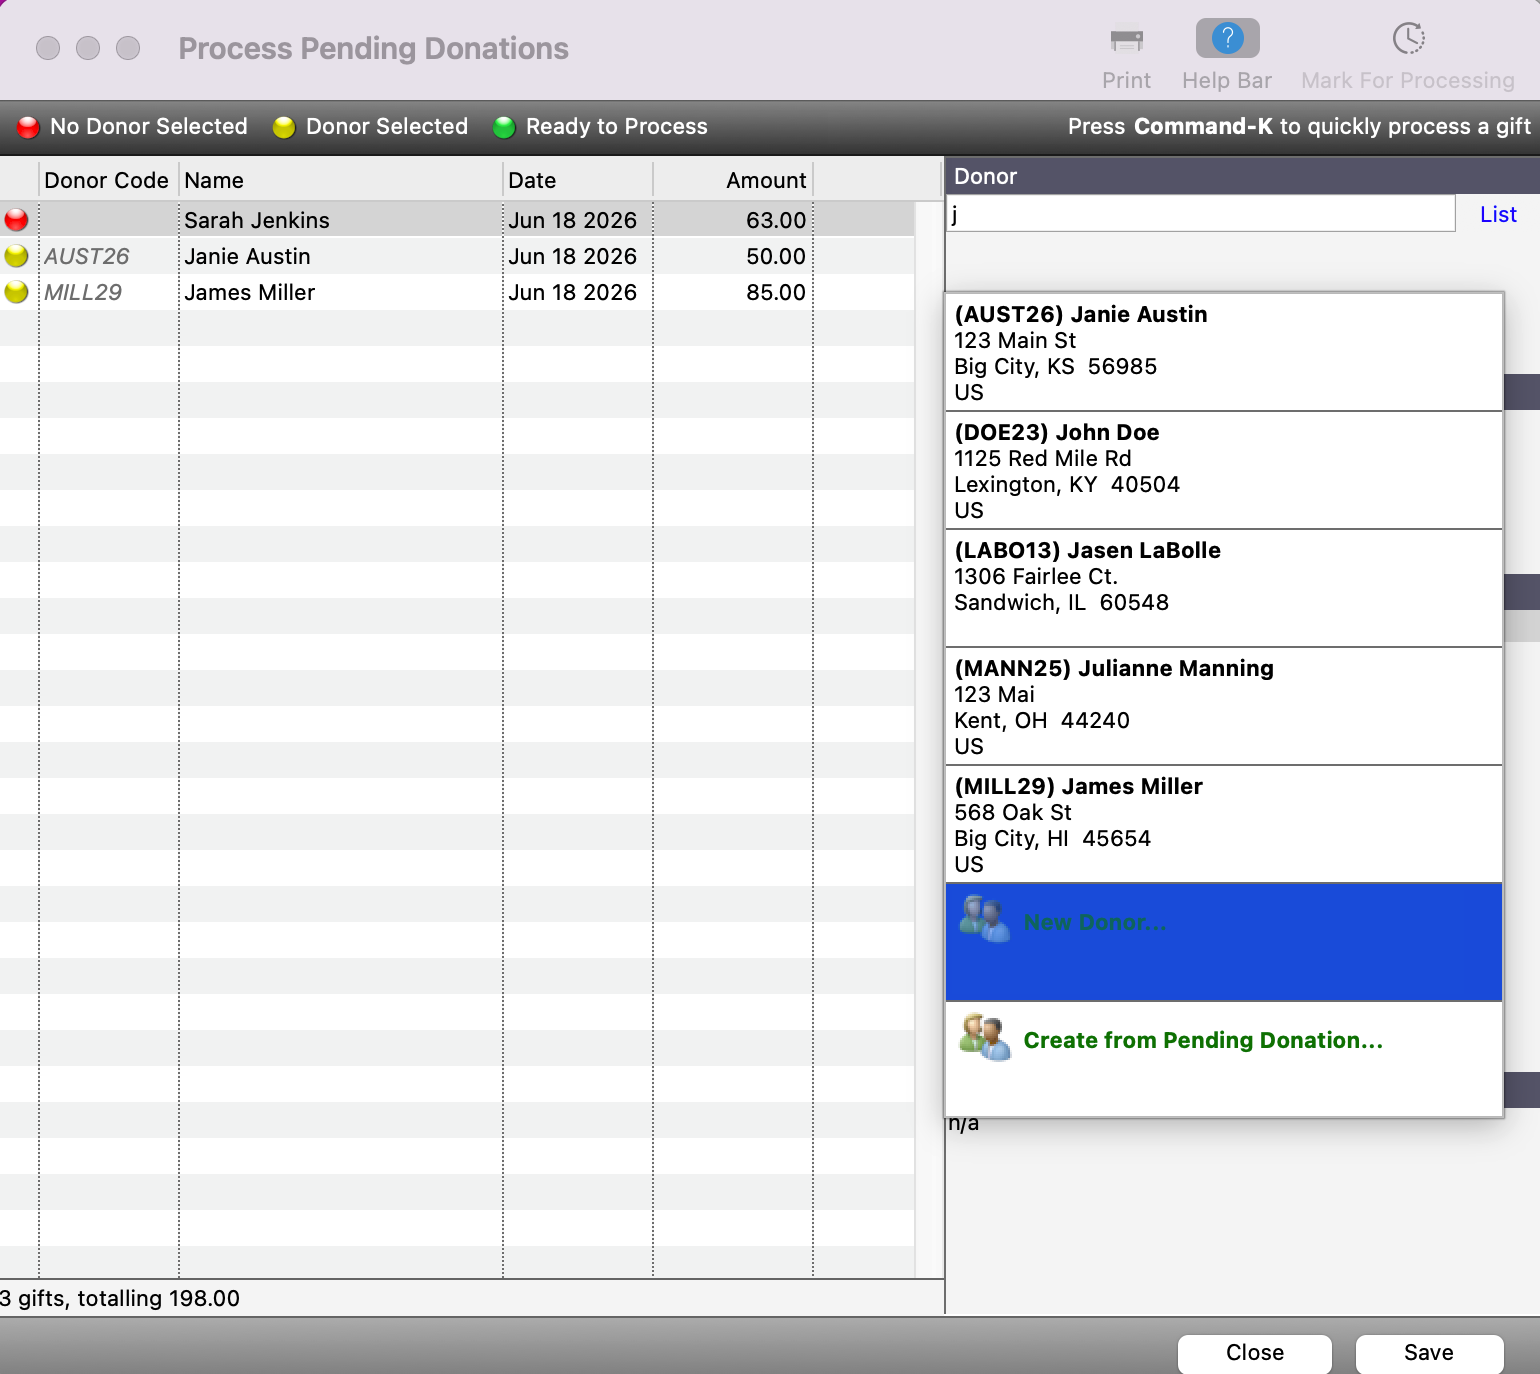
In the Donor search field, start typing a portion of the donor's name, then hit Tab on your keyboard. You will see a list of potential donors to which you can tie this donation. If there is a match, double-click on the Donor record you want to tie to the donation. Then, you will see the red dot turn to yellow next to the donation record.
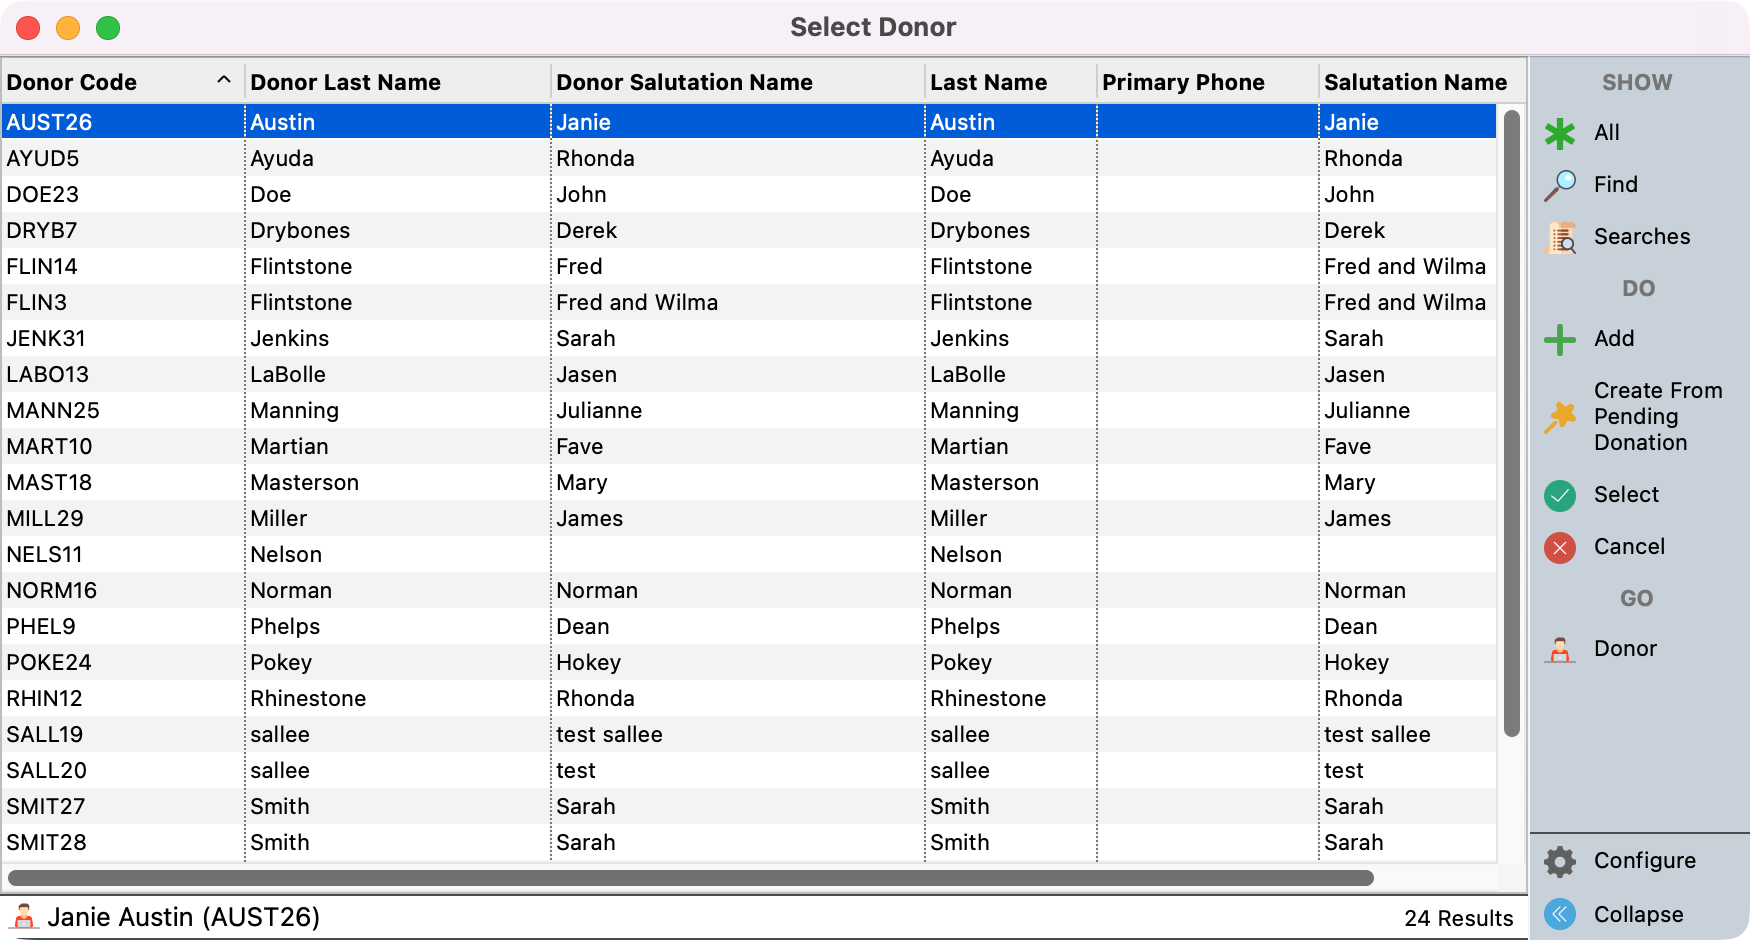
You can also click list next to the search field to bring up a list of donors to select.
Creating new Donor Records
There are a few ways to Process Pending Donations and create a corresponding Address, Individual, and Donor record. You can use the Create from Process Pending Donation feature or Add the records manually. You can see both options below.
Create from Process Pending Donations
-
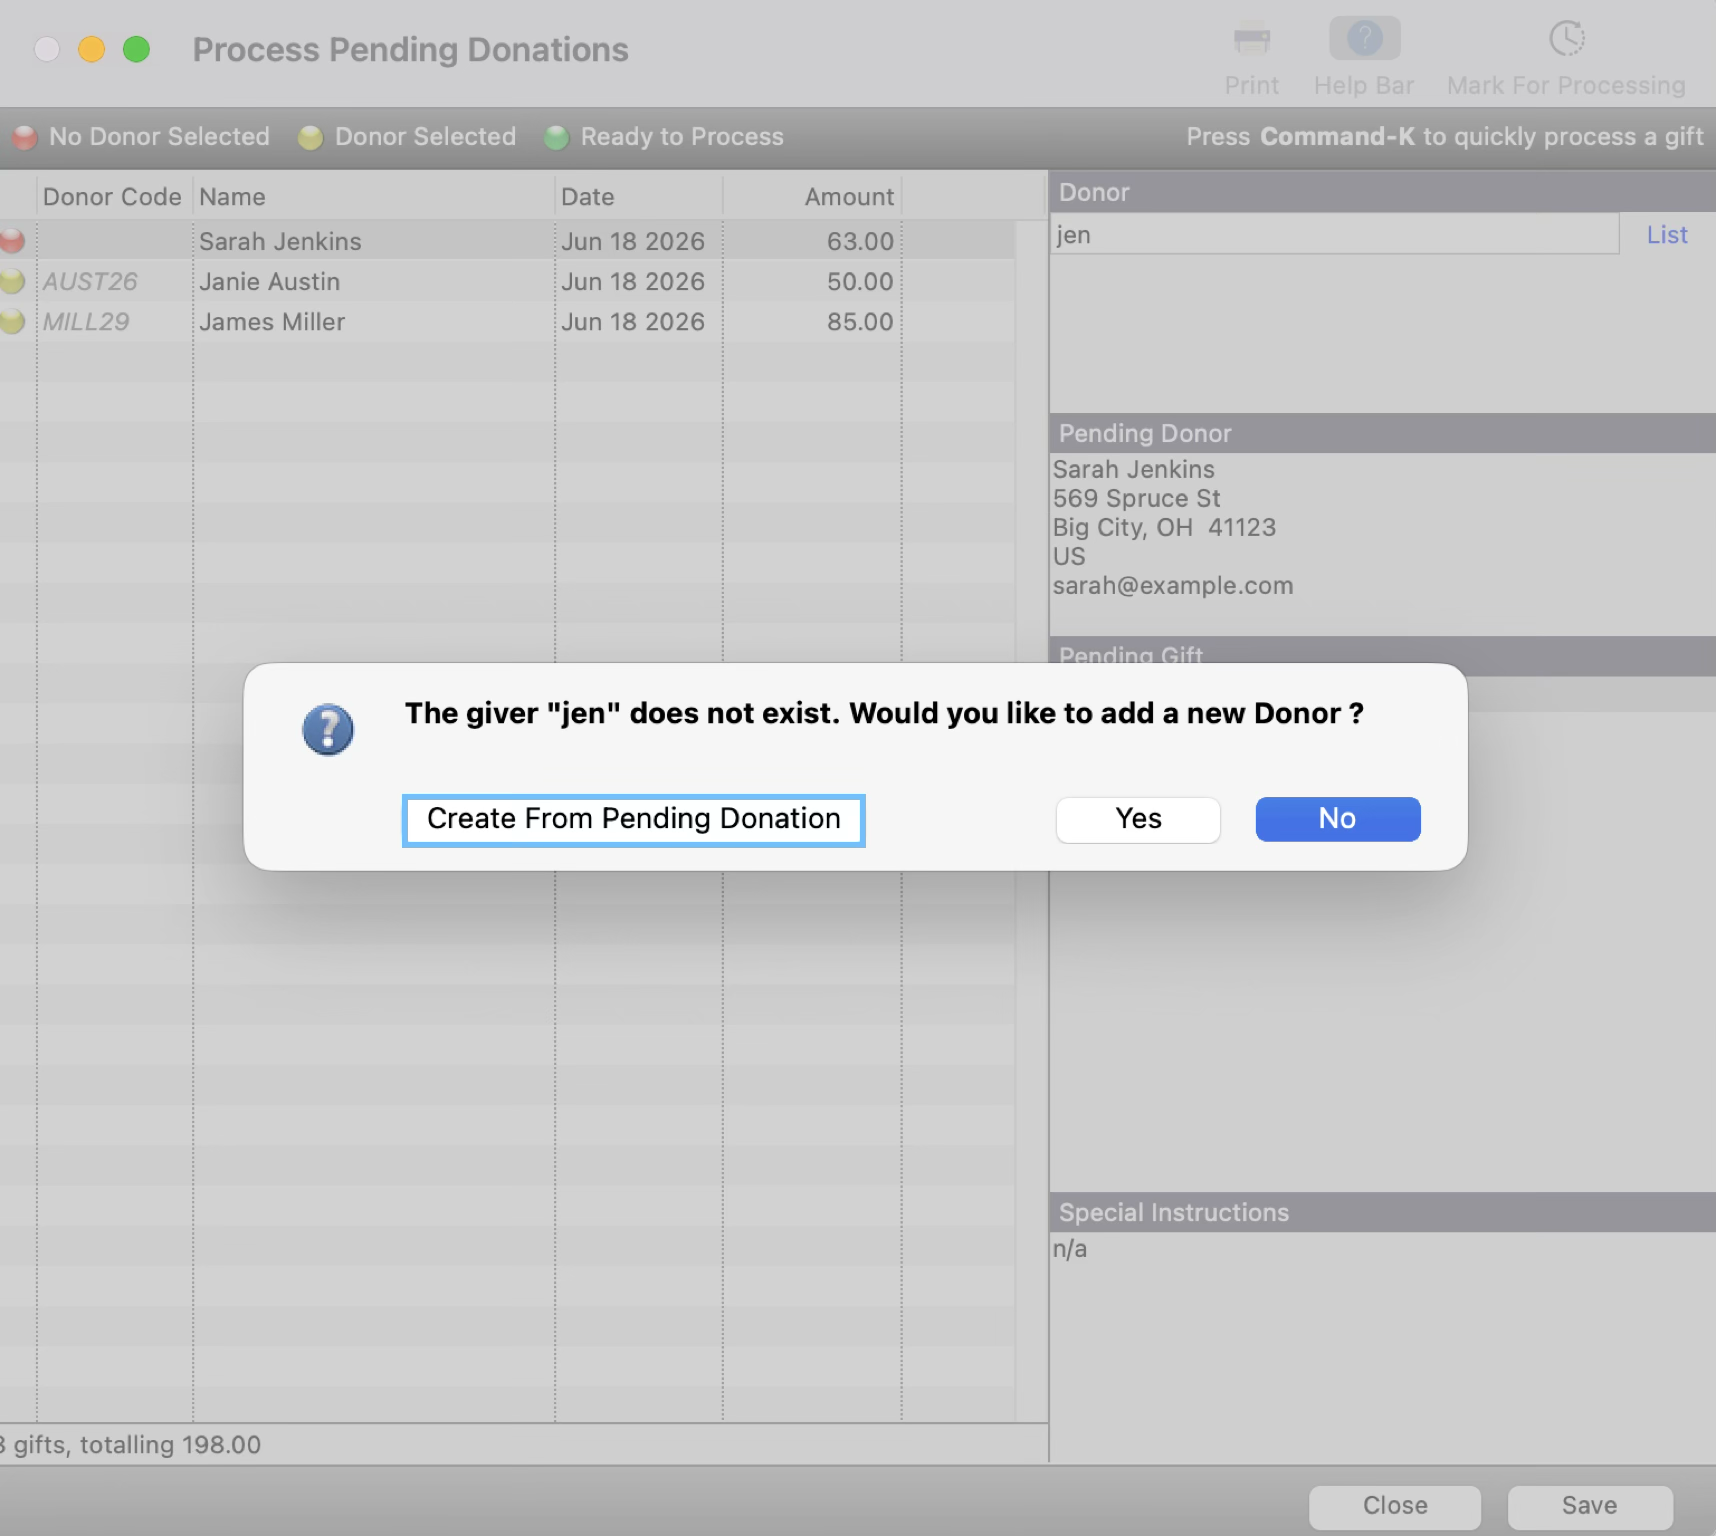
If you do not find a match after searching for a Donor, you will need to create a new Donor Record. The Create from Process Pending Donations will automatically create an Address, Individual, and Donor record. To create these records, simply double-click, Create from Pending Donation.
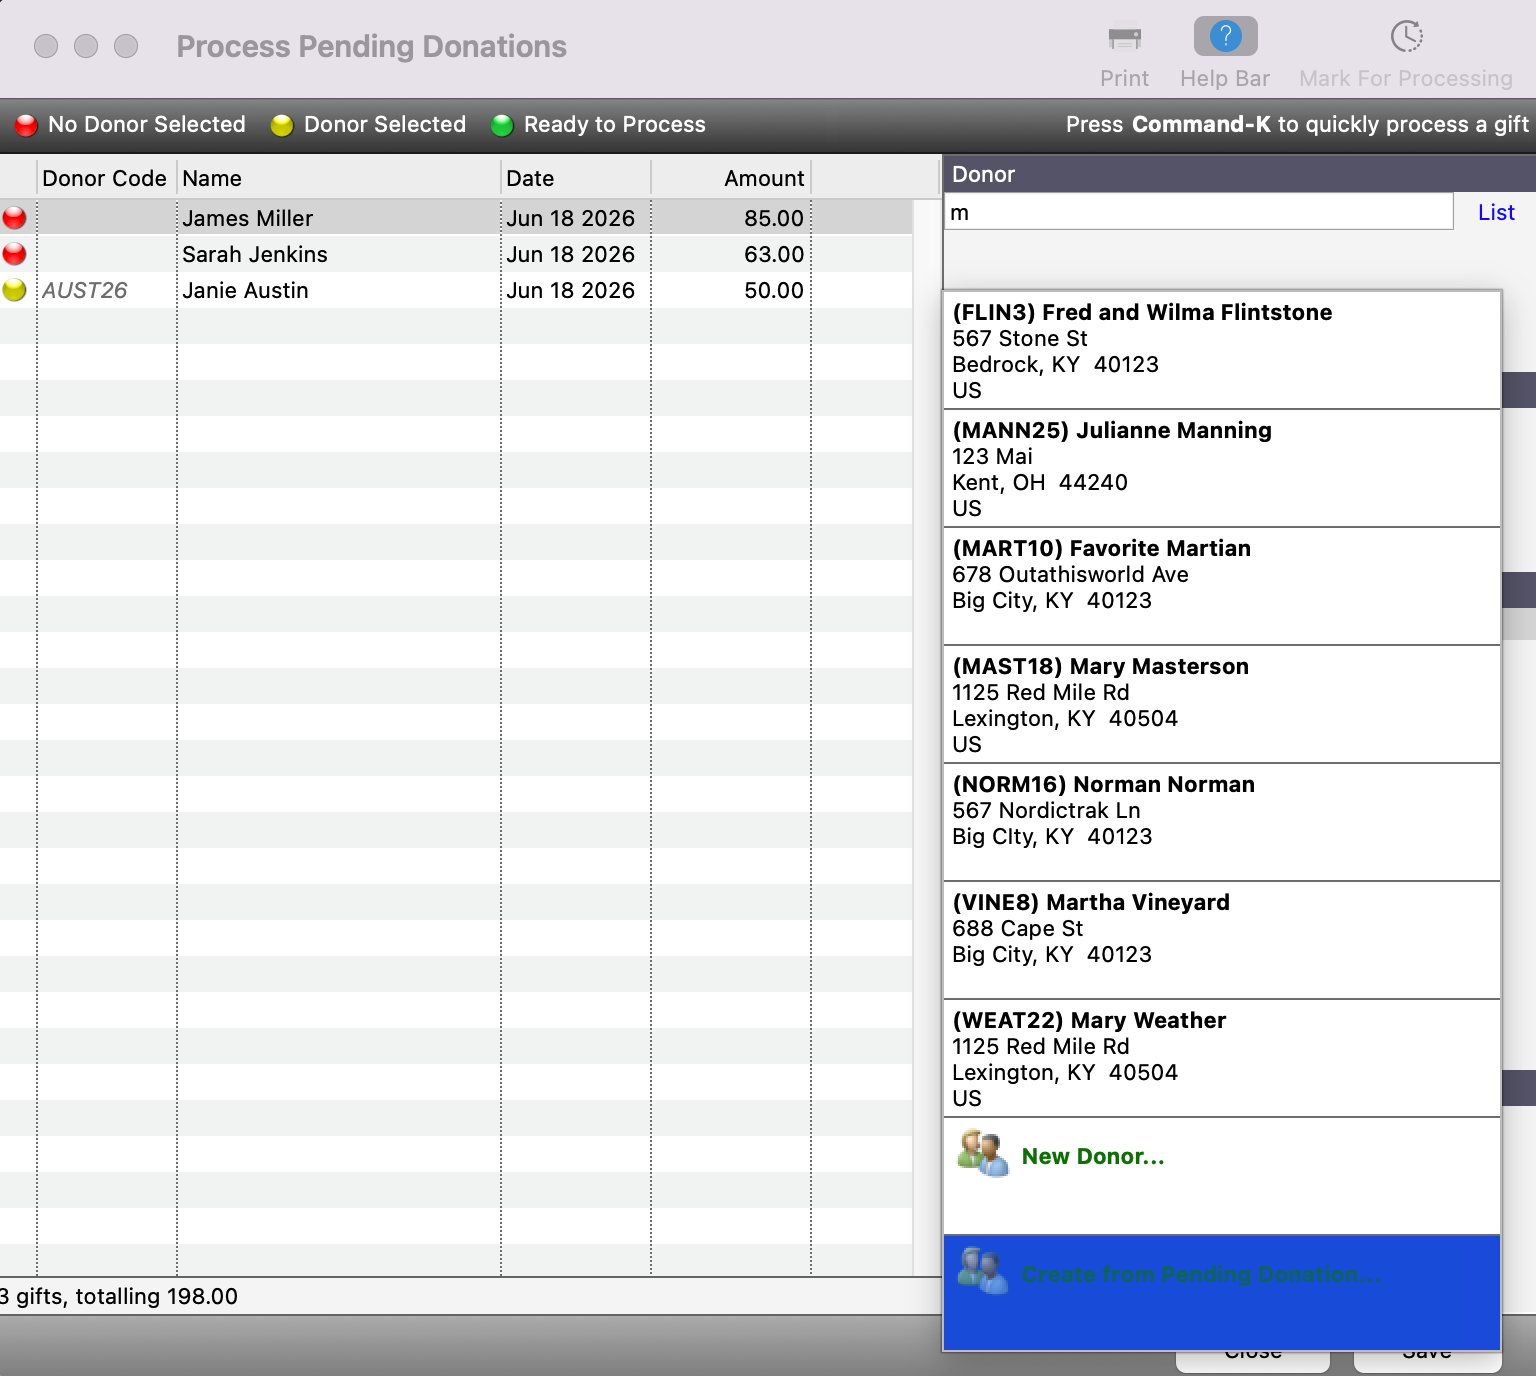
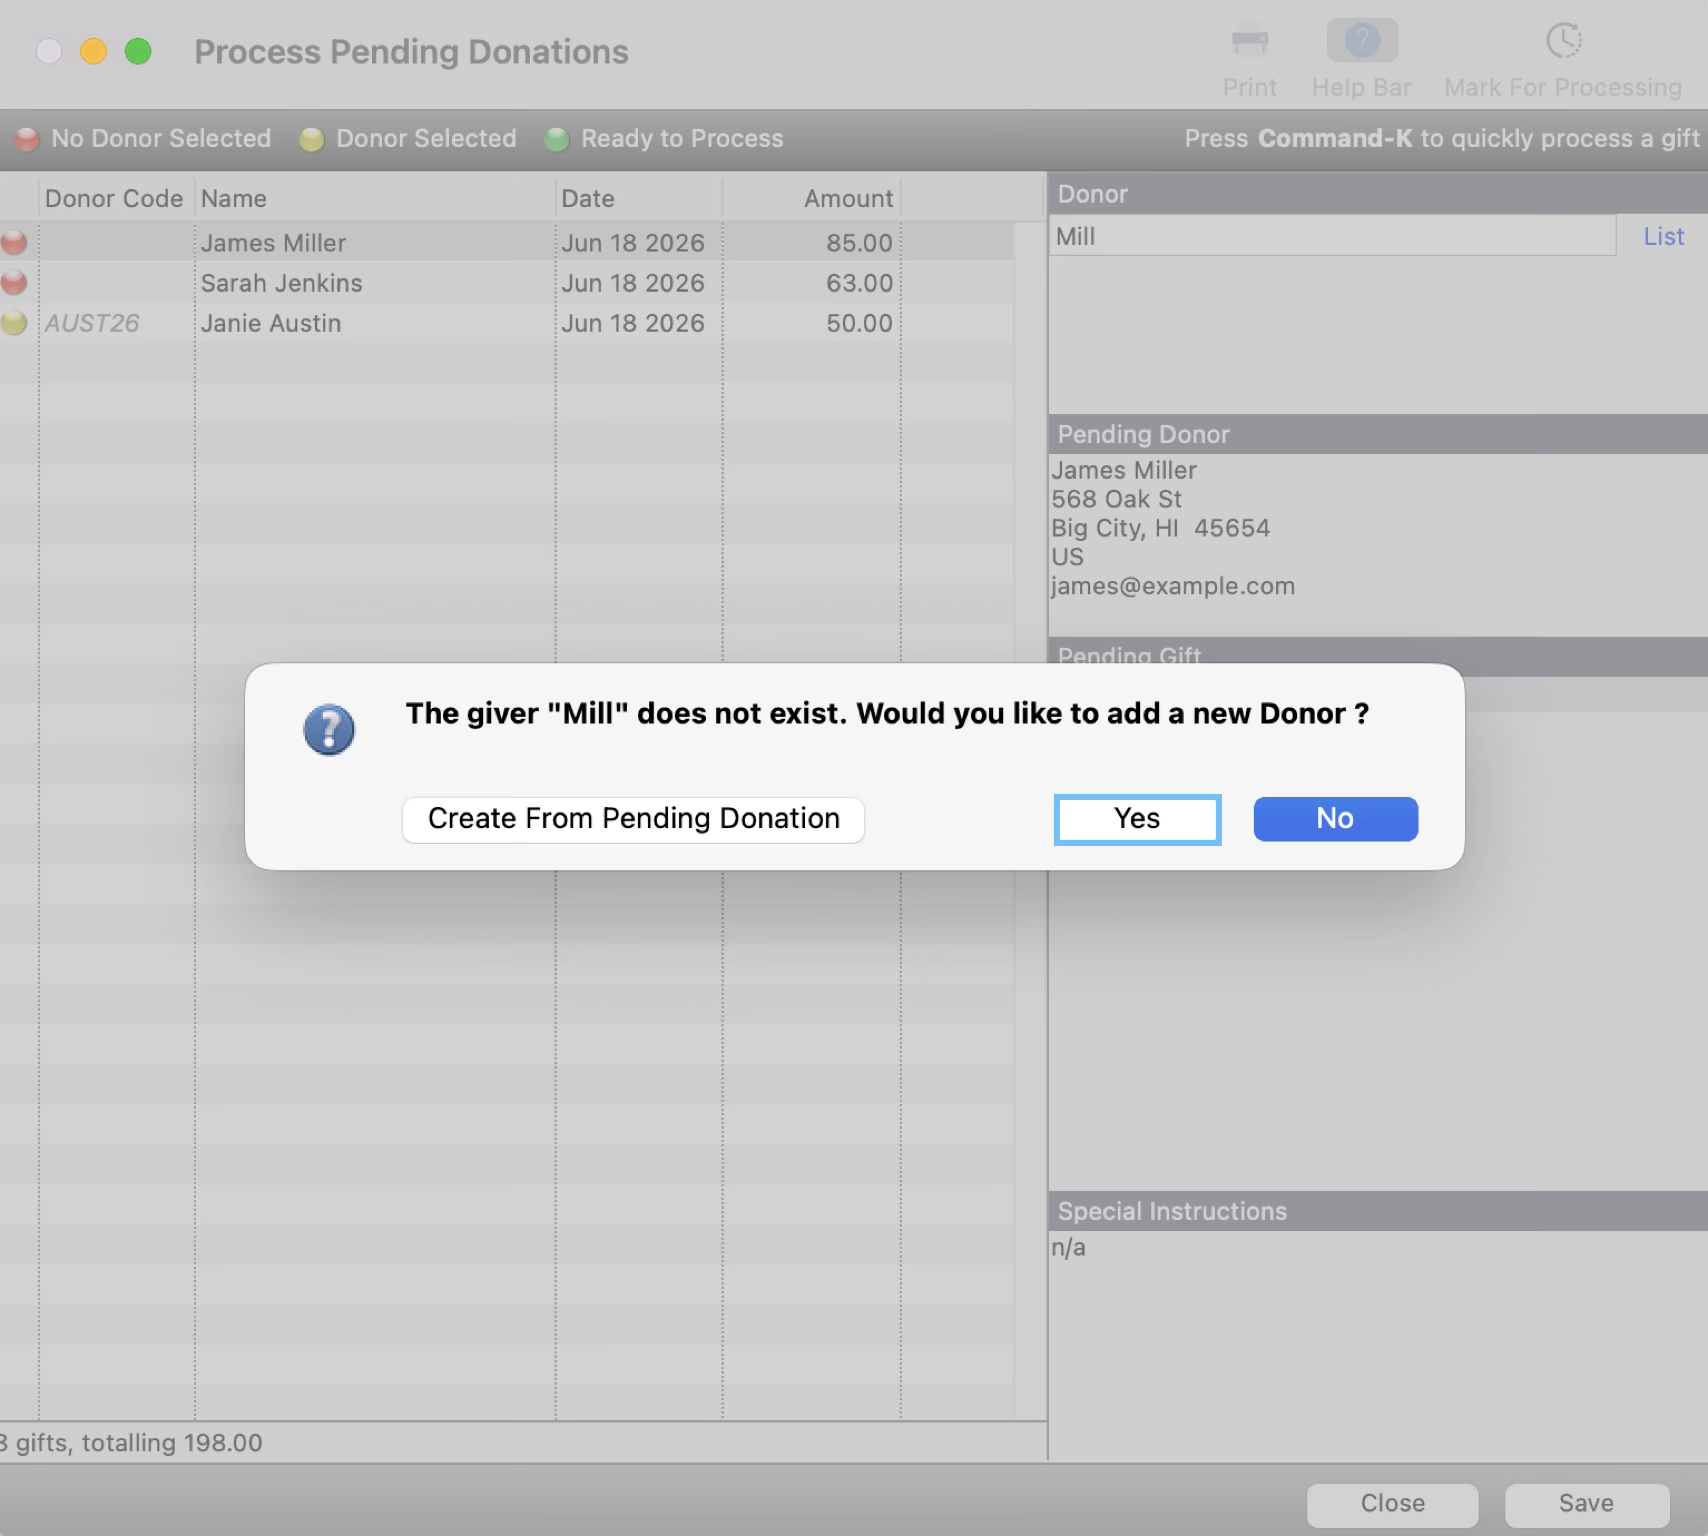
If no records return from your search, you will see this pop-up asking if you want to create a new Donor. When that happens, click Create From Pending Donation to create an Address, Individual, and Donor record.
-
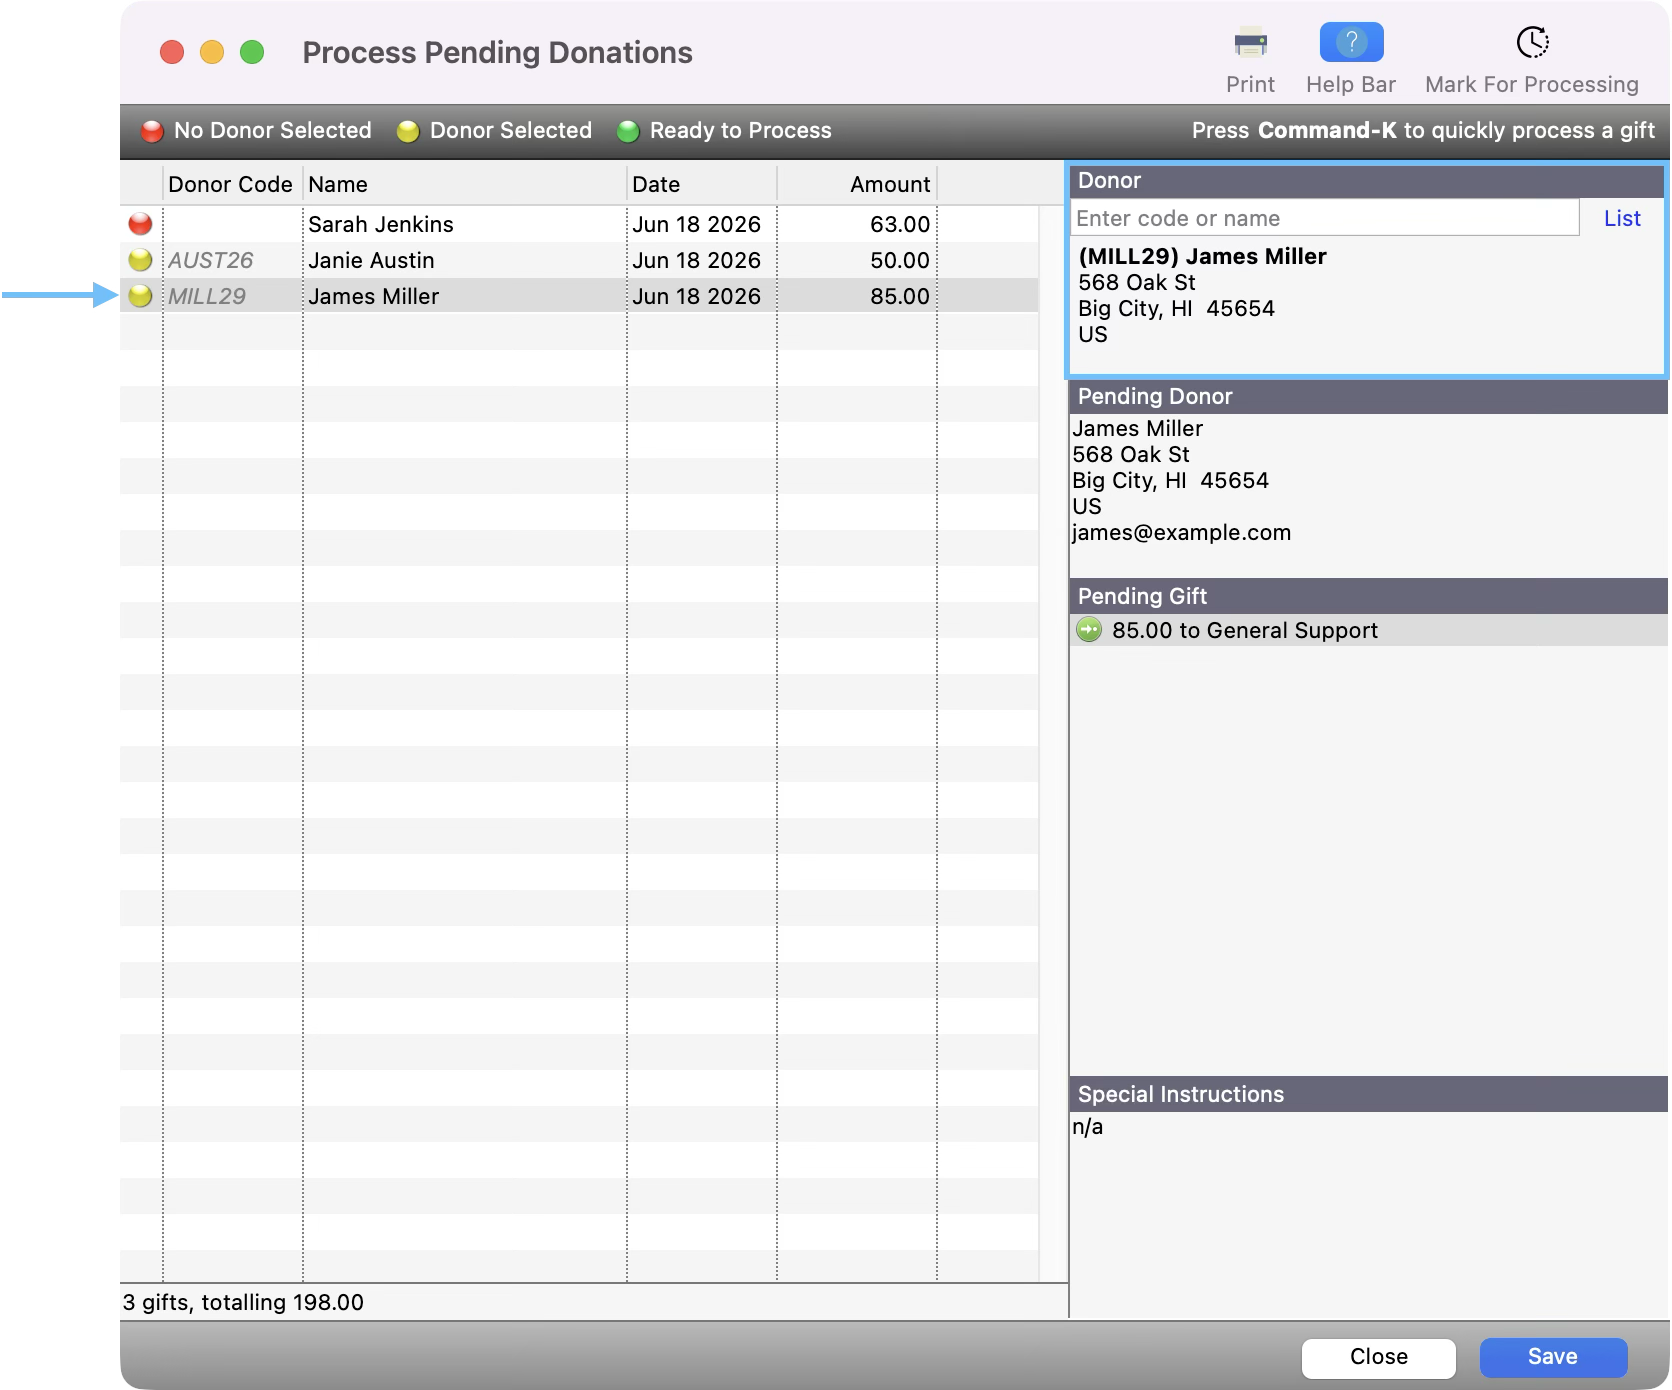
After clicking Create from Pending Donation, you will see that a Donor record has been added and that the red dot has turned to yellow next to the Donation.
-
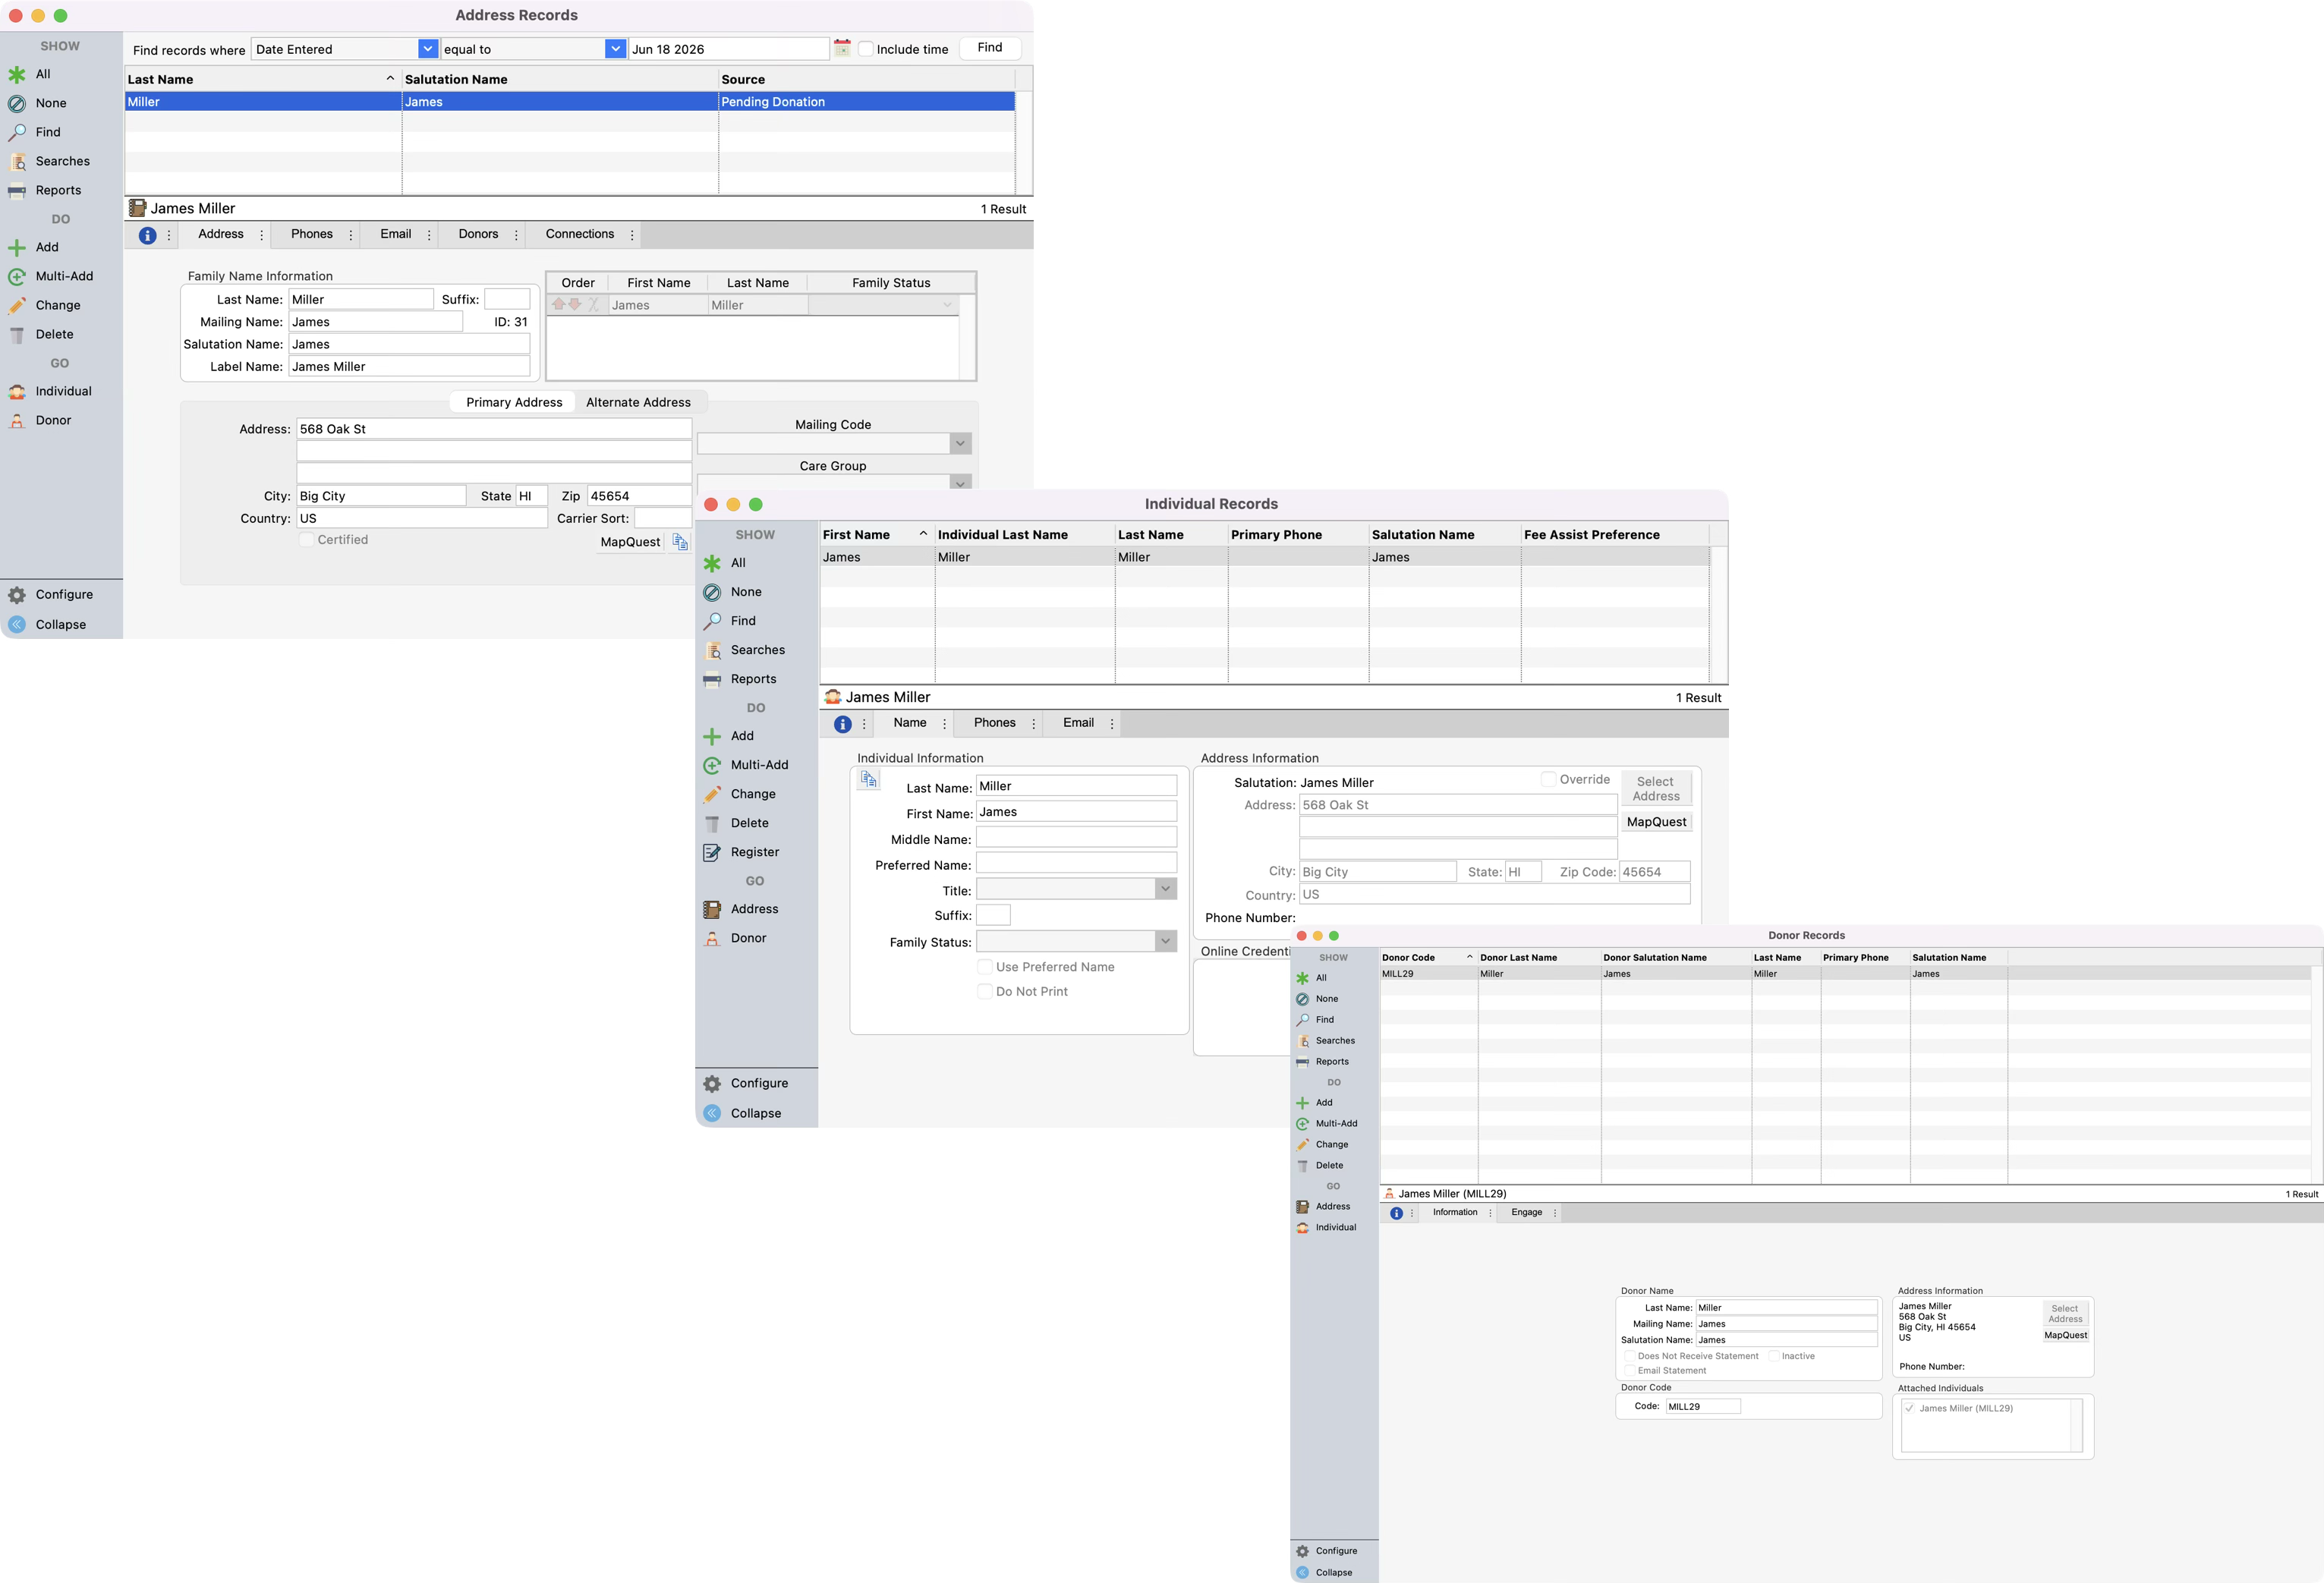
You can review the Address, Individual, and Donor records created from the Create from Pending Donation button. You’ll notice that the source for the creation of the Address record is Pending Donation.
Create from New Donor or Add
The second way to add the Address, Individual, and Donor records is to use the New Donor or the Add button. Although more manual, all the details from the pending gift record will be automatically copied into the new Address, Individual, and Donor record windows. This approach allows you to tie a Donor to an existing Address record or add more details to the Address fields that are not a part of the pending gift record window.
-
If you do not find a match after searching for a Donor, you will need to create a new Donor Record. To use the more manual approach, click the New Donor button.
If no records return from your search, you will see this pop-up asking if you want to create a new Donor. When that happens, click Yes to begin creating the needed records.
-
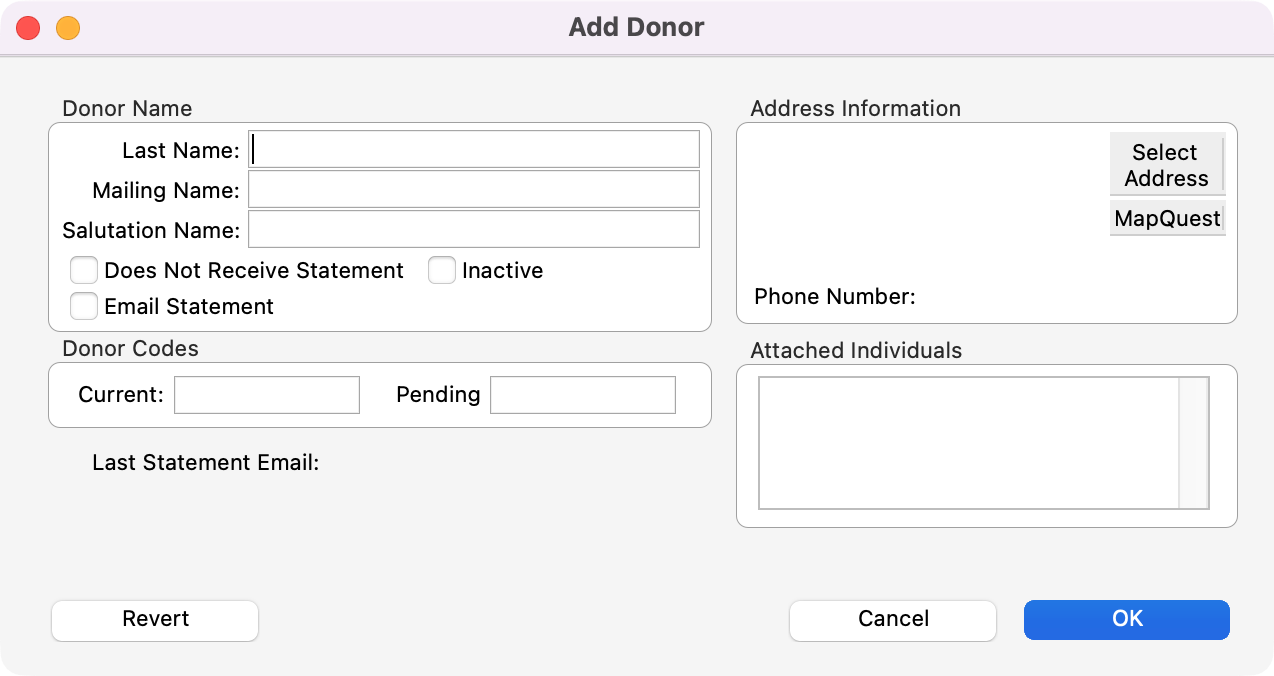
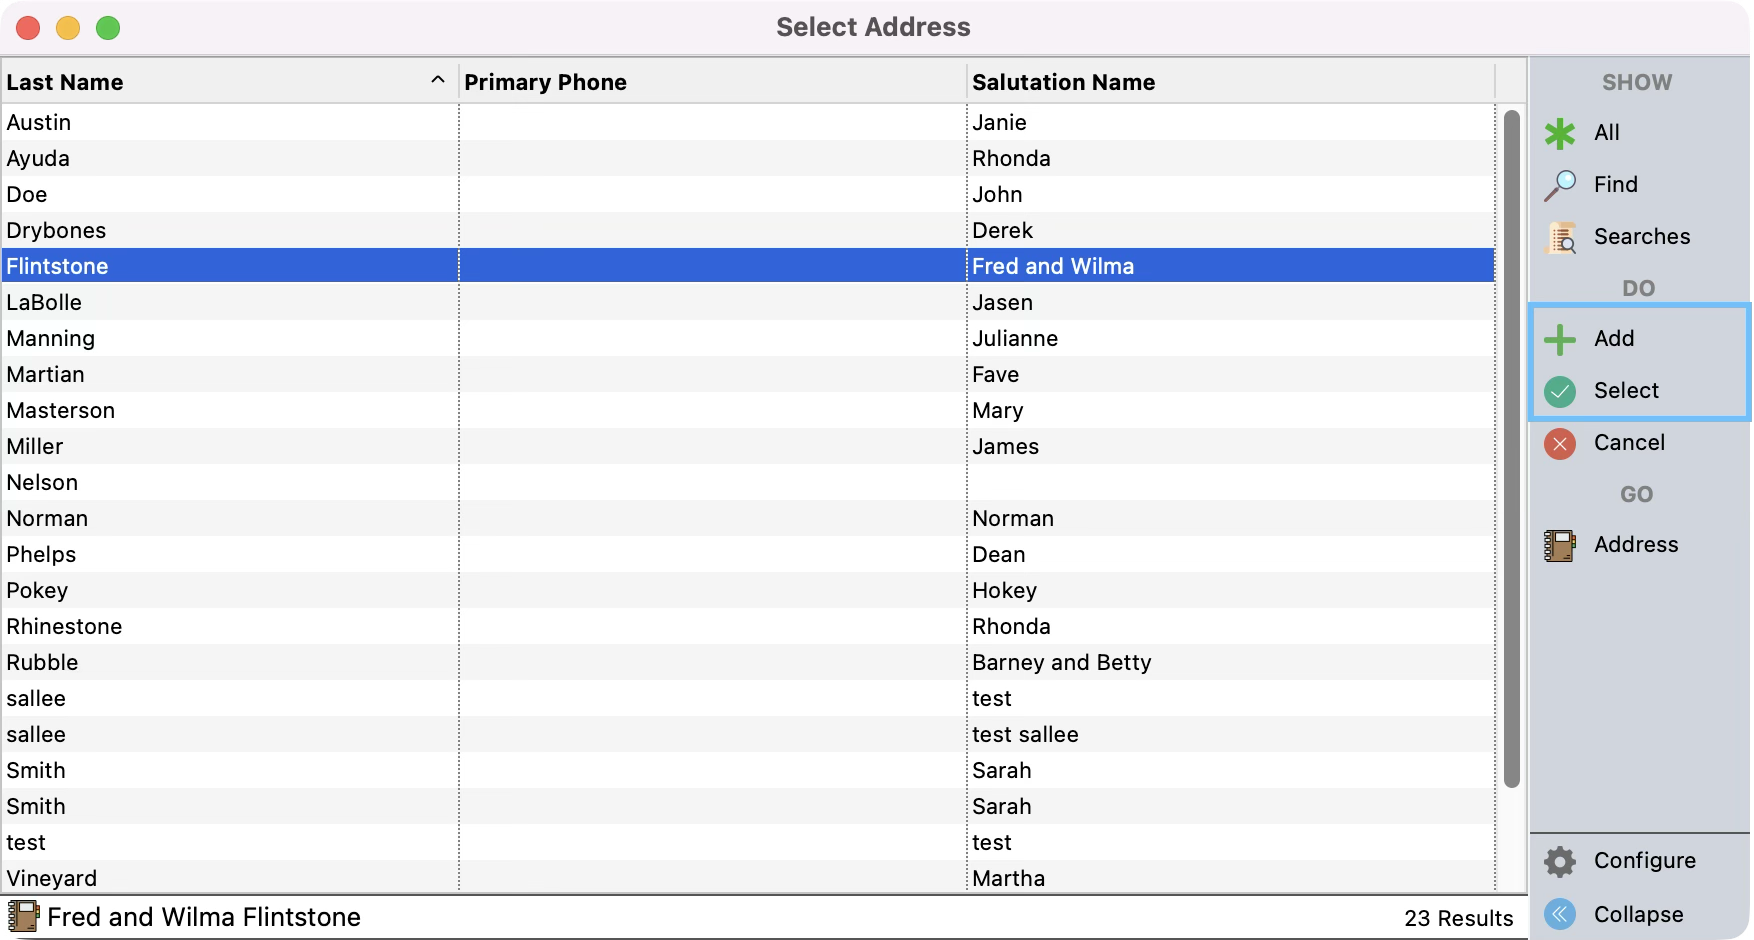
You will see the Add Donor and Select Address windows open. In the Select Address window, setup a find to make sure that this donor is not connected to an existing Address. If they are, click the corresponding Address record and click Select. If there is no existing Address record, click Add.
-
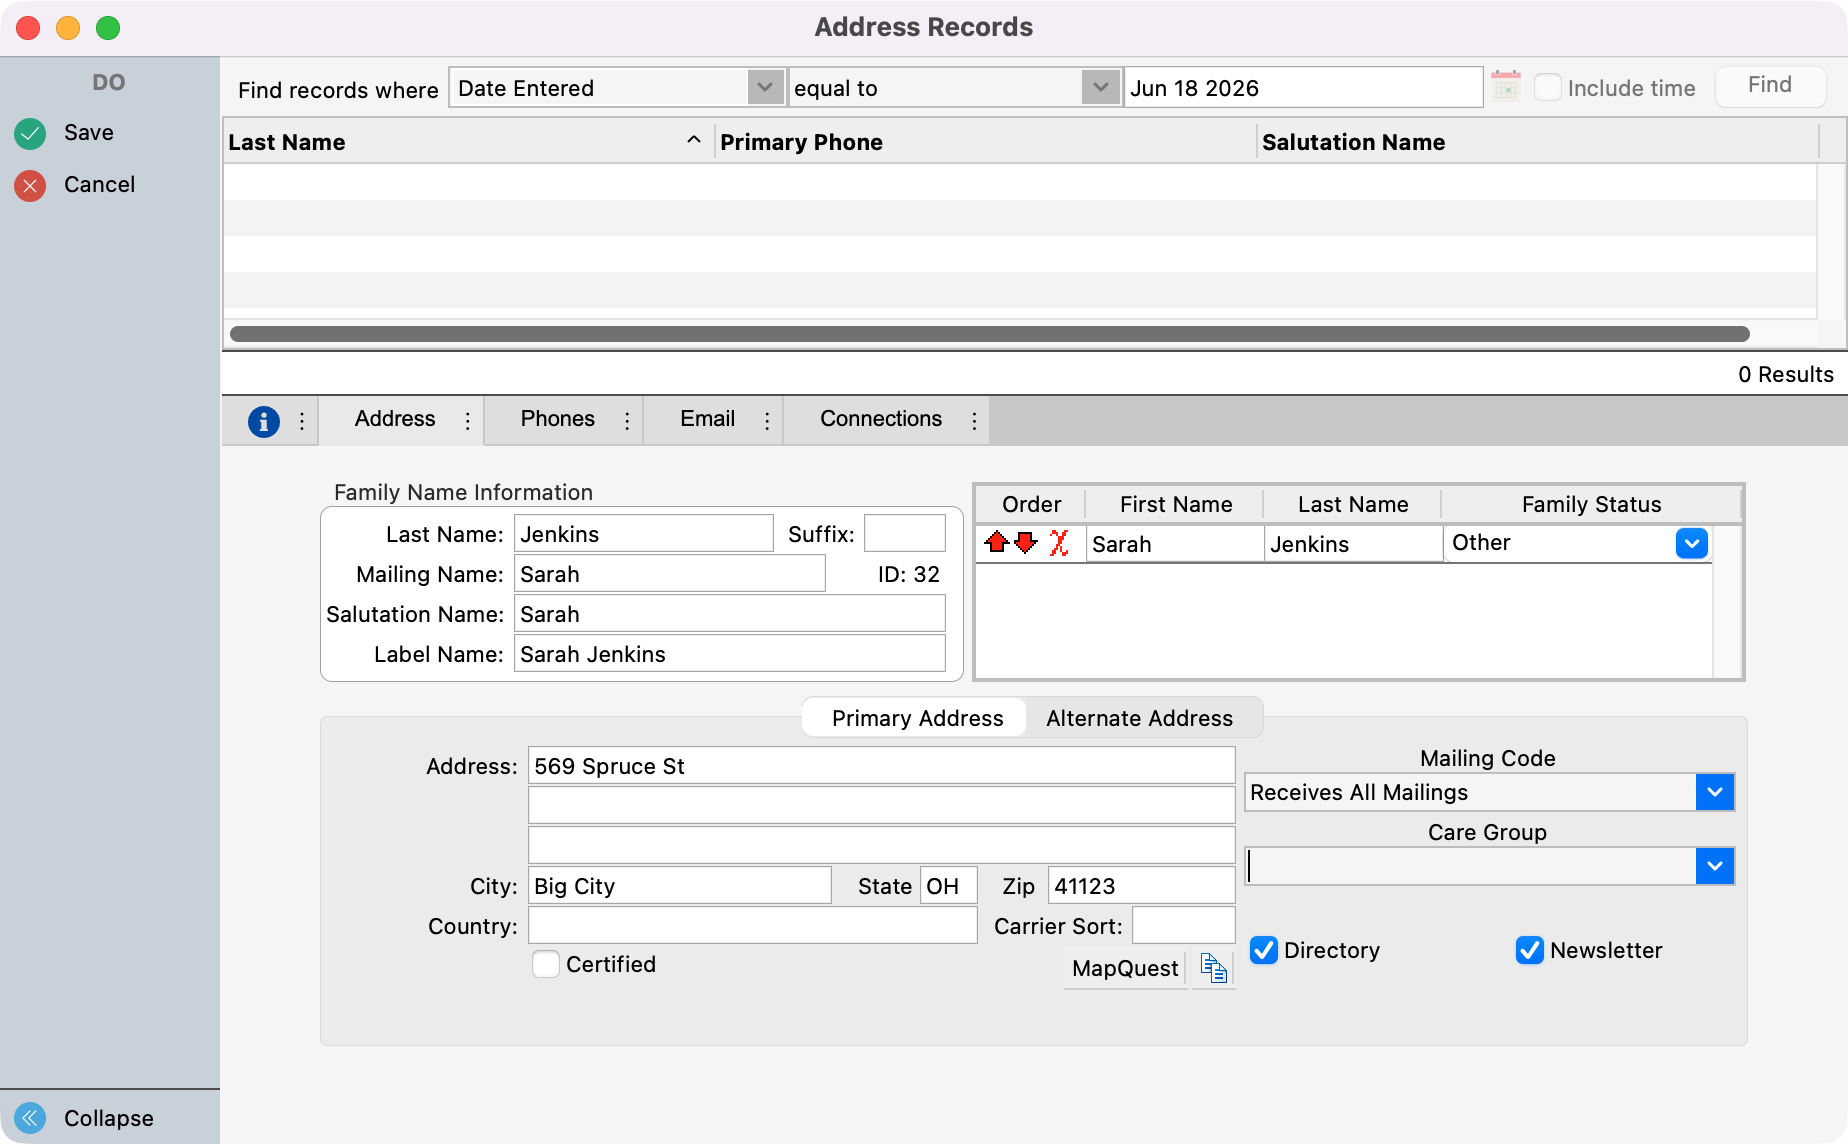
When adding a new Address record, you will see in the Address record window that the details from Process Pending Donation have auto-populated the fields in the Address record. Review the fields and make any changes you wish, such as selecting a Code or Care Group. Save your changes in the upper left sidebar.
-
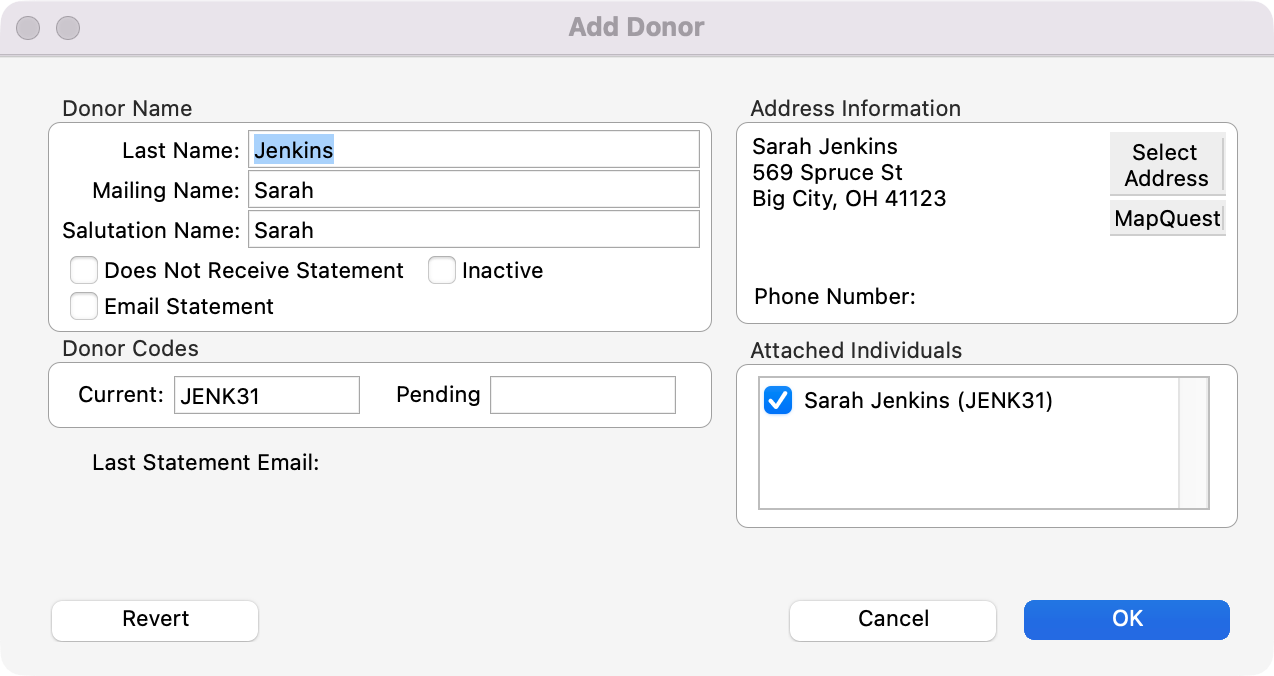
After clicking Save, you will see all the windows close except the Add Donor and Process Pending Donation windows. Review the fields in the Add Donor window and click OK.
-
After clicking OK, you will see that a Donor record has been added and that the red dot has turned to yellow next to the Donation.
Finishing Processing your Donations
-
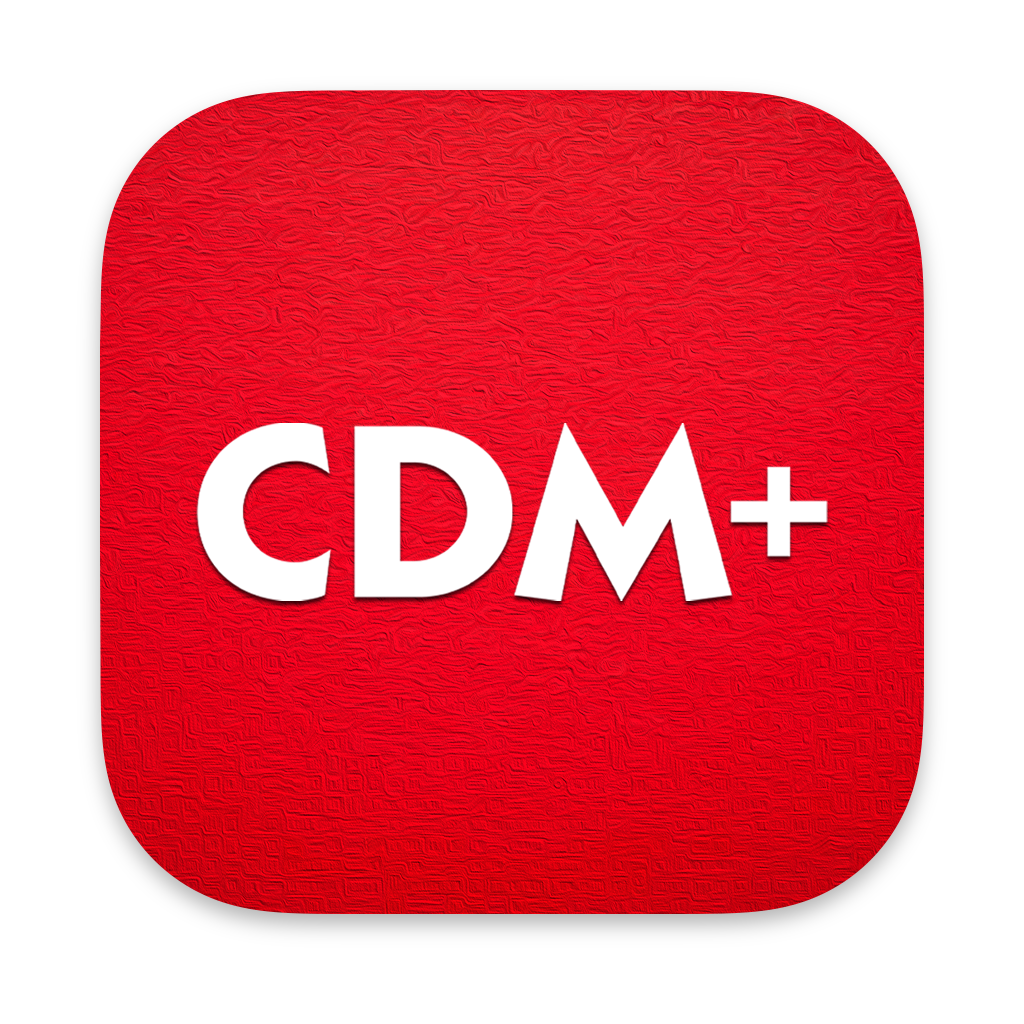
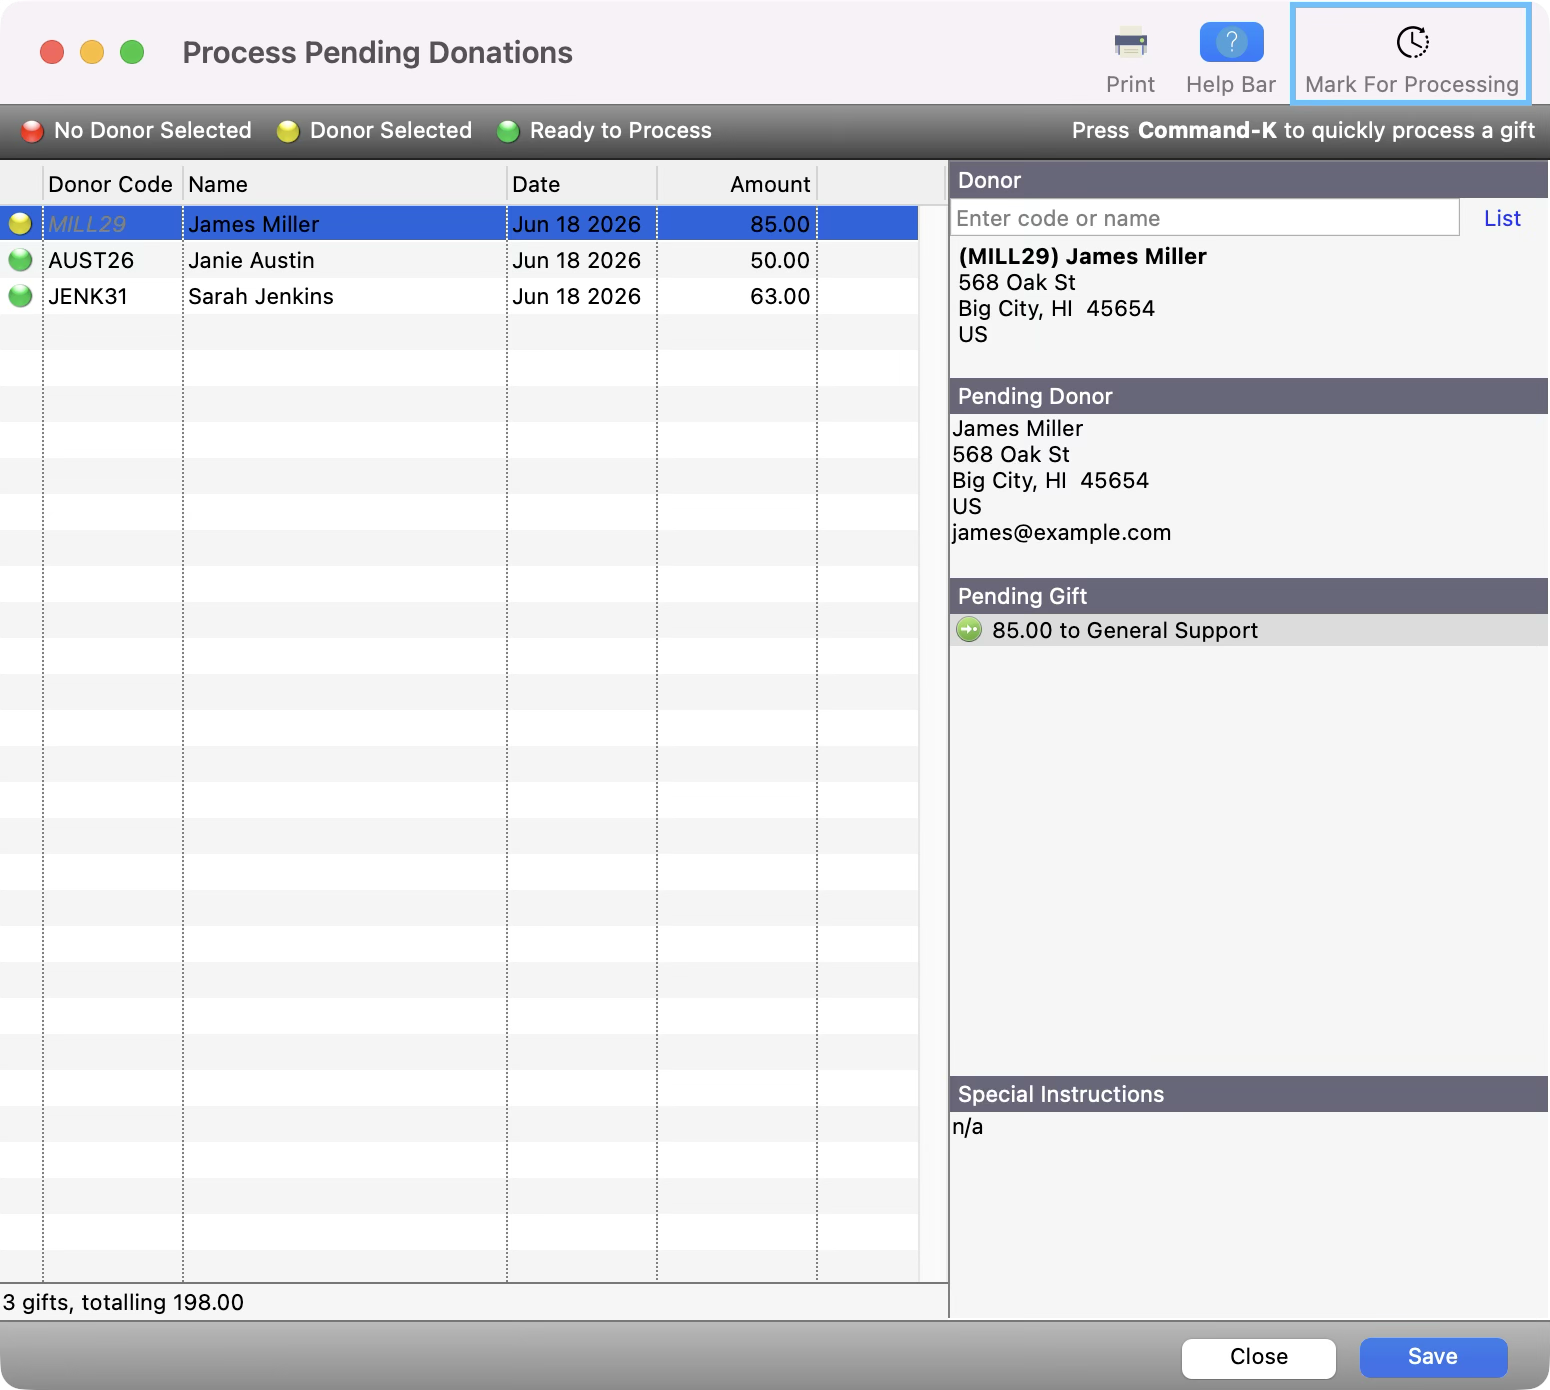
After you have reviewed all your Donations and have associated them with an existing Donor record or have created a new one, you can now mark these records for processing. Simply click on the records with the yellow dot, and then click Mark for Processing. Then, you will see the dot next to the Donation turn green.
-
Once you have marked all the Donations you want to process, simply click Save at the bottom right corner. All of these Donation records will now be displayed on your reports.