An Event record is what you will create to track both online and manual registrations. The event record is how you will be able to assign ticket prices, capacity limits, and pull into a report to see the details about your event.
Creating an Event Record
-
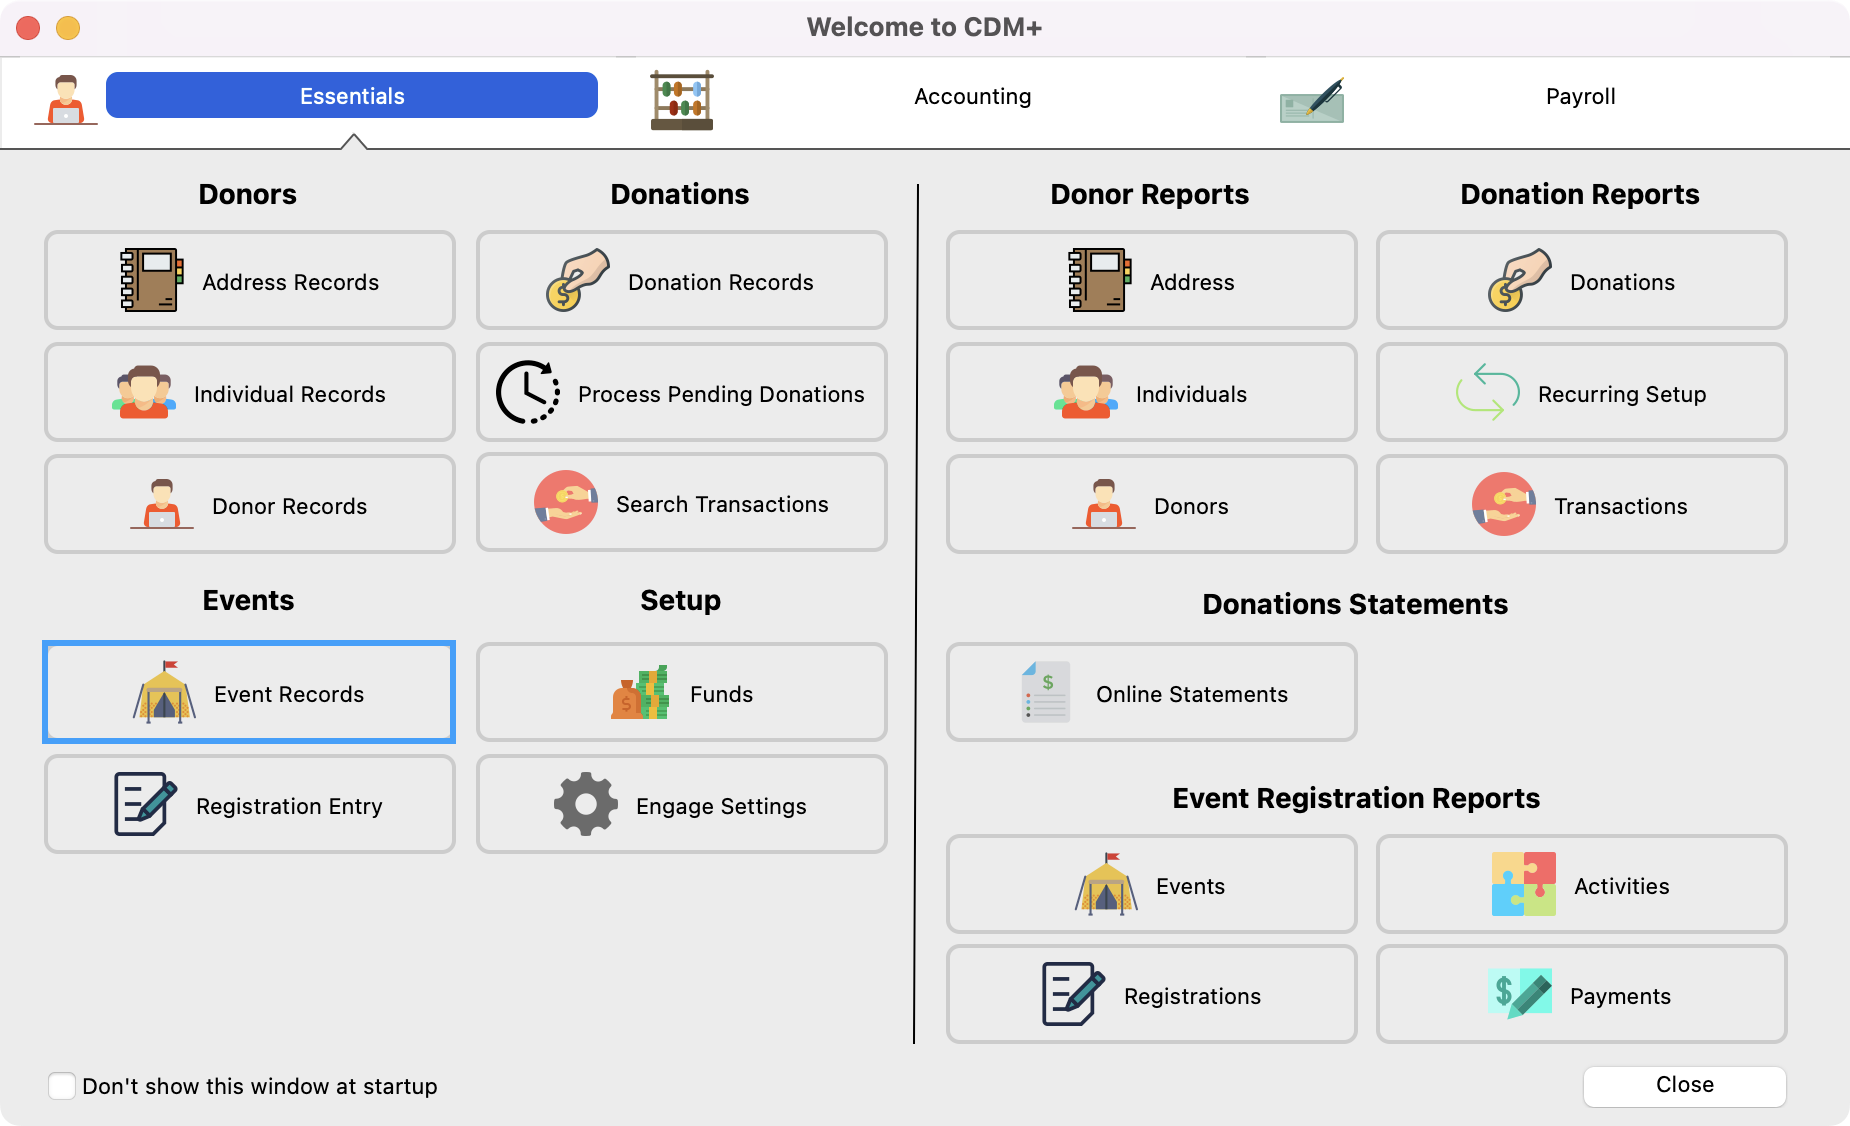
From the Welcome to CDM+ window, click Event Records.
-
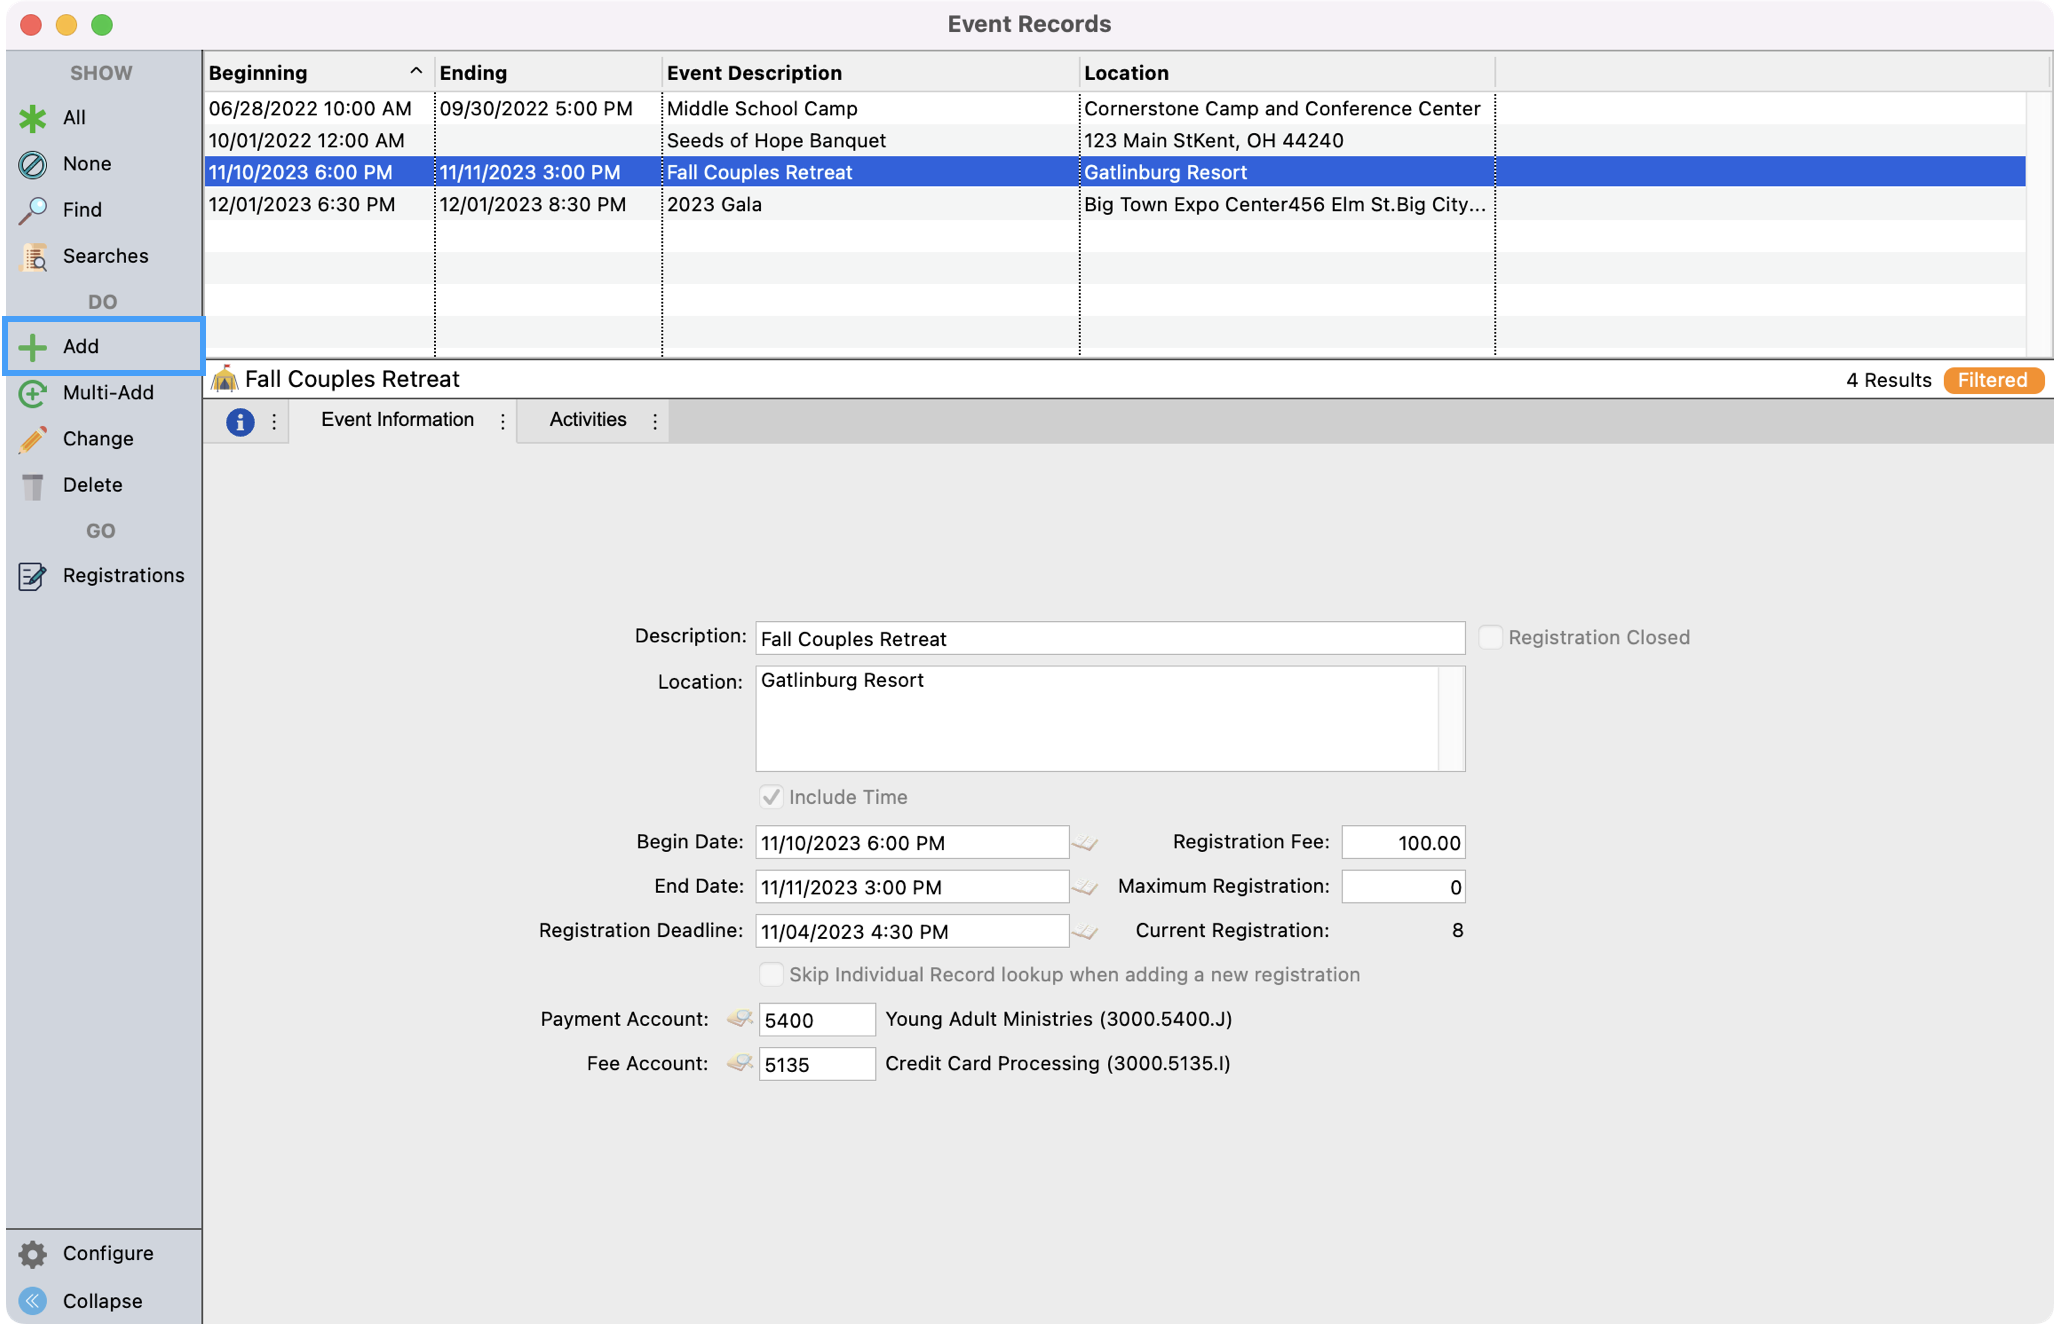
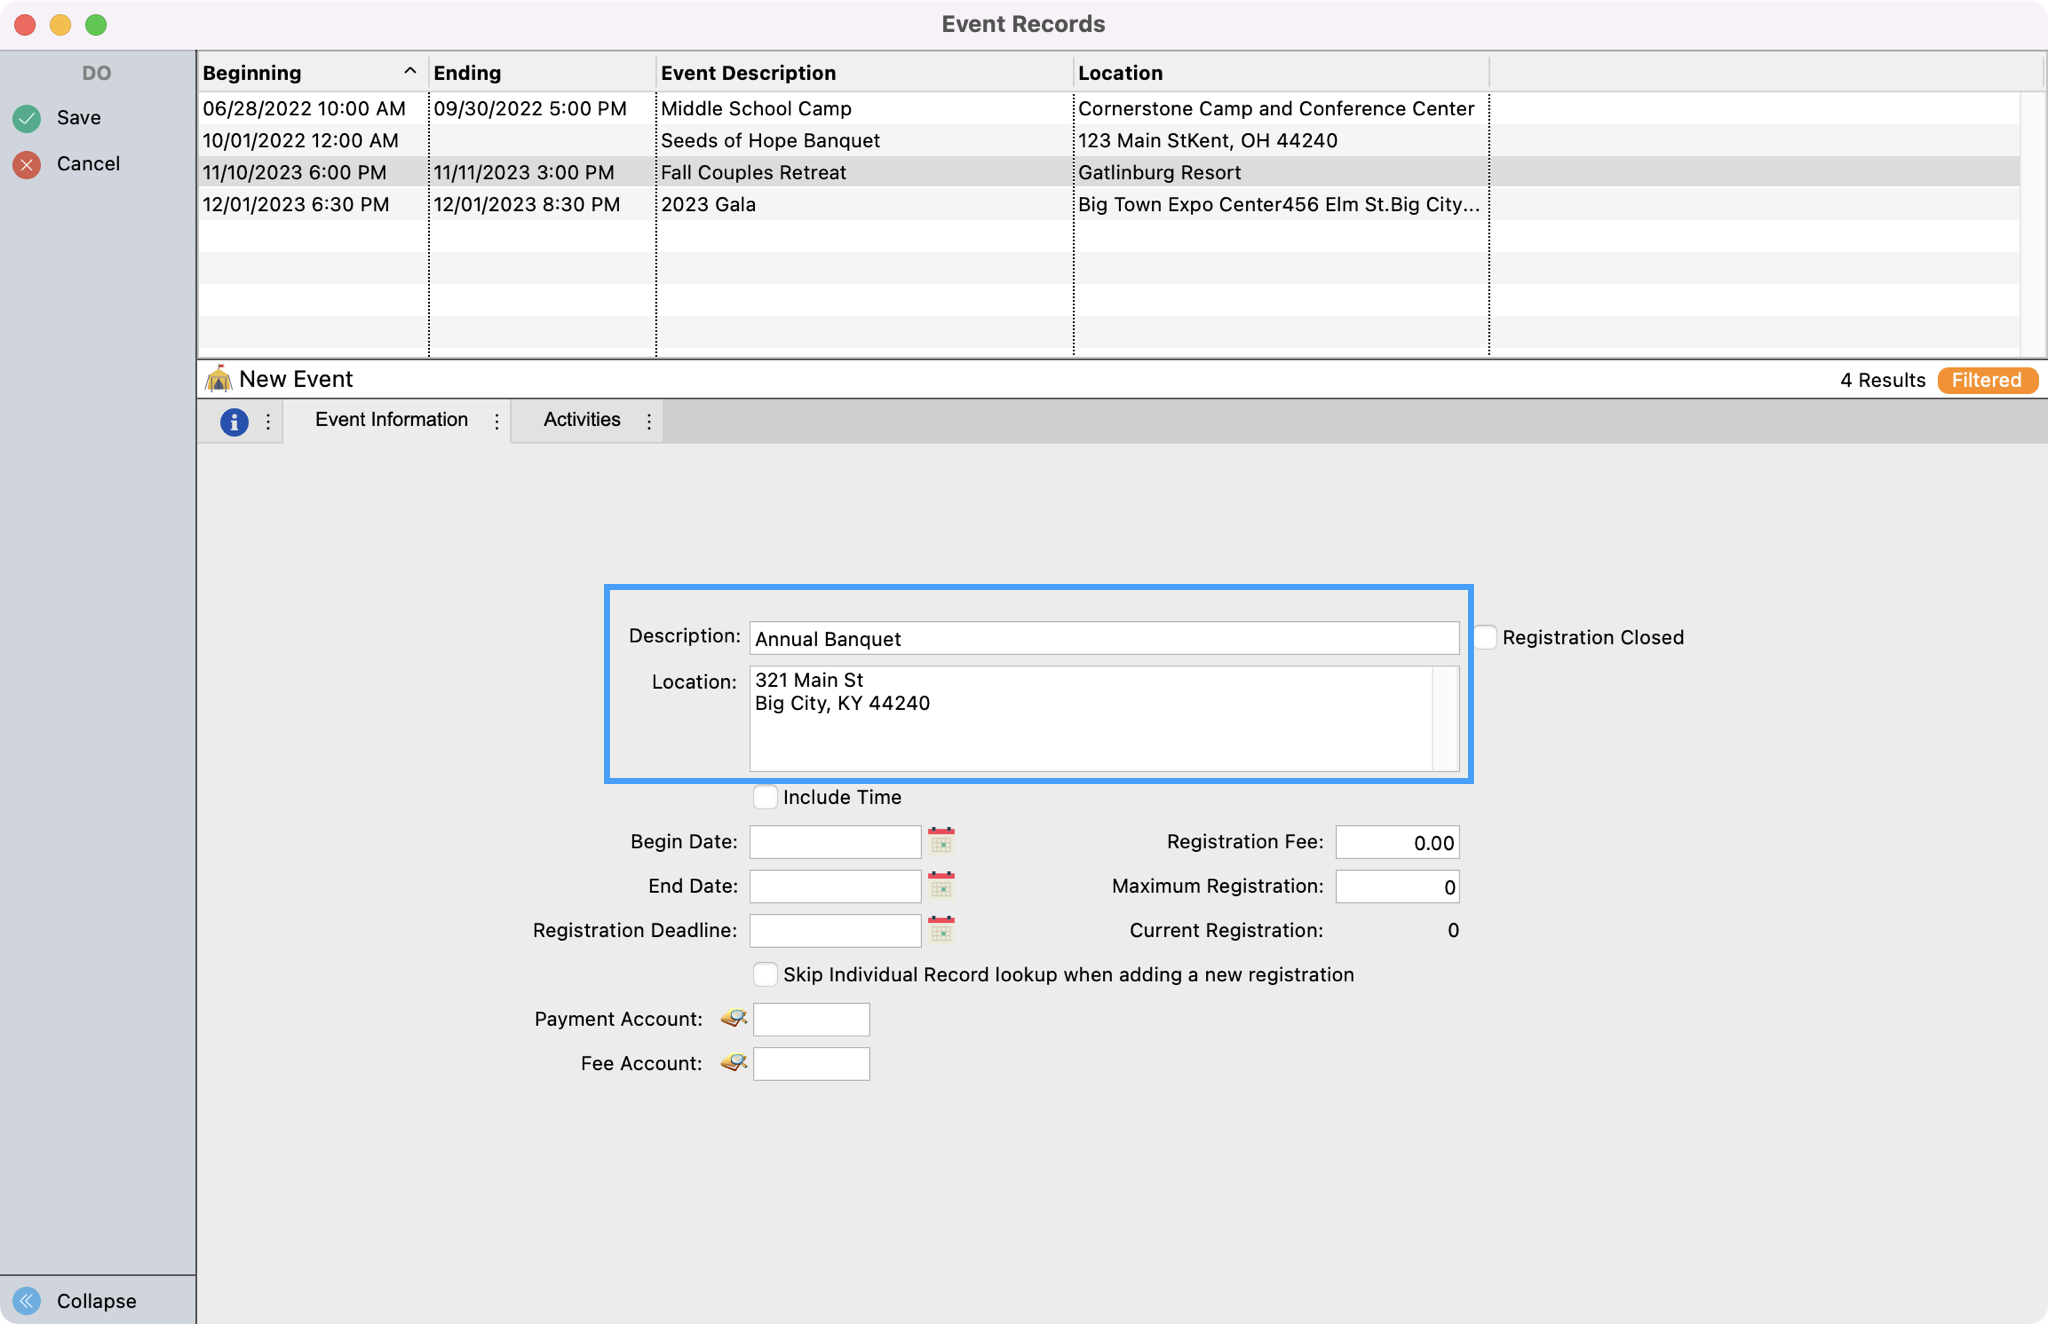
In the Event Records window, click Add from the left sidebar.
-
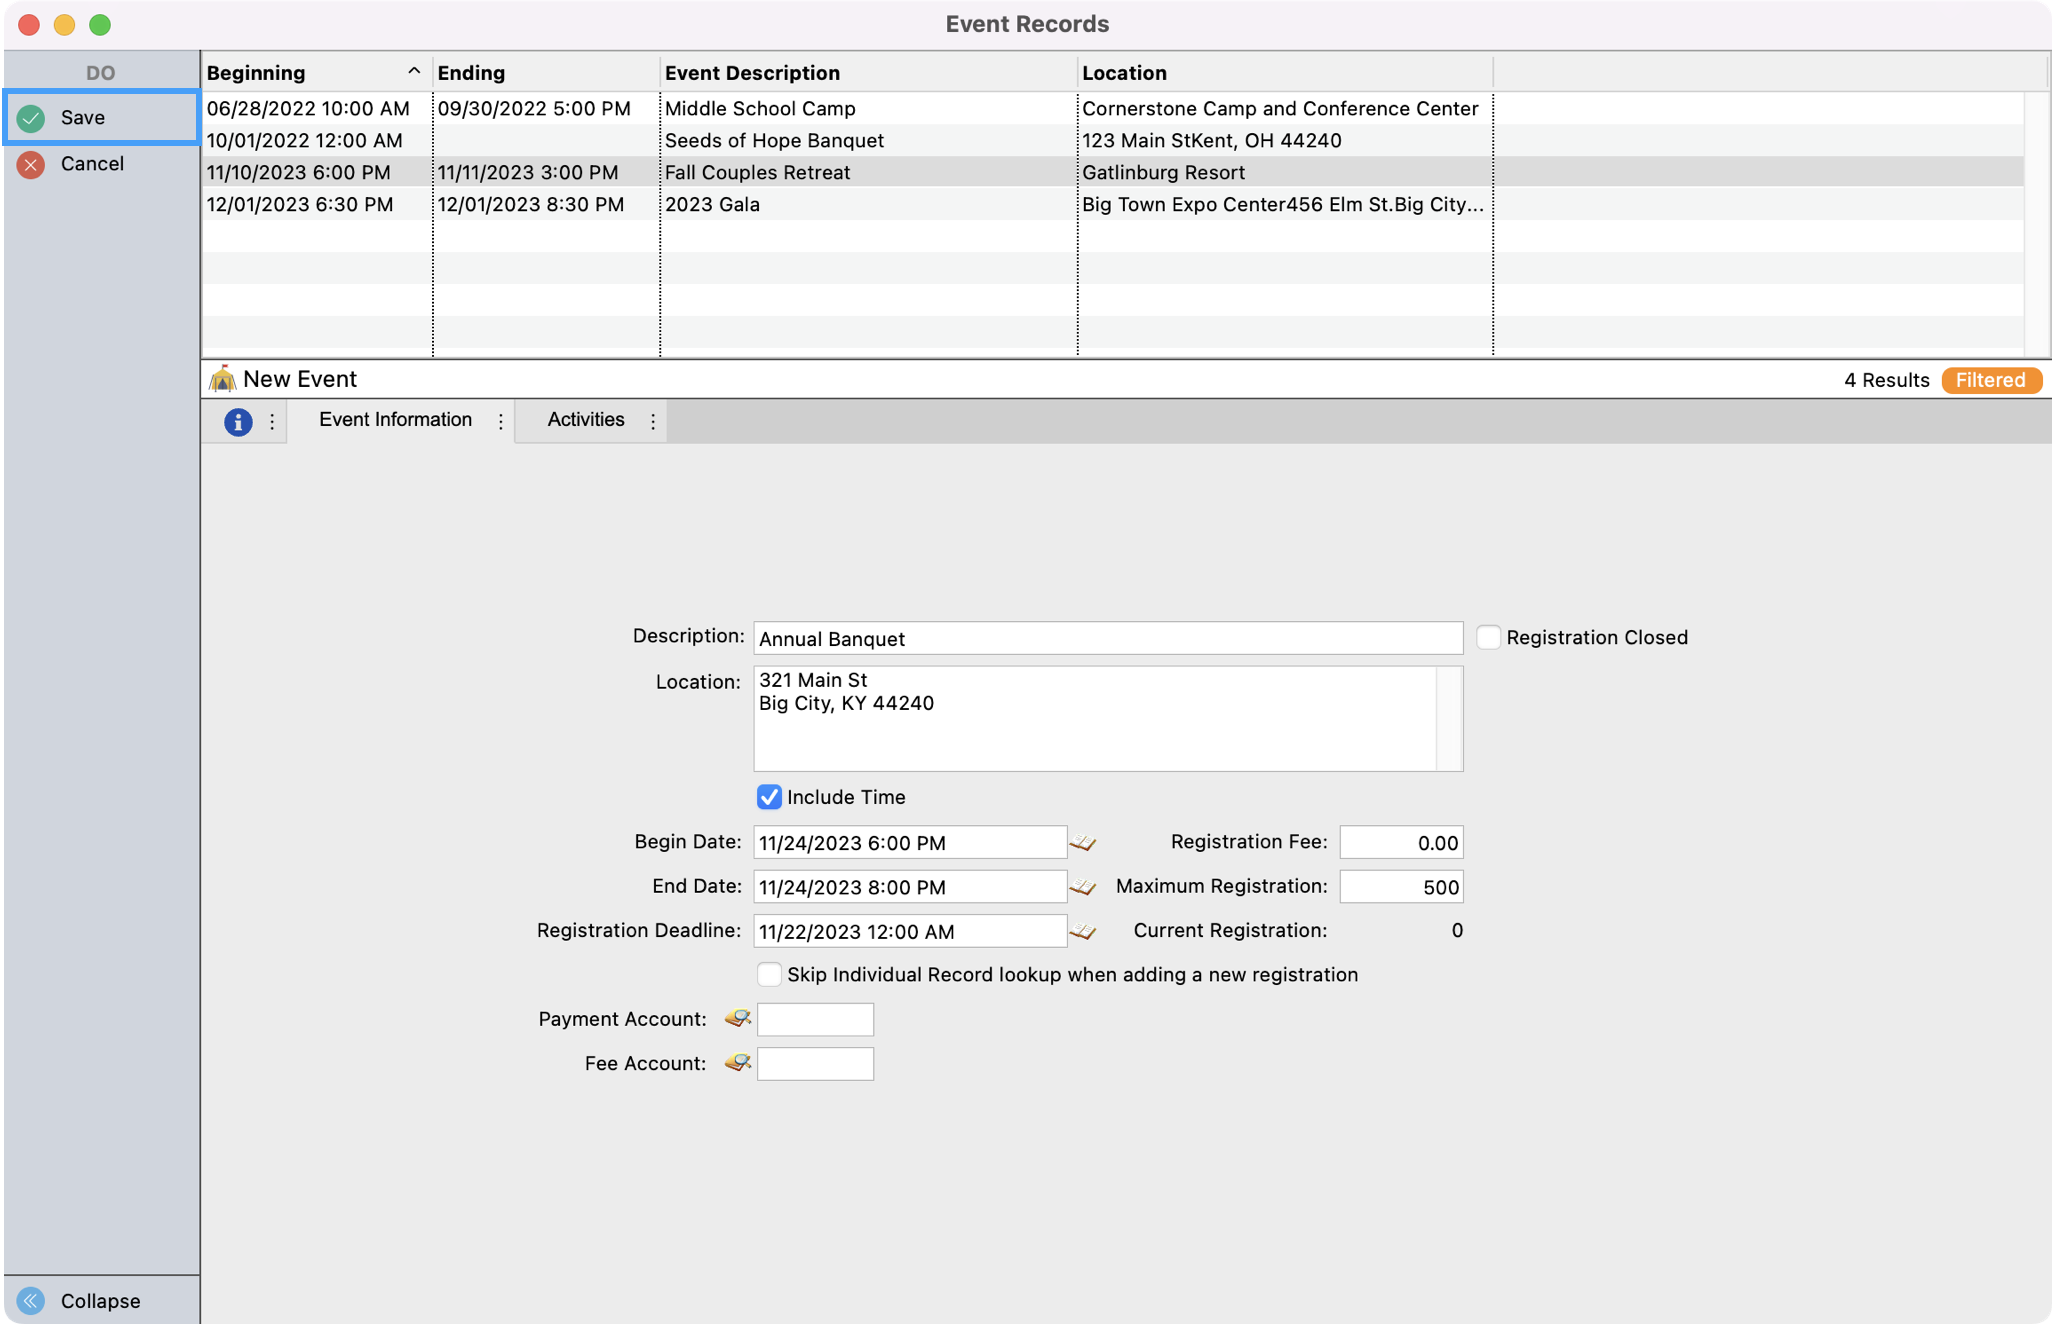
Next, add the Description and Location details for your event.
-
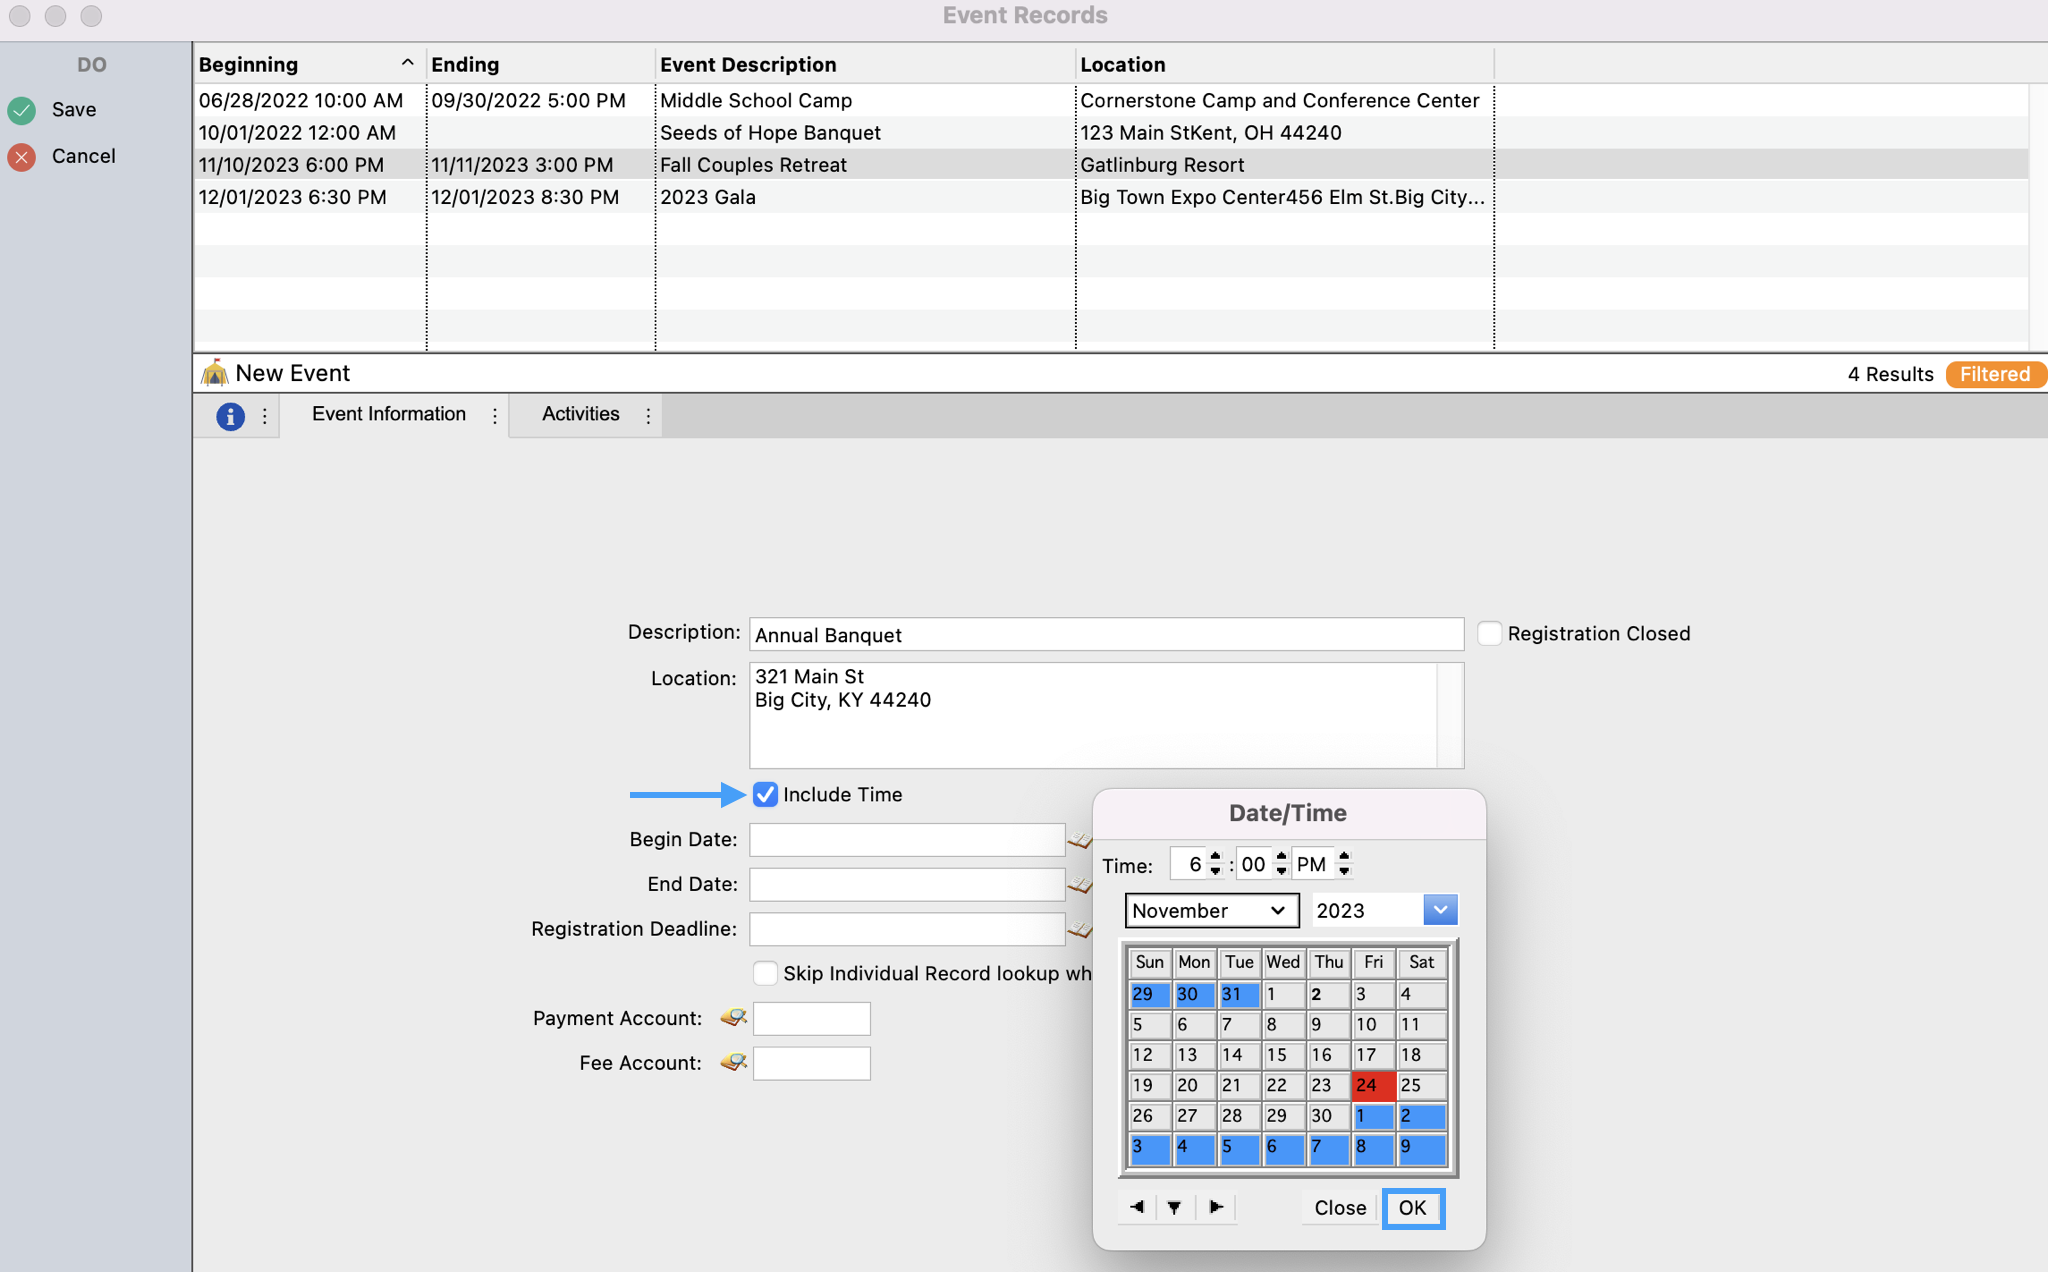
Then, enter in the Begin, End, and when applicable Registration Deadline, dates of your event. If you want to include the time for your event, click the Include Time box. Then, click on the icon to the left of the begin date field. Set your time first and then select your date. Do this same step for both the End and Registration Deadline date fields.
-
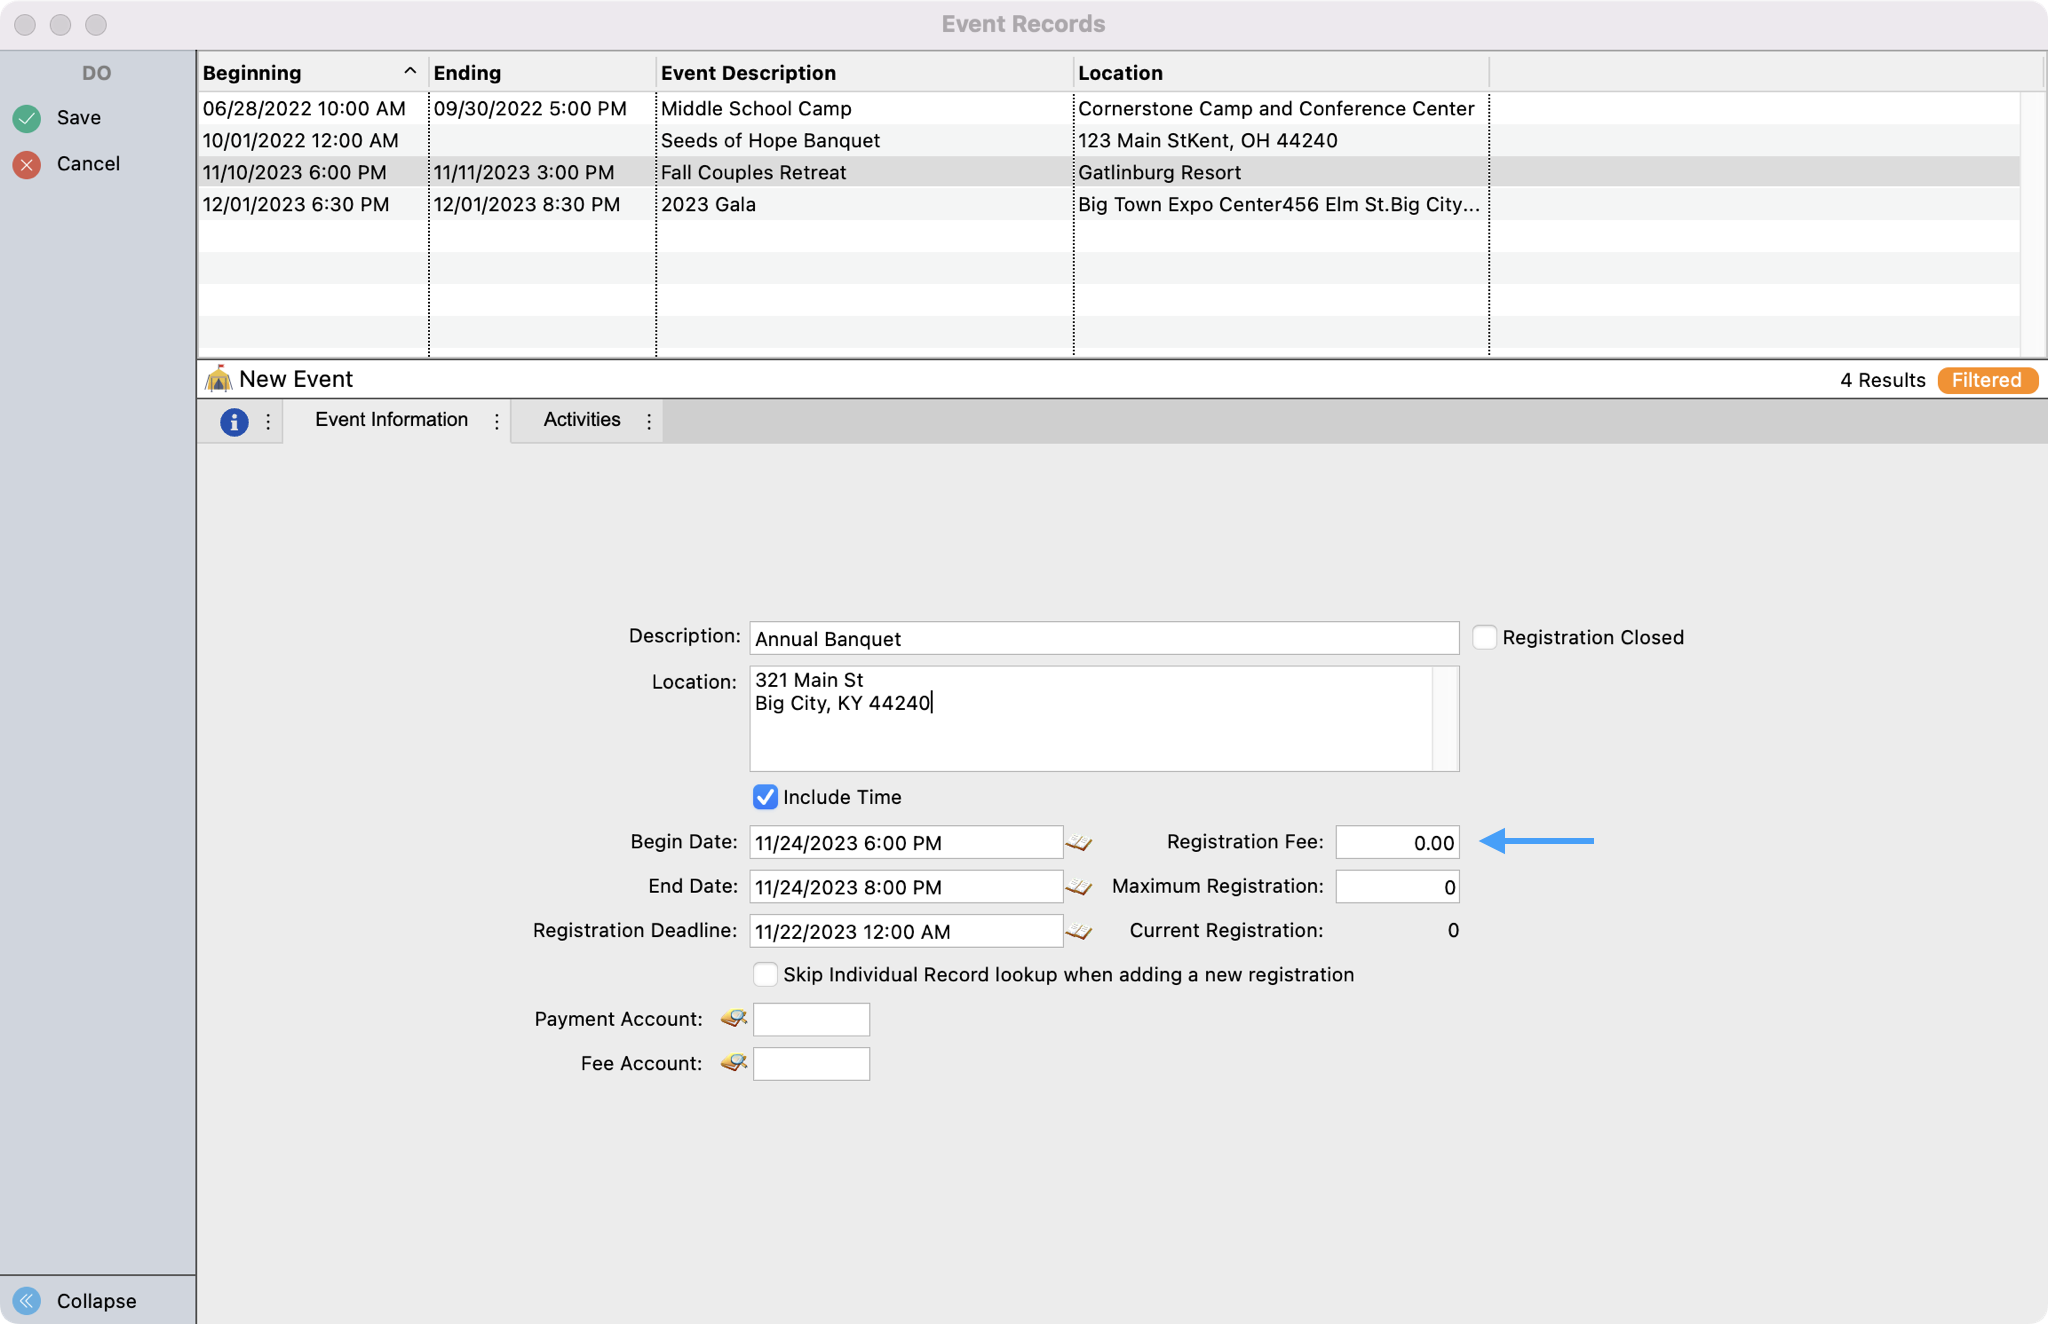
Next, you can add a Registration Fee.
If you enter a Registration Fee here ALL registrants will be charged this amount; it cannot be changed. If you have an event for which there will be varying amounts charged, leave this field blank and set up each Registration Fee as a separate Activity. If most participants will be paying the same Registration Fee, you may wish to enter that amount here and create one or more Activity for Registration Fee discounts (fee will be a negative amount) and/or additional charges.
-
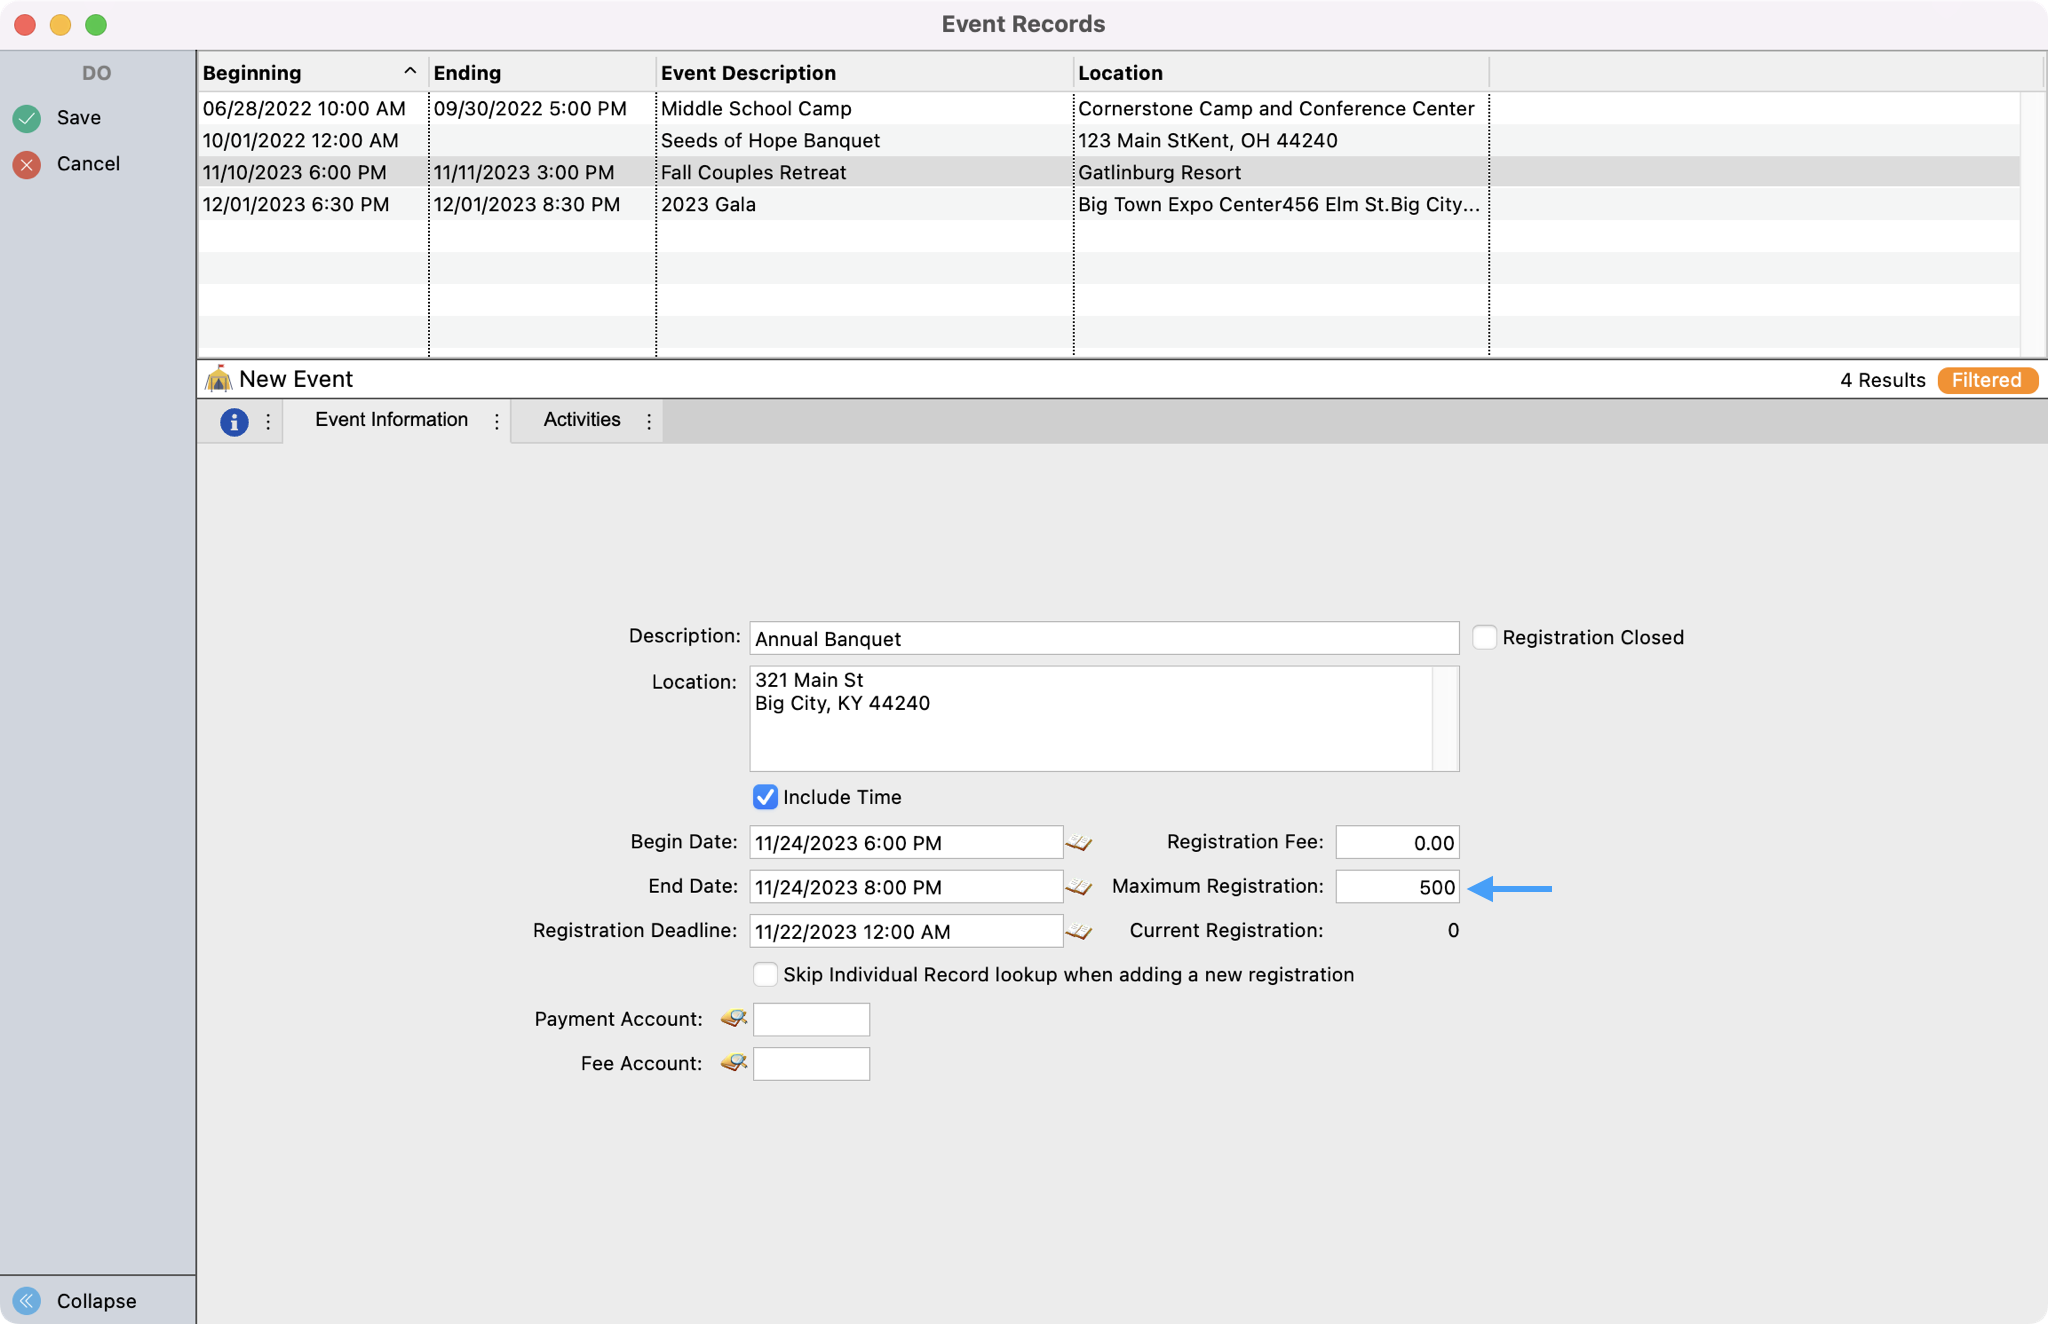
Then, if there is a capacity limit for your event, you can enter in a Maximum Registration number. As attendees register, you will be able to track your capacity.
-
If this is all you need for your event, then you can click on Save from the left sidebar. However, if you want to ask custom questions for your attendees or add different ticket options you'll proceed to add Activities to your event.
Adding Activities to your Event Record
You can use activities for many purposes to help manage your event. One example is when there are different ticket pricing options (individual vs table, adult vs child, etc) for your event. You can also use activities to ask custom questions from their meal choice preference to how did you hear about this year's event. If you have an event where there are multiple workshop, activities, or add-ons (such as a T-shirt) you can add activities that will allow each attendee to make their selections. Activities is what you can use to gather any details that you need from each attendee.
-
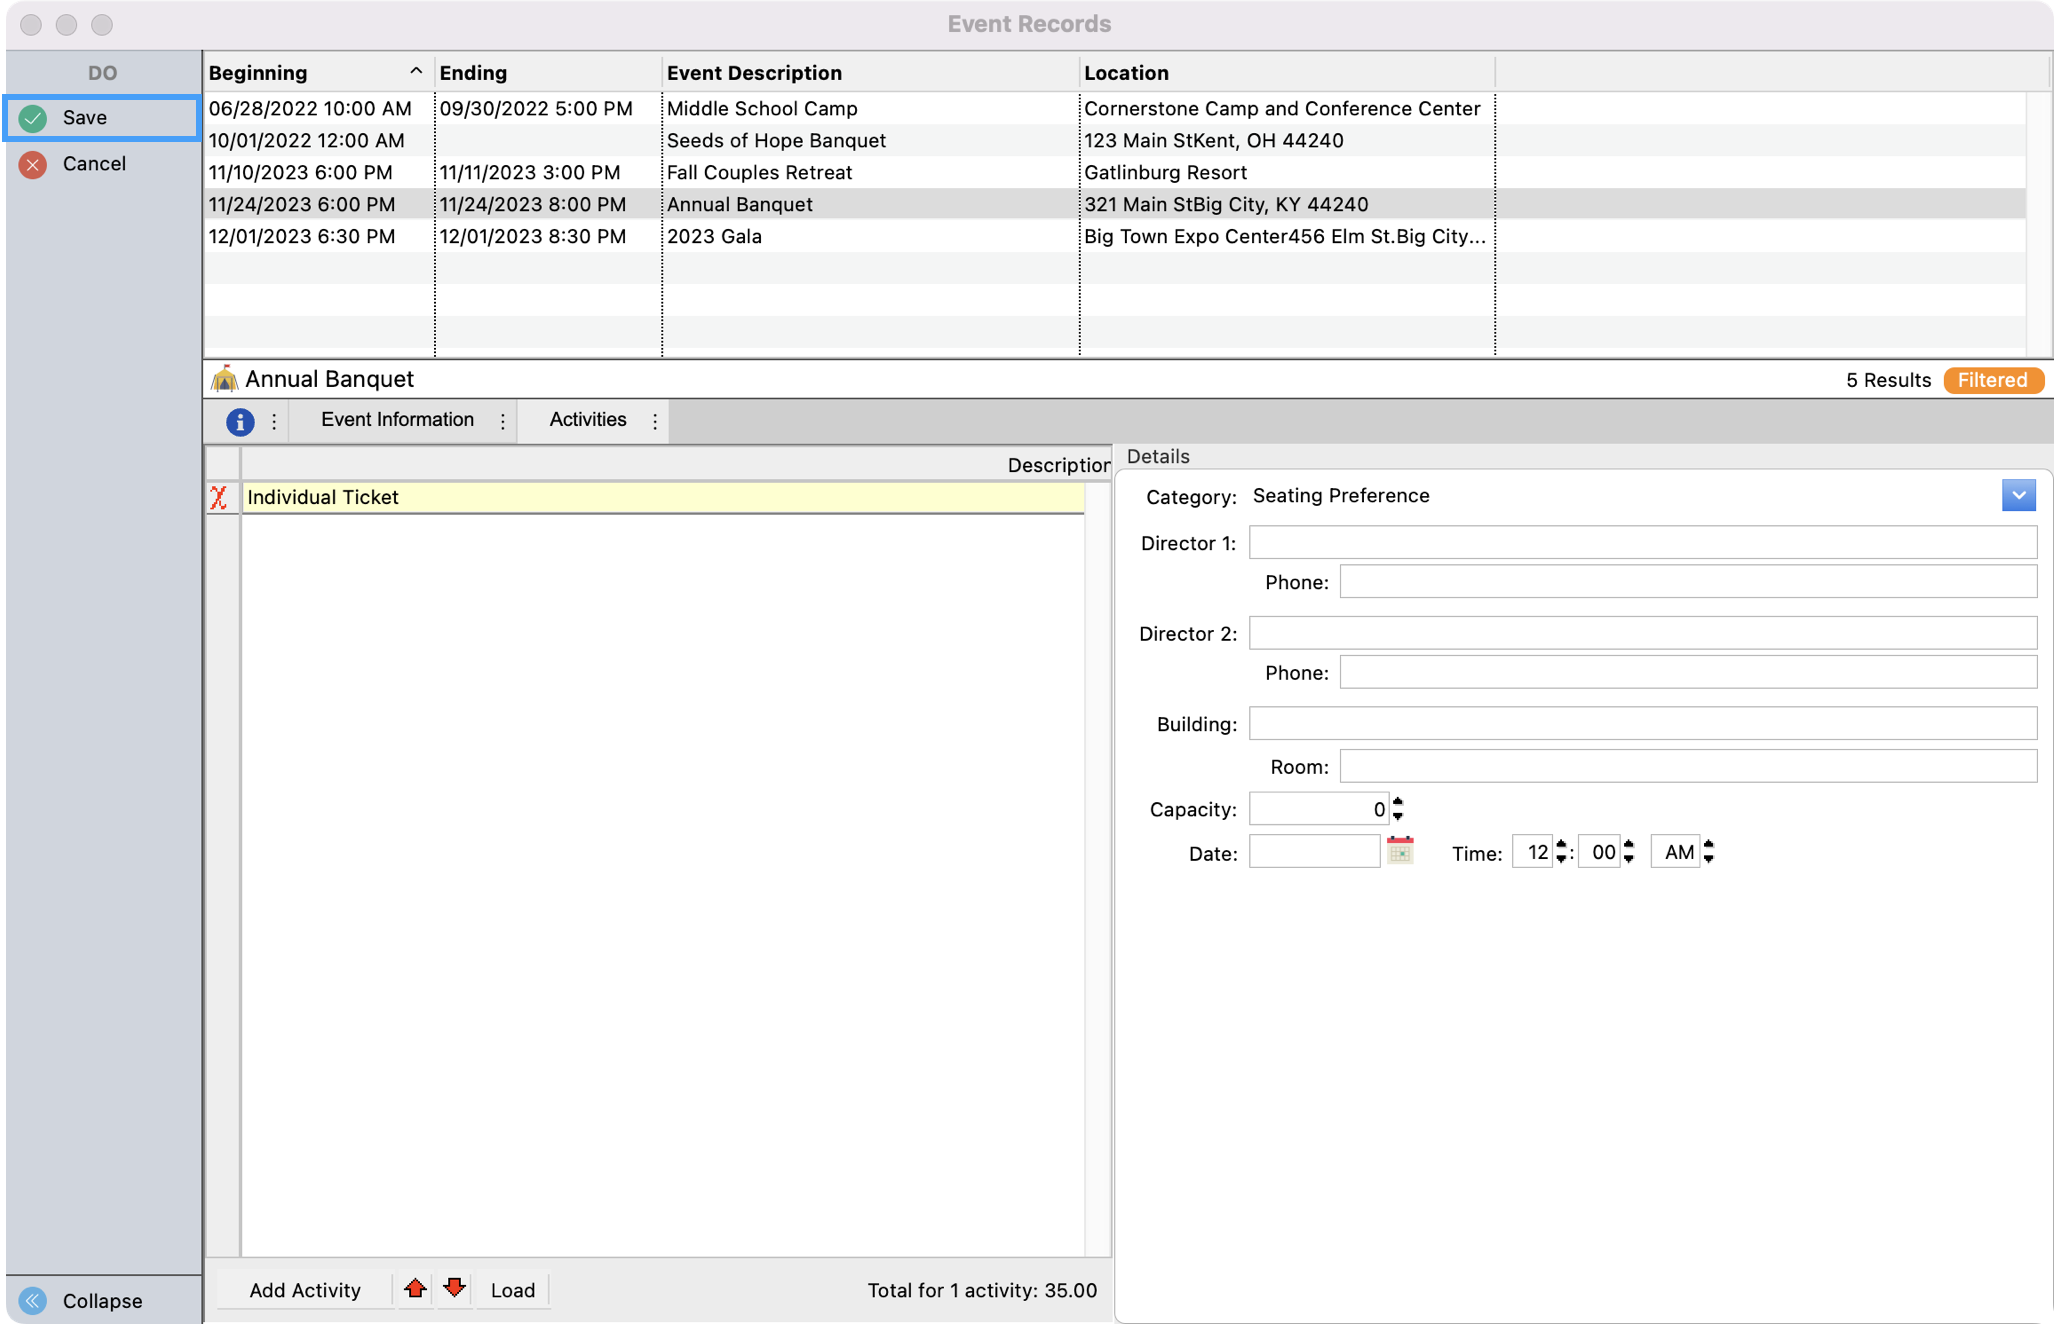
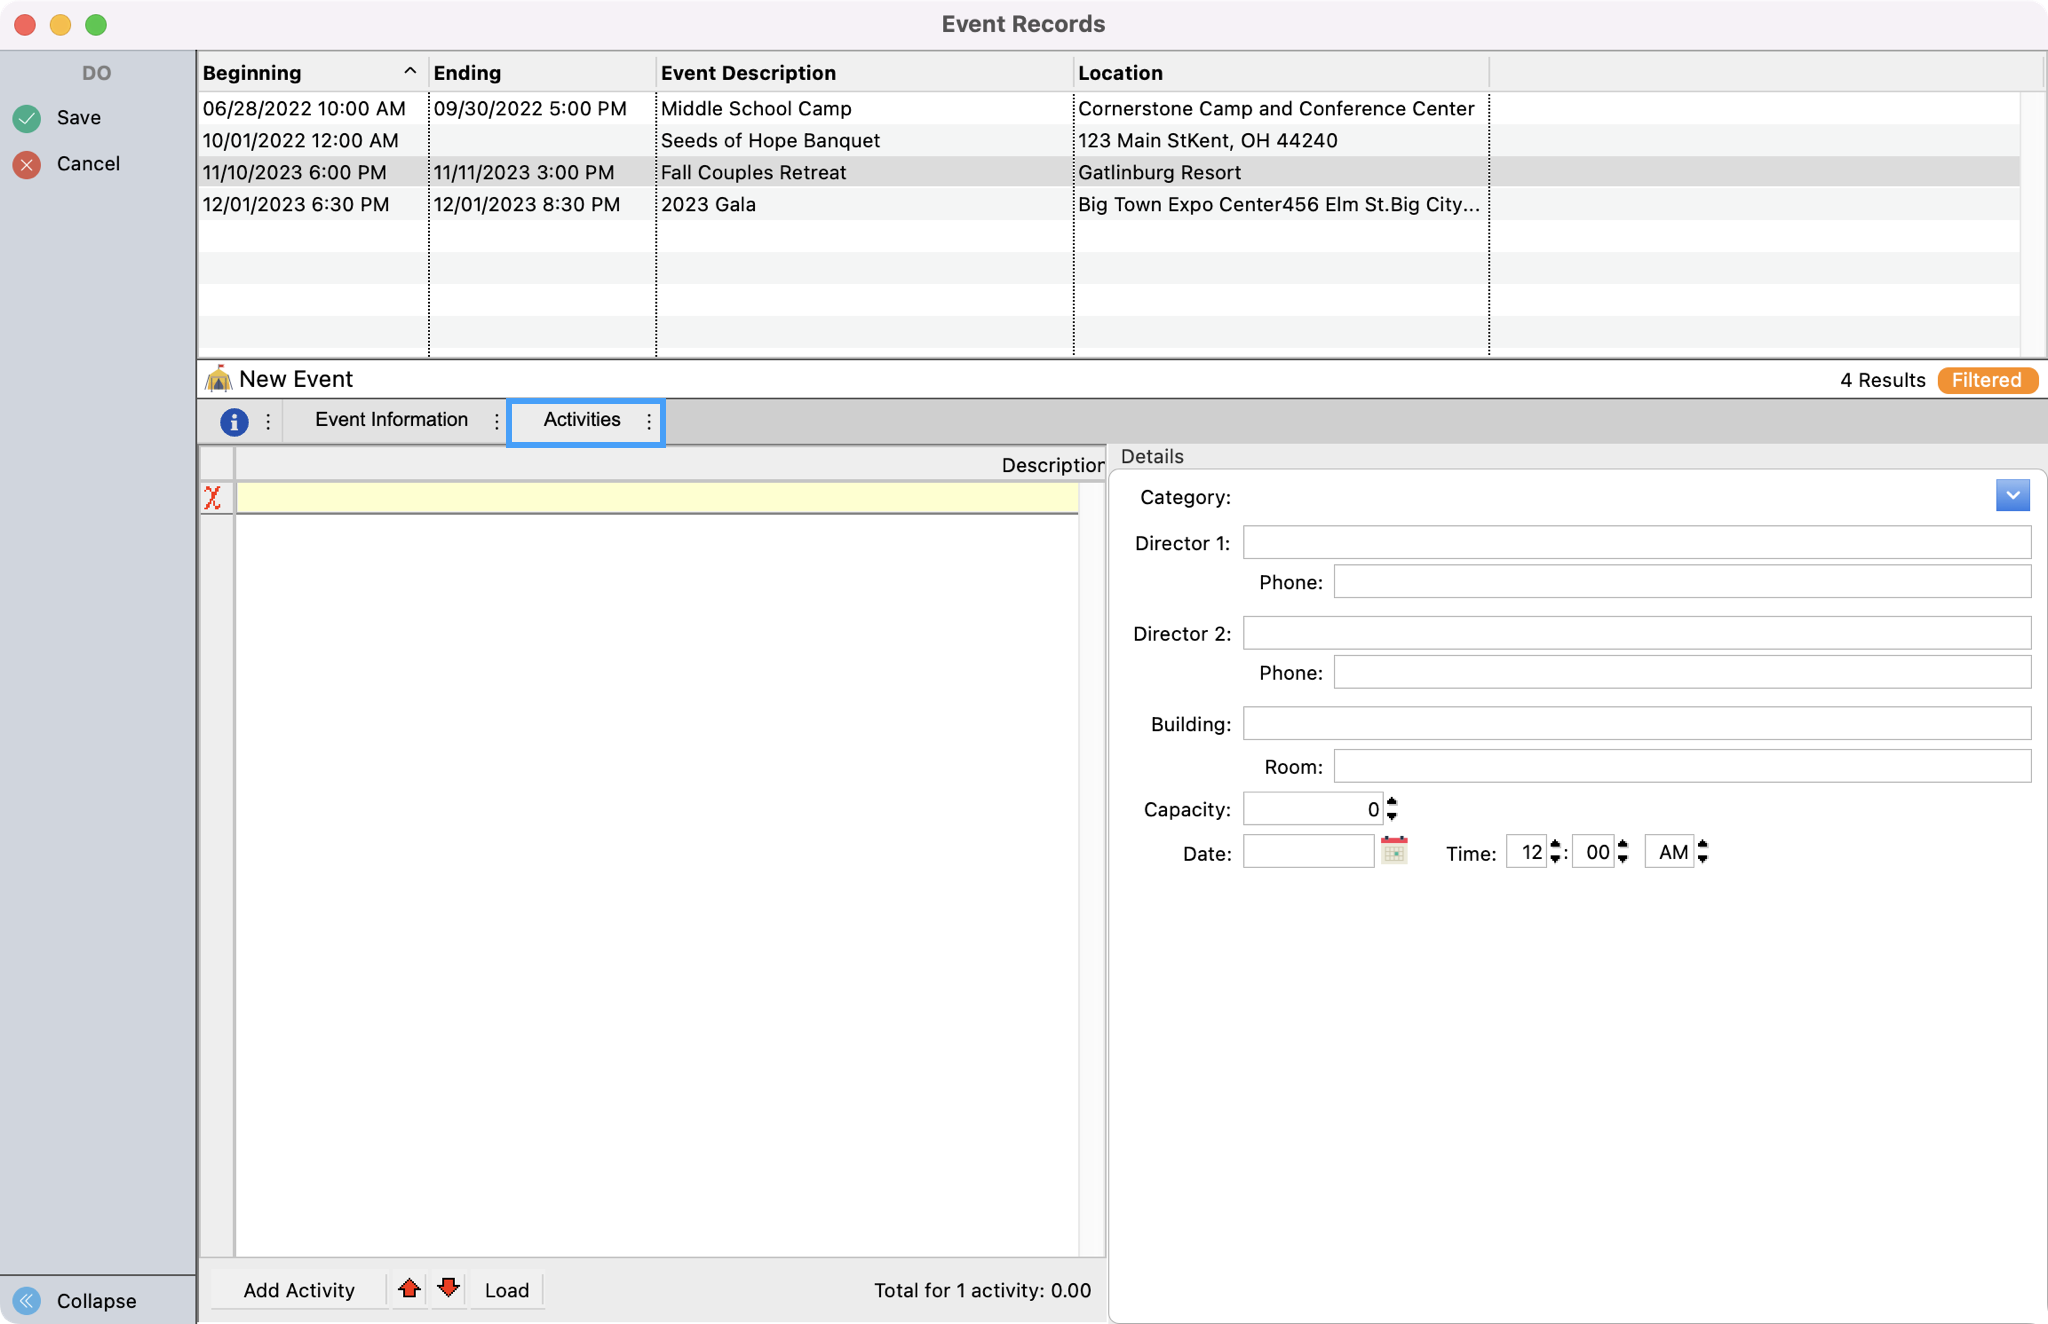
First, click the Activities tab. If you have not previously saved your Event record you will be able to edit fields accordingly. If you have saved your event, click on Change from the left sidebar to be able to make changes.
-
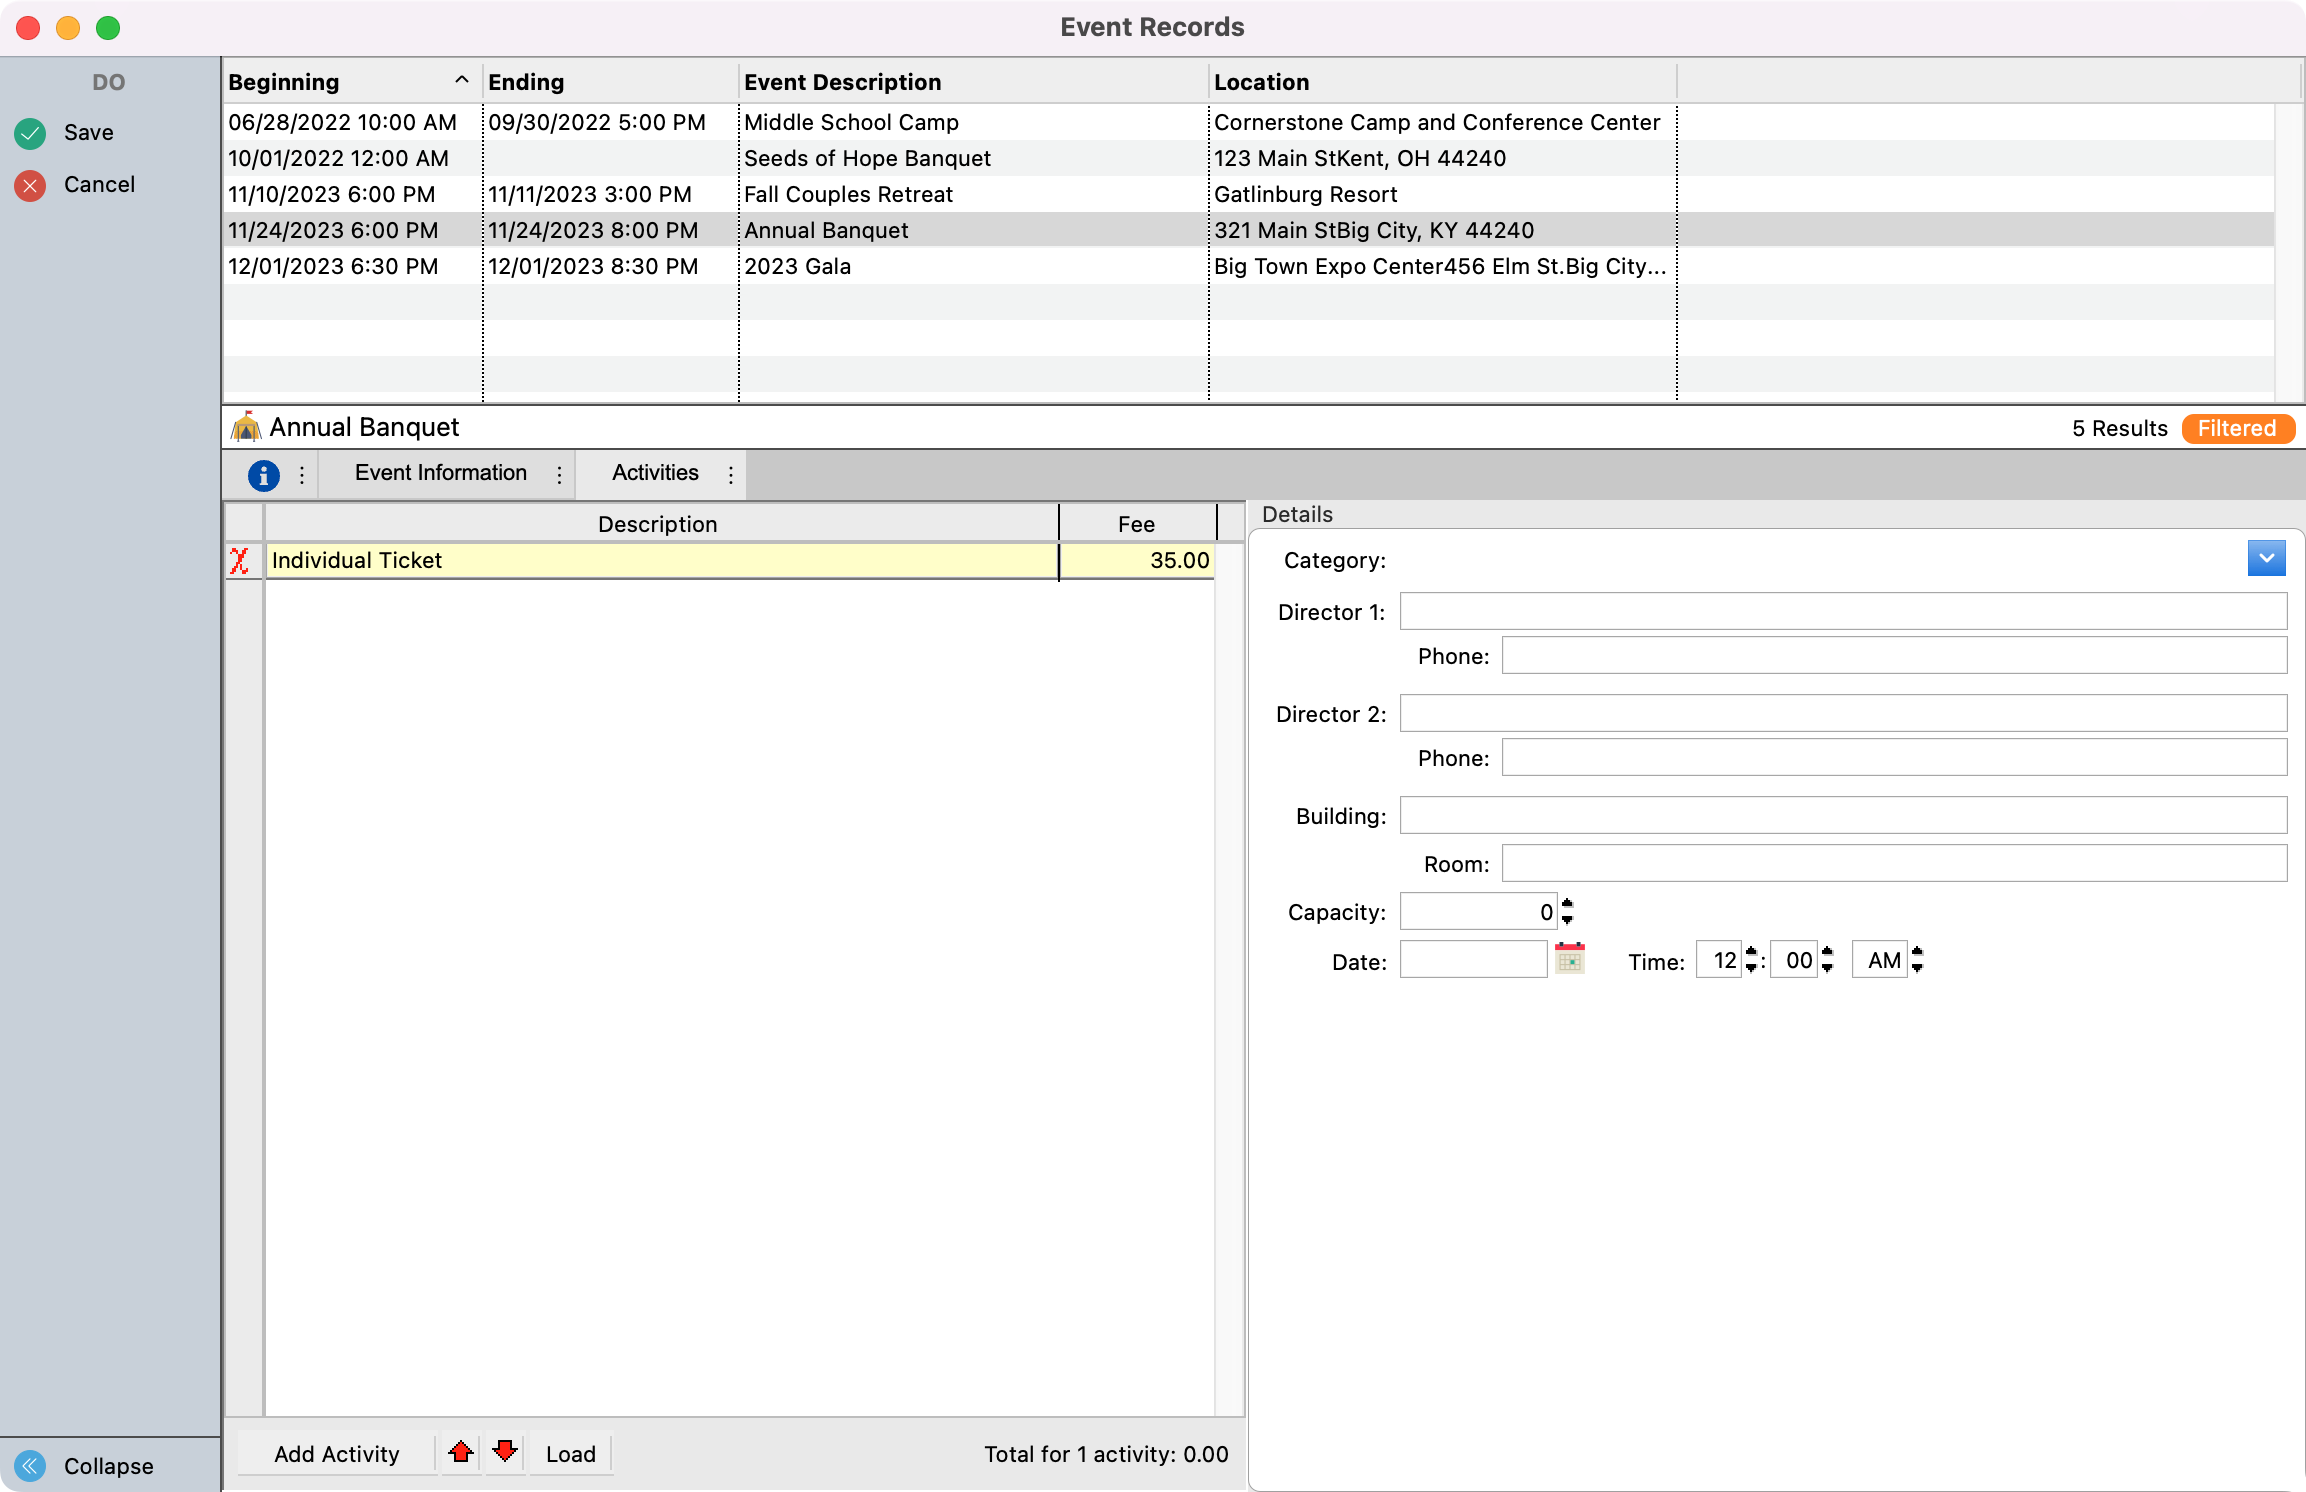
Click the small Add Activity button at the bottom of the activities list. Type the Description of the activity (e.g., Individual Ticket, Table Host, etc). If there is a fee for this activity, you can use the tab button on your keyboard to move over to this field and put in the dollar amount. If it is free you can leave it blank.
-
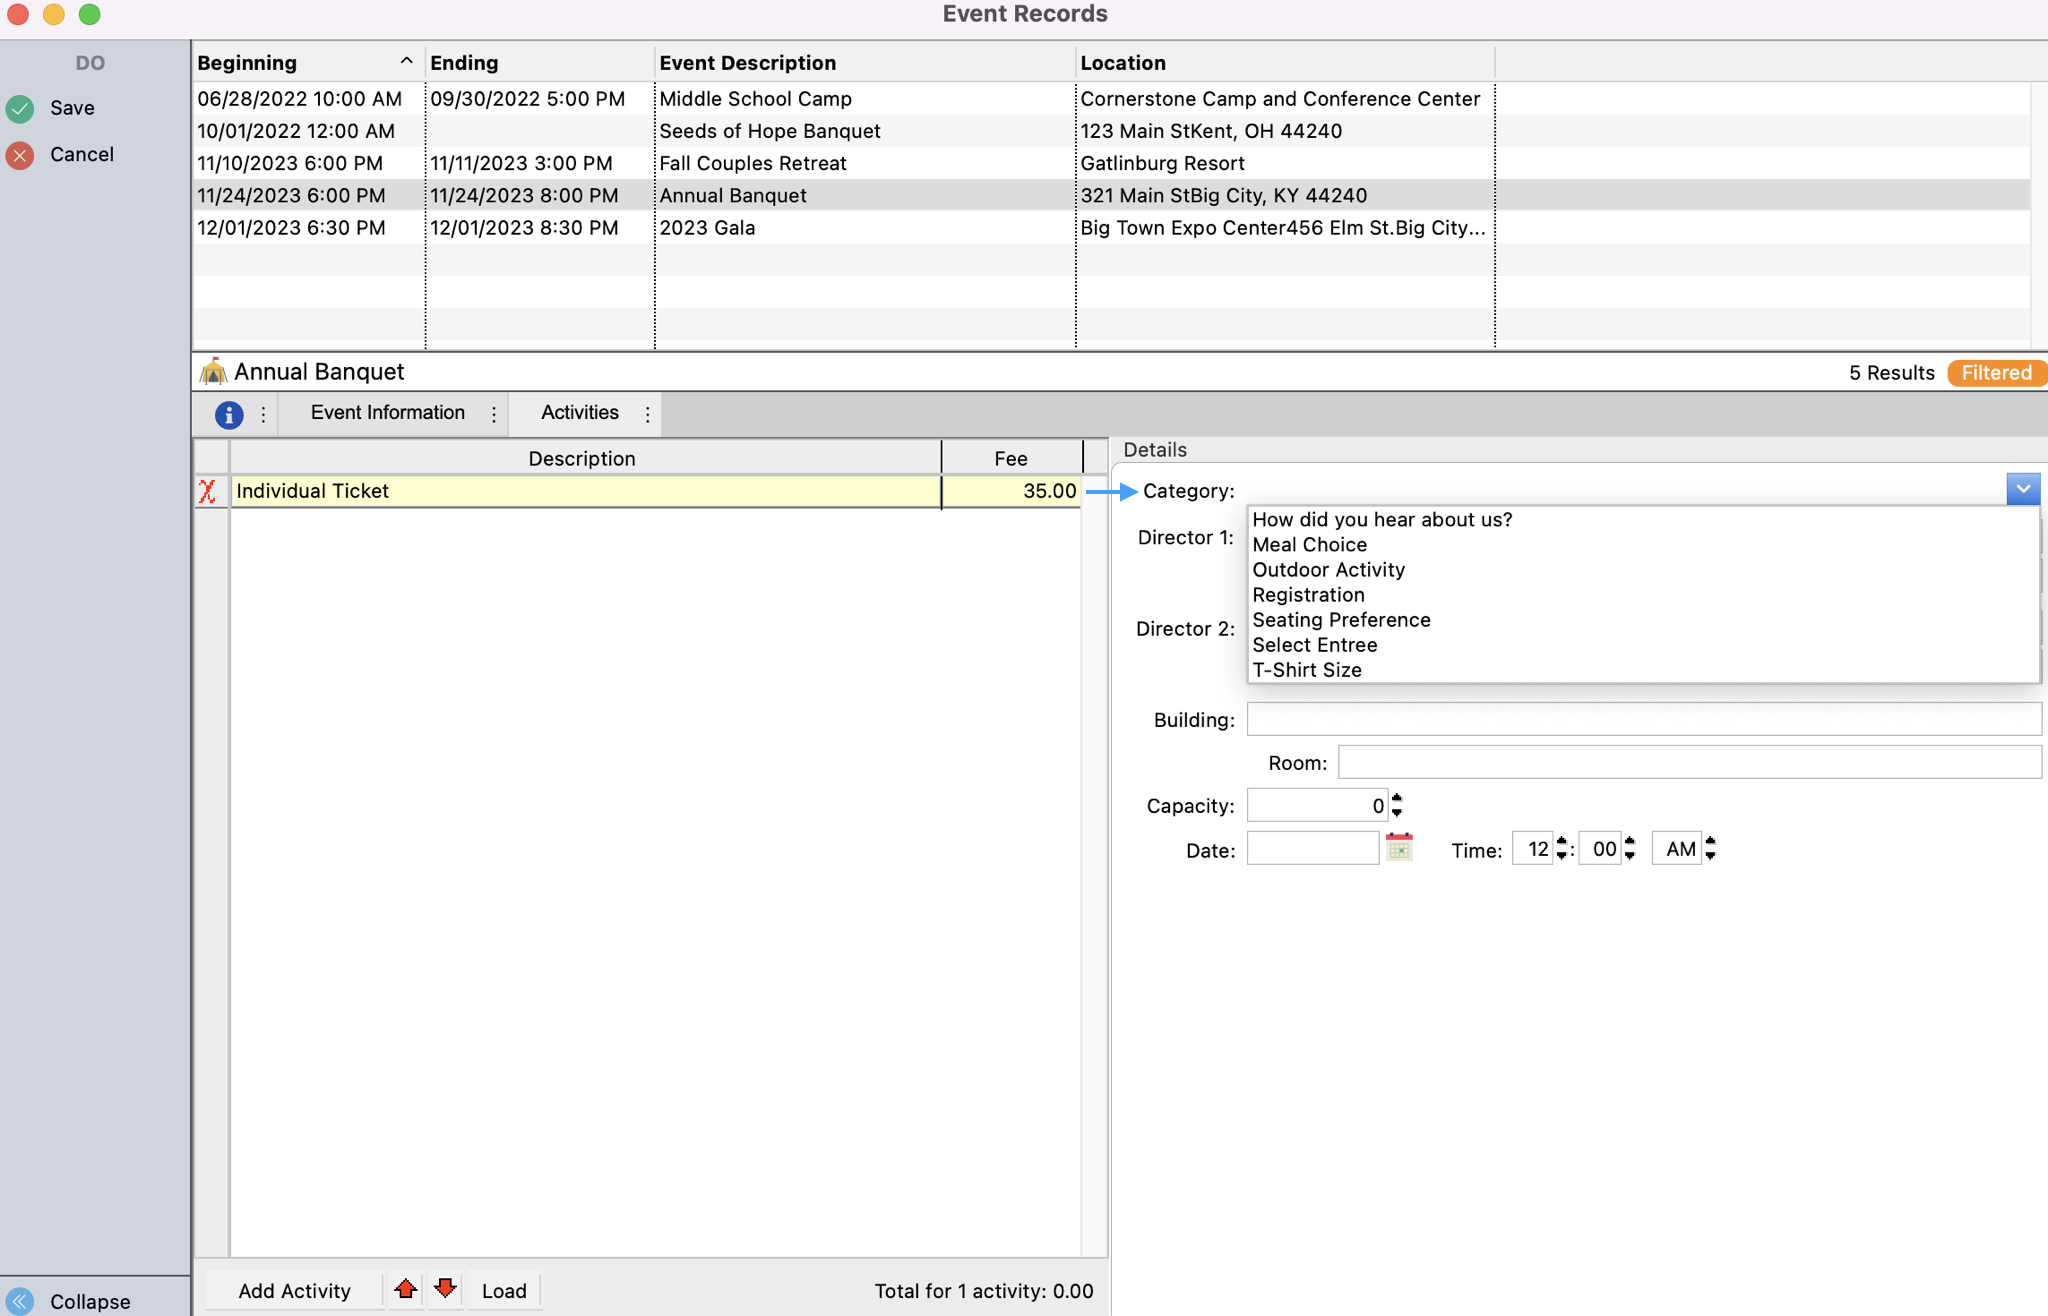
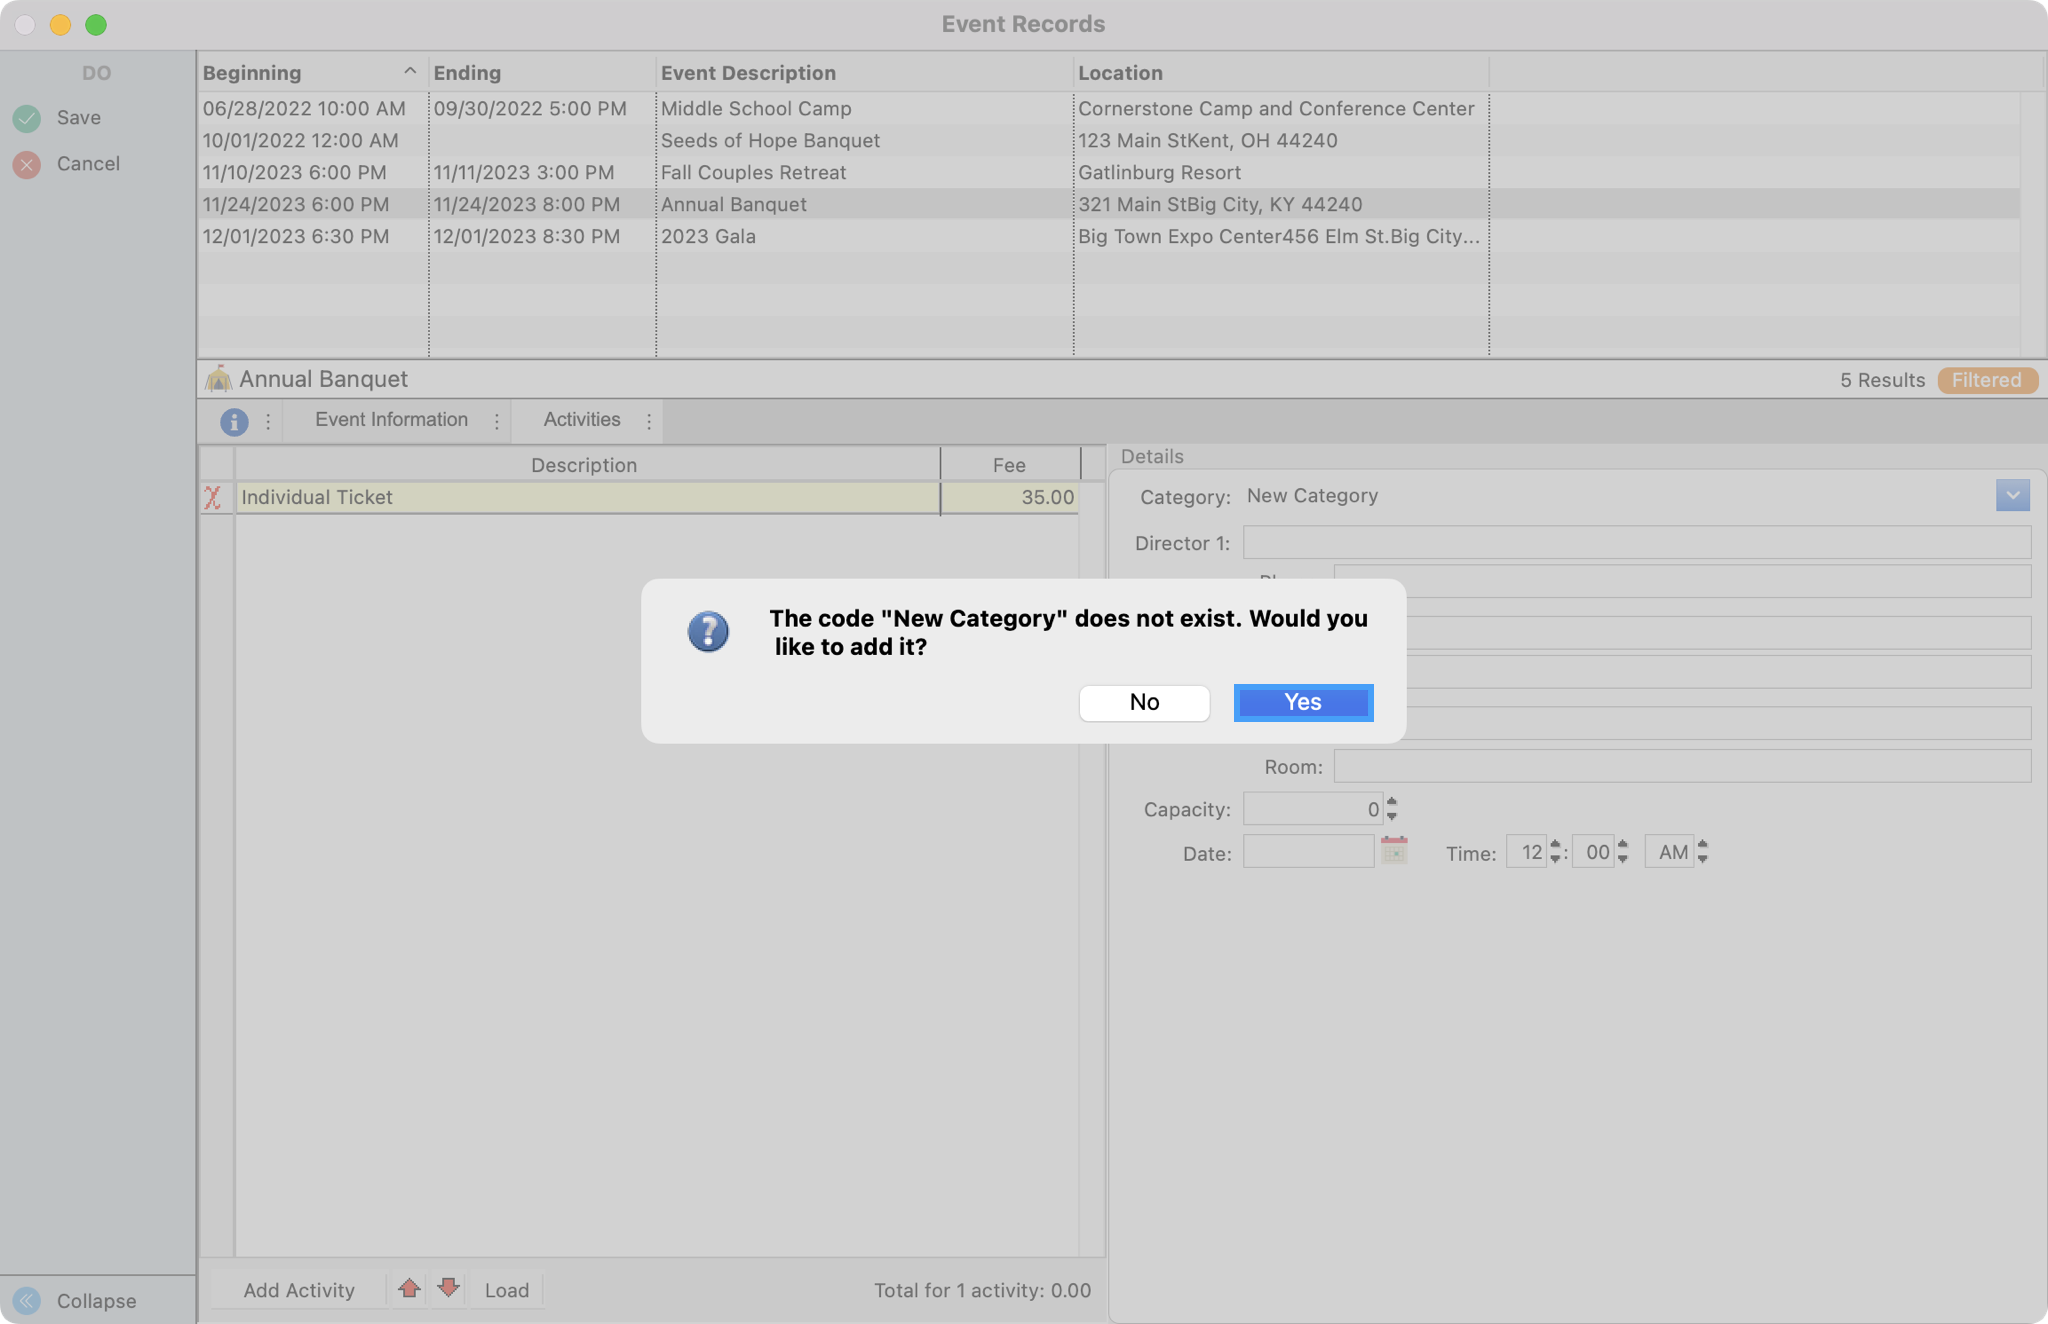
You have the option to assign Activities to Categories, which will cause them to be grouped during Registration Entry. You may use the drop-down list to choose from an existing Category or to create a new Category by typing a description in this field. When you tab out of the Category field, you will be asked if you wish to add this Category, click Yes.
-
Tab through the Directors, Phones, Building and Room fields, typing the appropriate information, if desired.

-
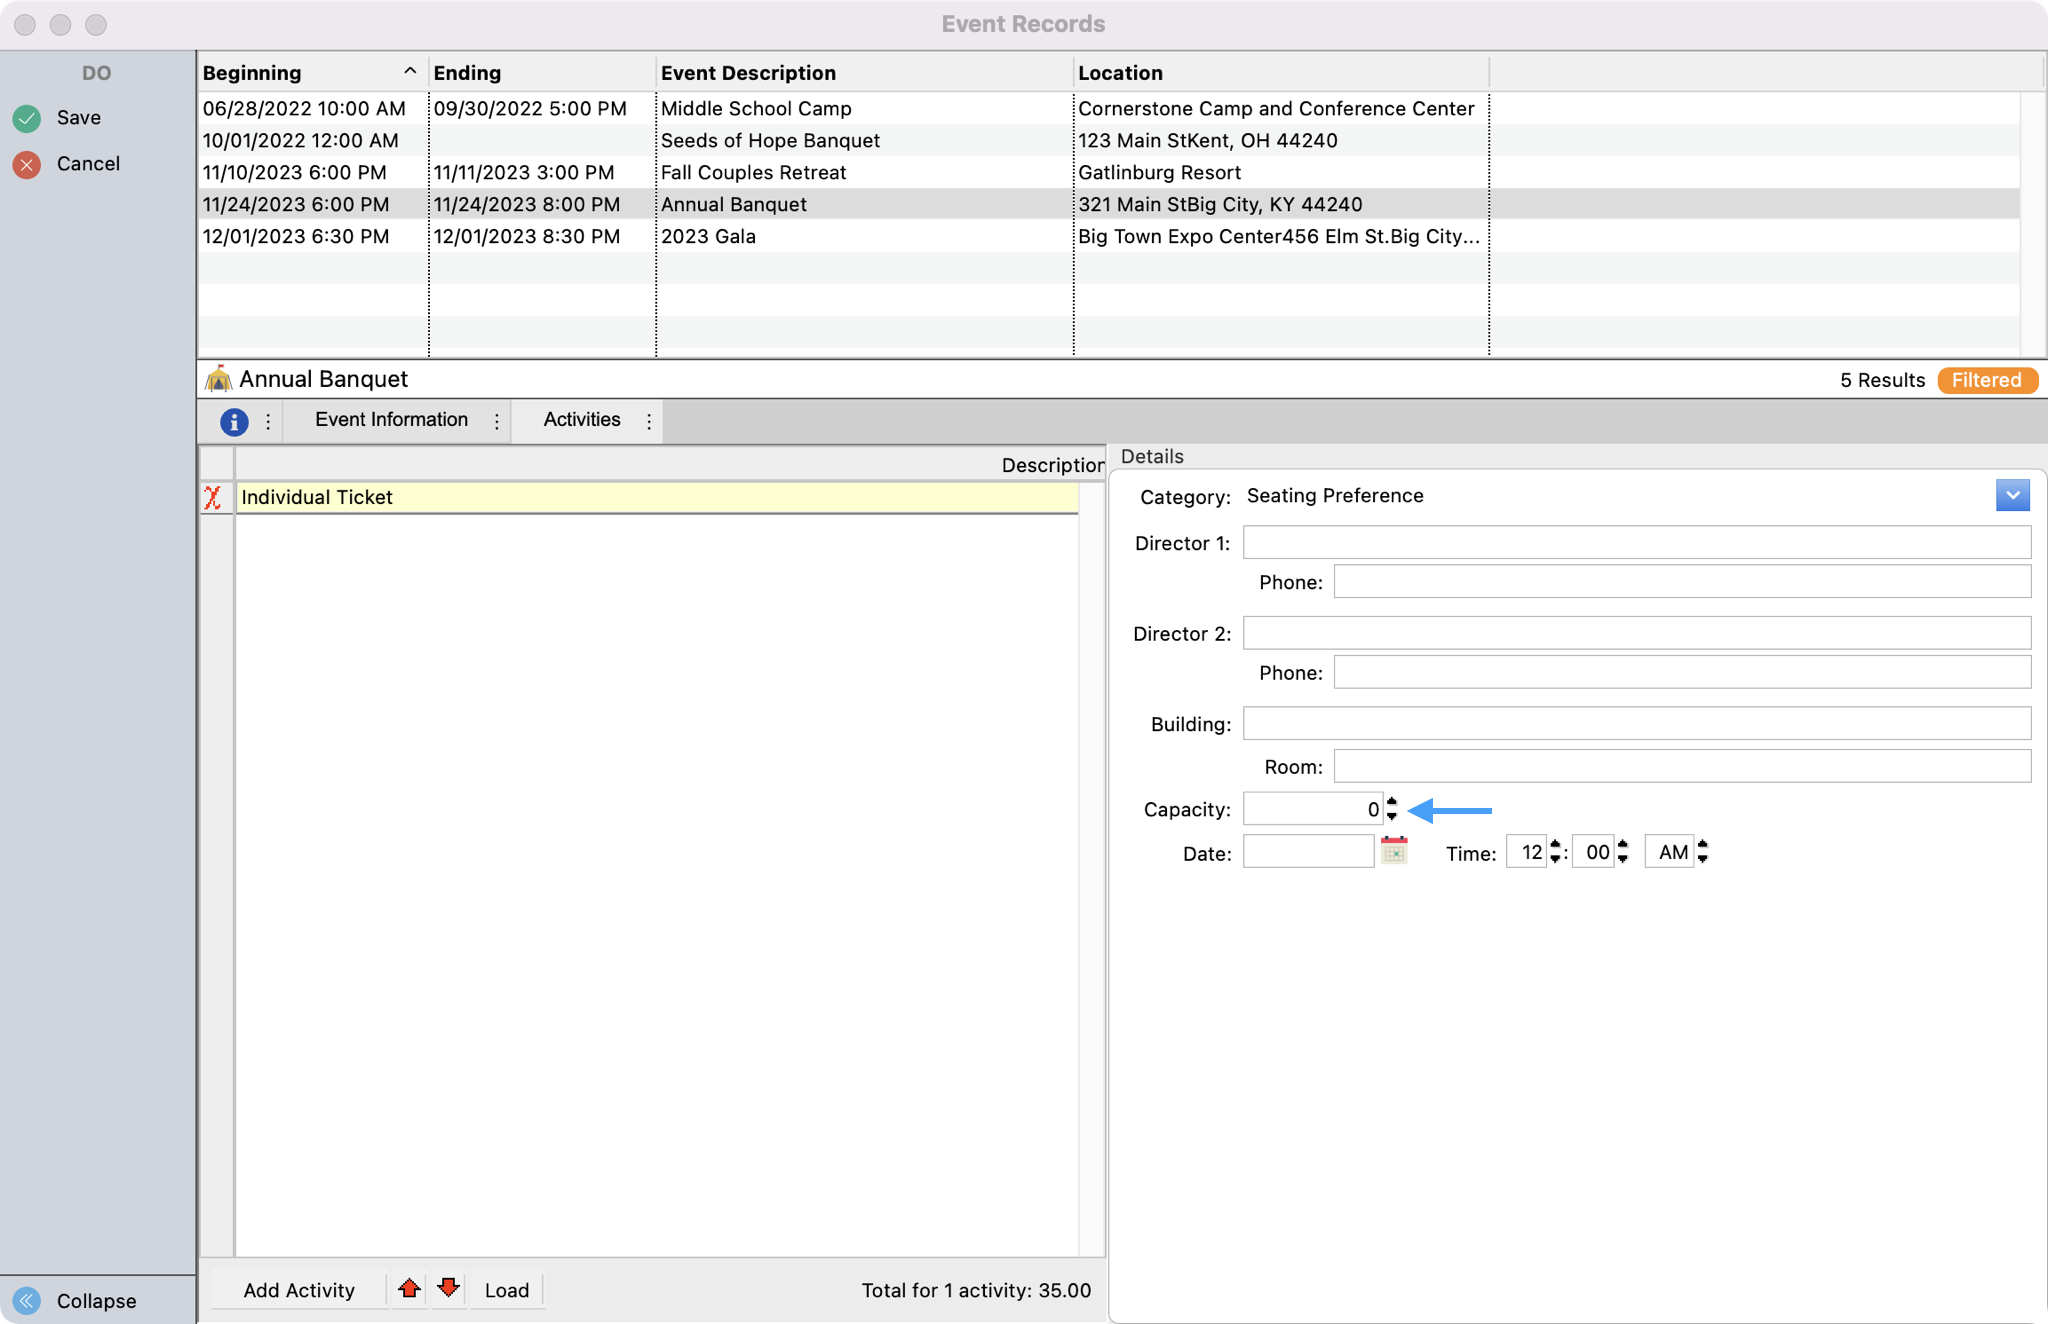
Continue using your keyboard's tab button to move to Capacity. When applicable you can add a capacity number for each activity. As registrations are made, CDM+ will warn you when the pre-set capacity has been reached.
-
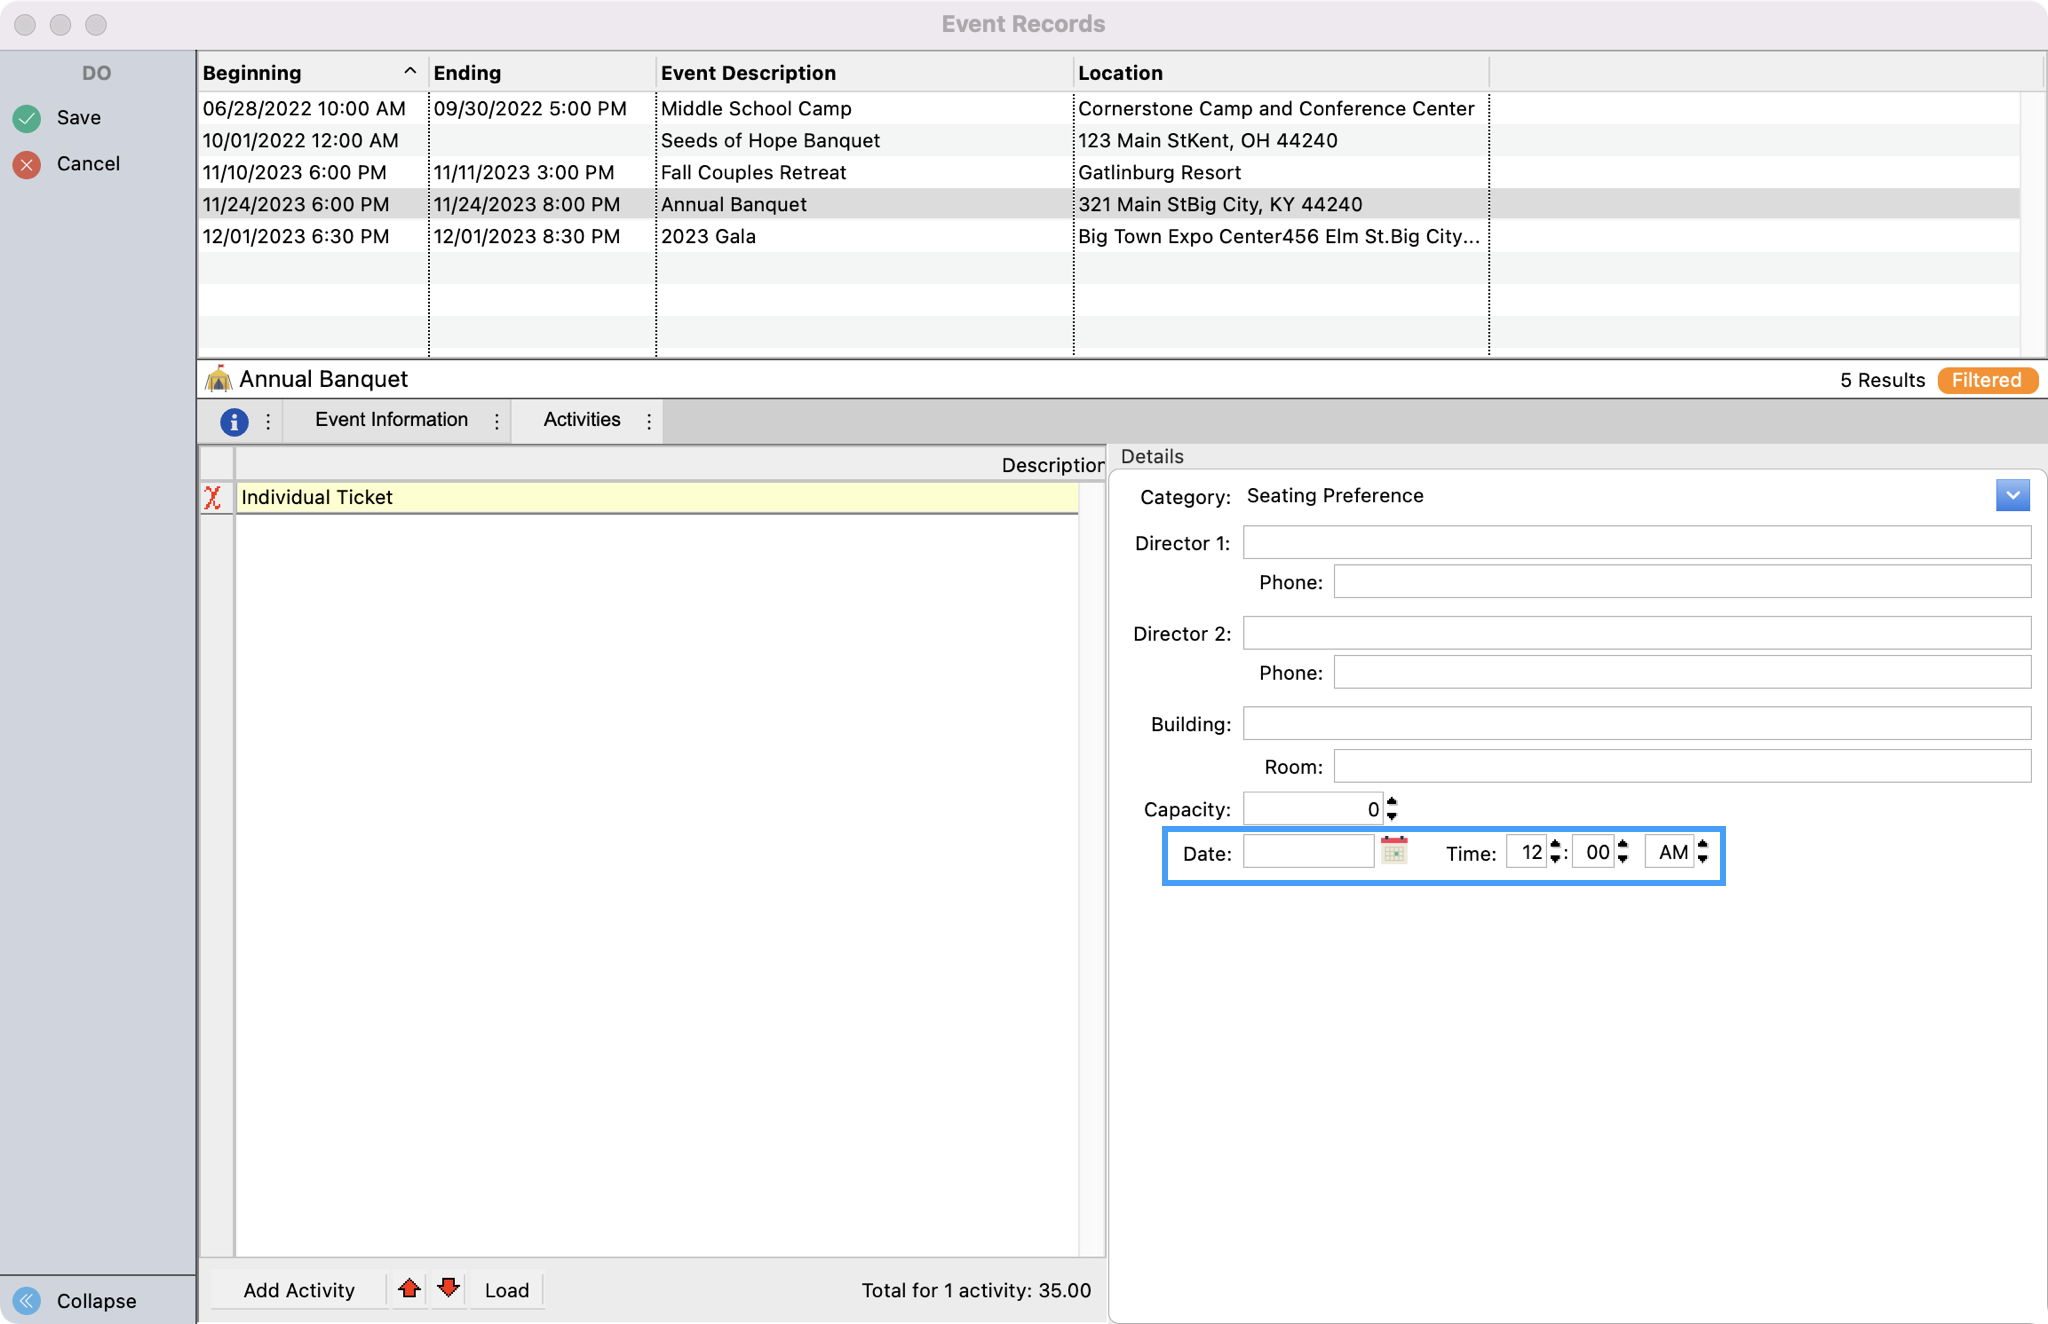
If each Activity has different dates and times (e.g. different workshop options at different times) you can continue using the Tab keyboard key to select the Date and Time for each activity. You can also double-click on the calendar icon to input the date.
-
Repeat this process to add each activity needed for this event. Once you are finished entering in your Activities, click Save in the upper left-hand corner of the page.