If you want your event registrants to be able to register online you will tie your Event record in CDM+ to an event registration link in Web Ministry Tools. This will allow you to create a registration link and QR code that you can use when advertising for your event.
-
First, you will need a Web Ministry Tools account. There is no extra cost for a Web Ministry Tools account. If you do not already have an account you can reach out to our Support team at support@cdmplus.com and they will be able to help setup an account for you.
-
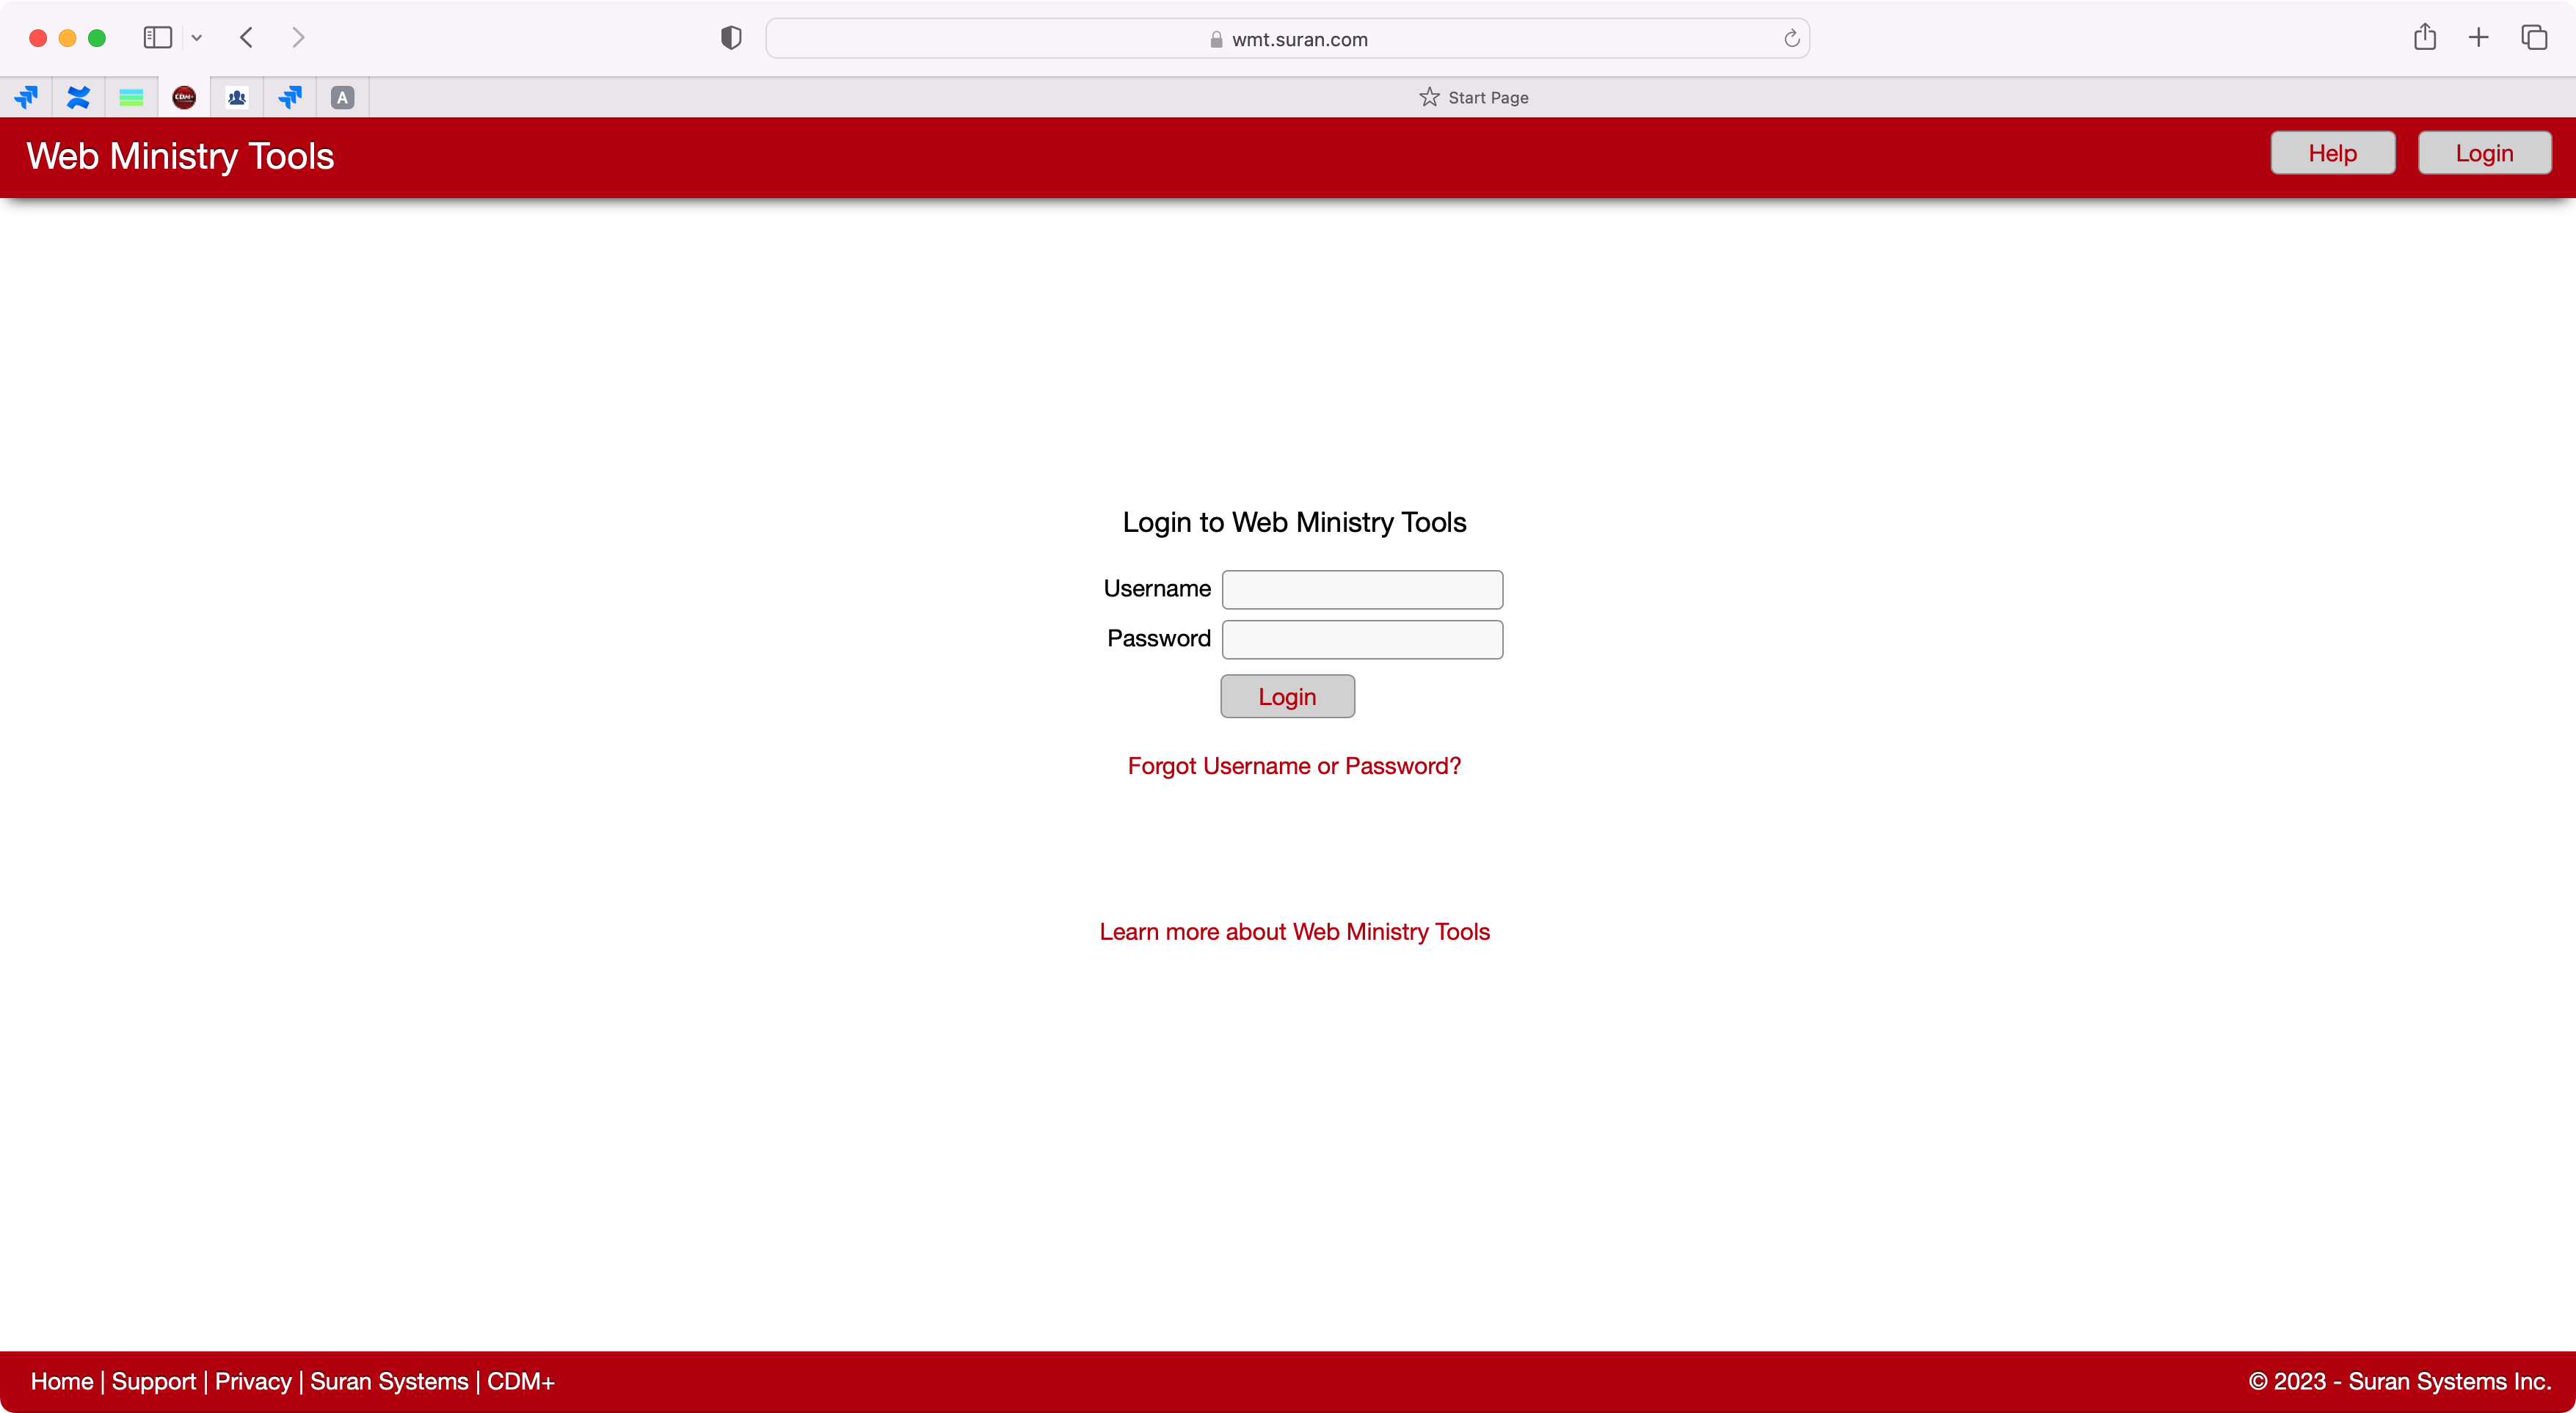
Once you have a Web Ministry Tools account, you will login at www.wmt.suran.com .
-
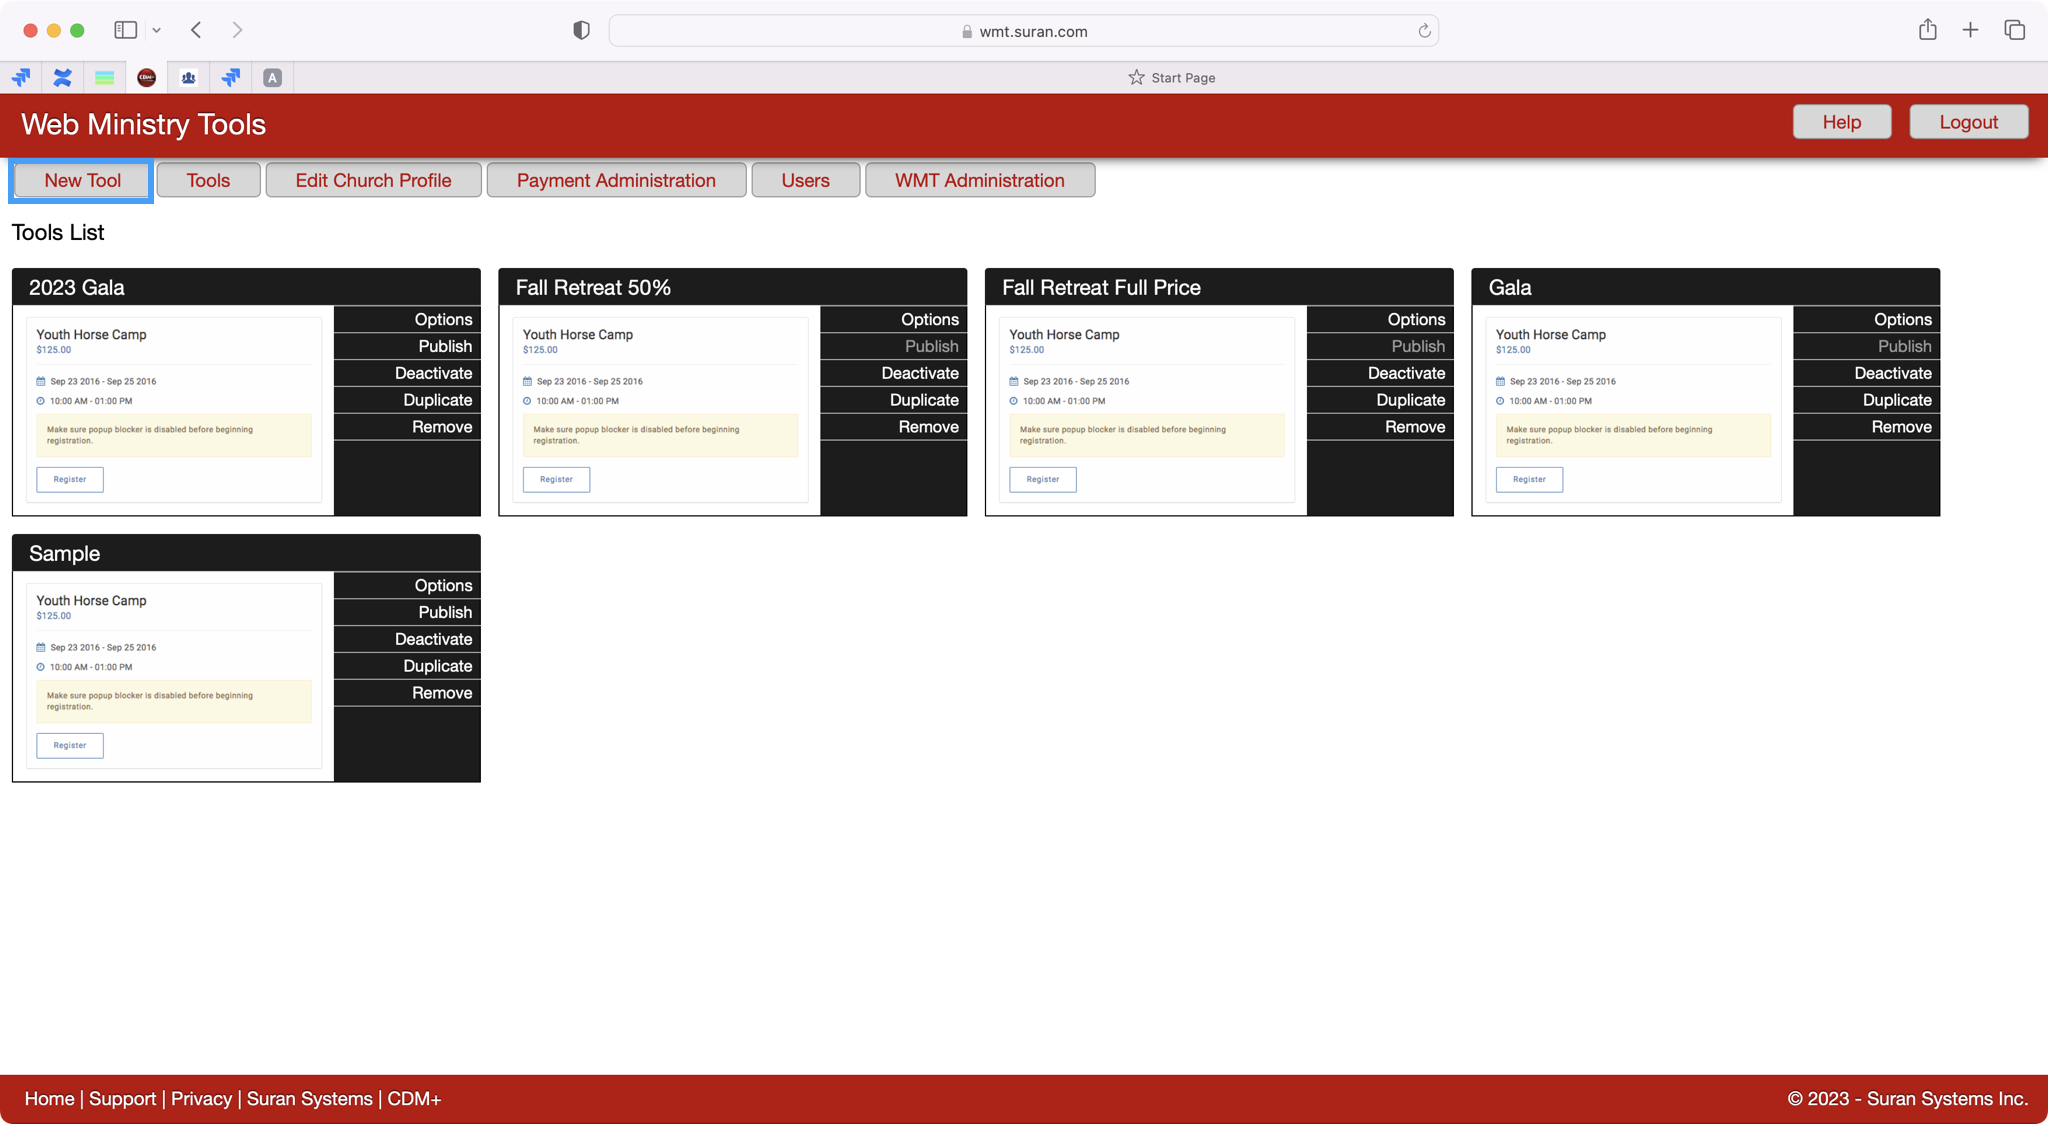
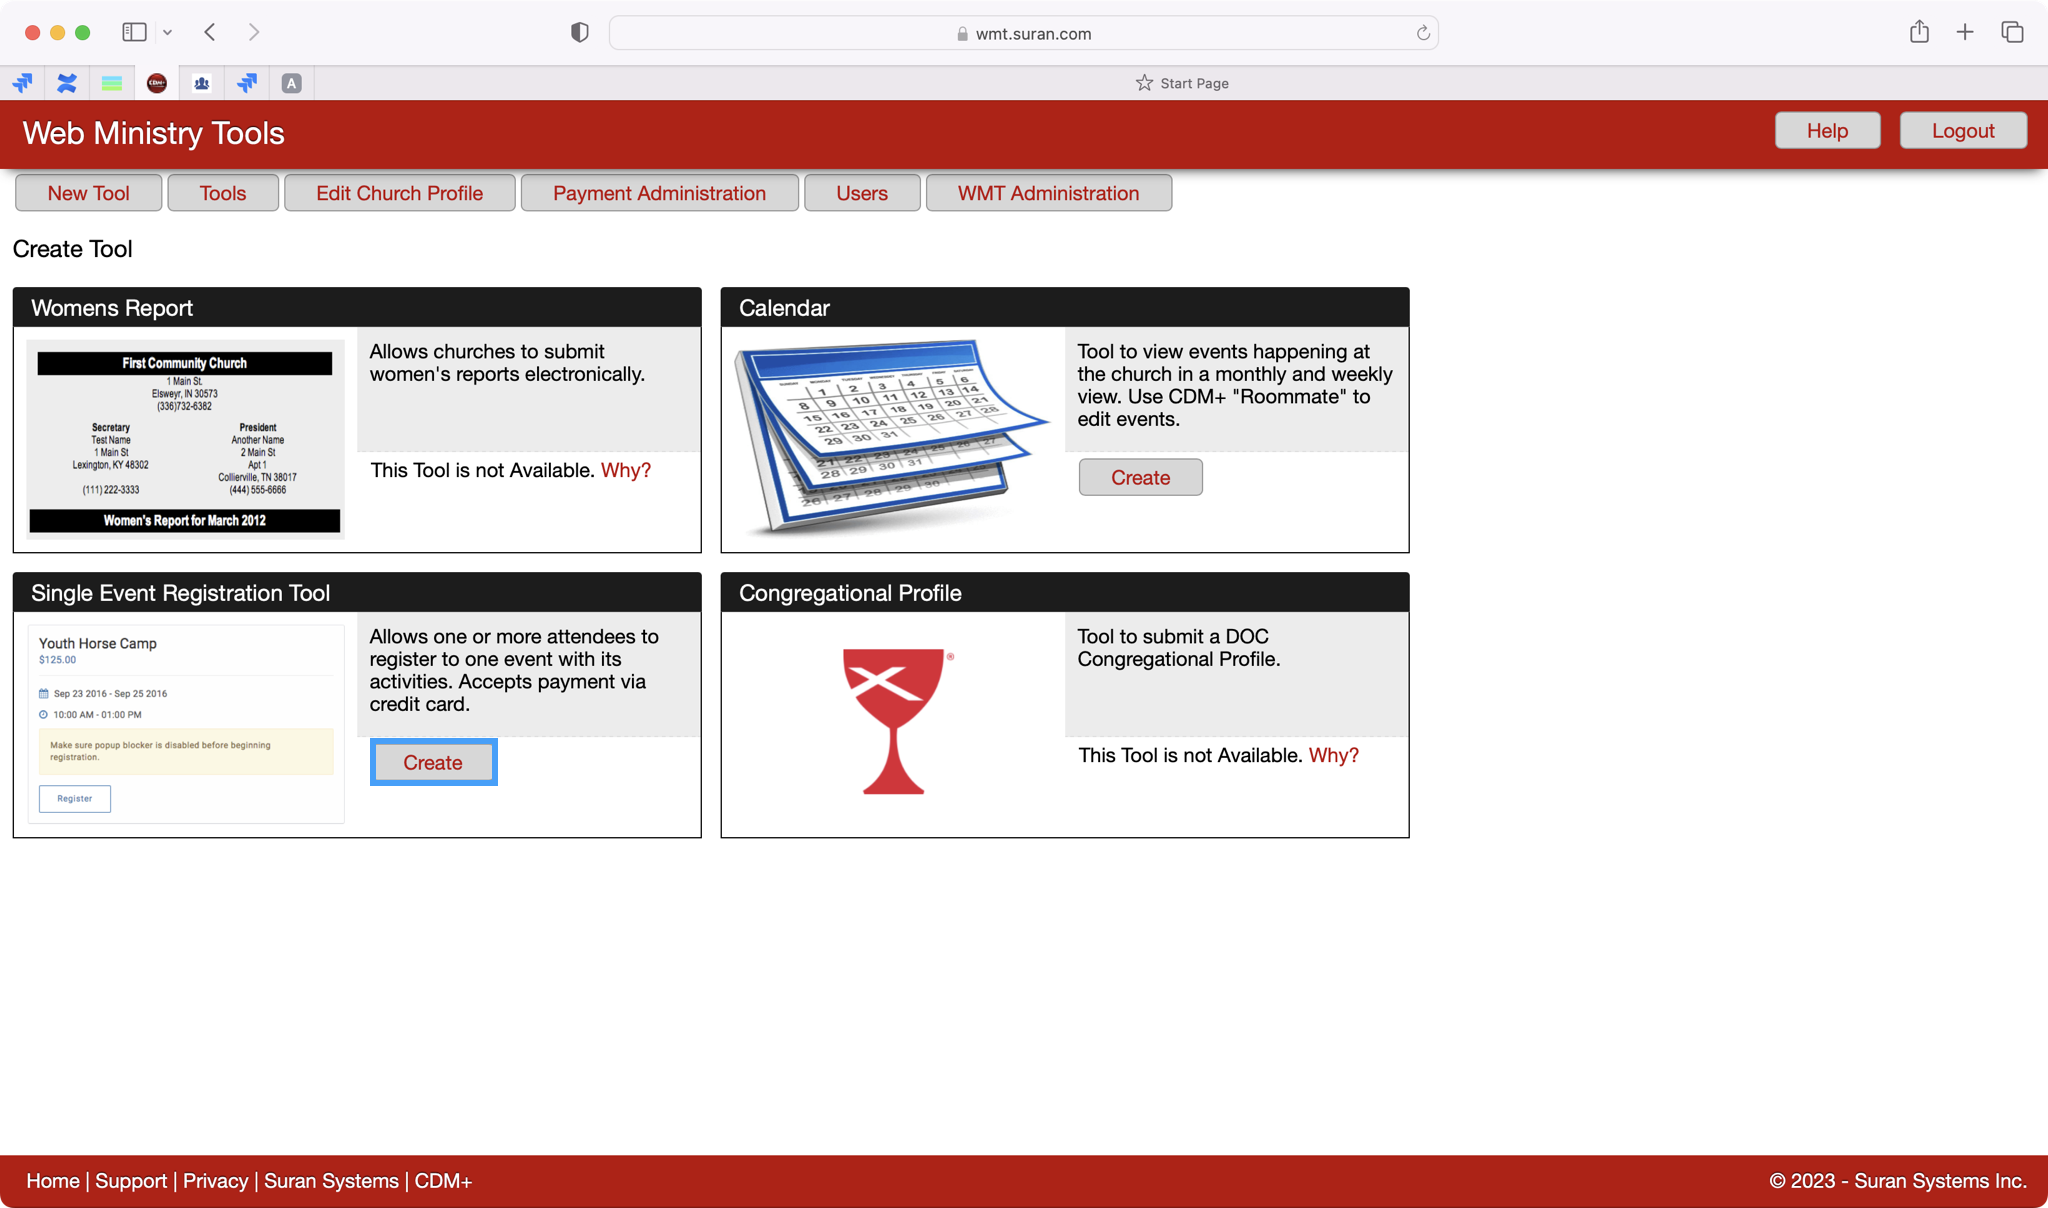
After you login, click on New Tool.
-
Then, click on Create under the Single Event Registration Tool option.
-
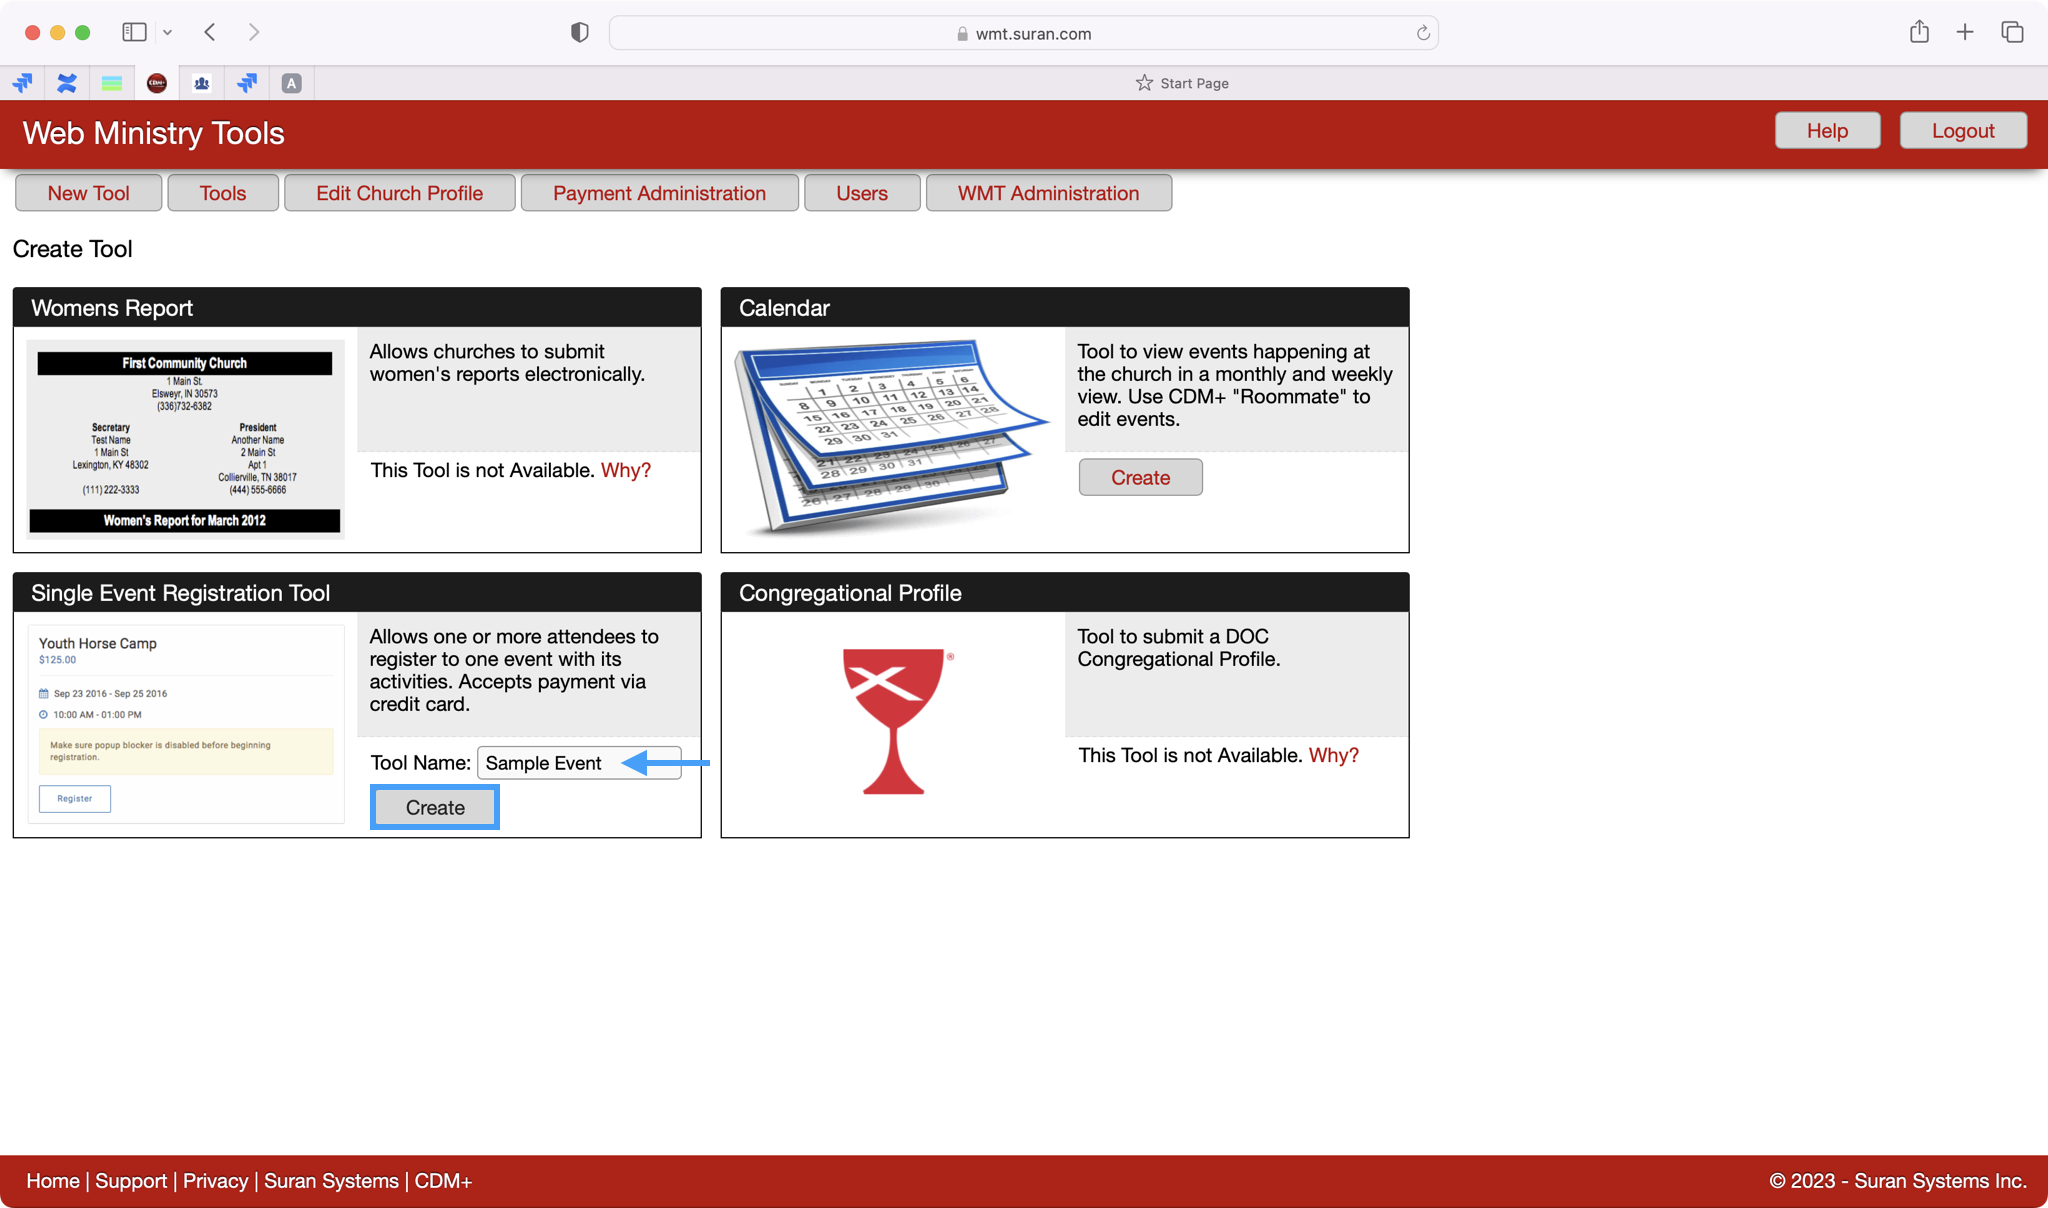
You will give your Tool a name, typically the name of your event, and then click on Create.
-
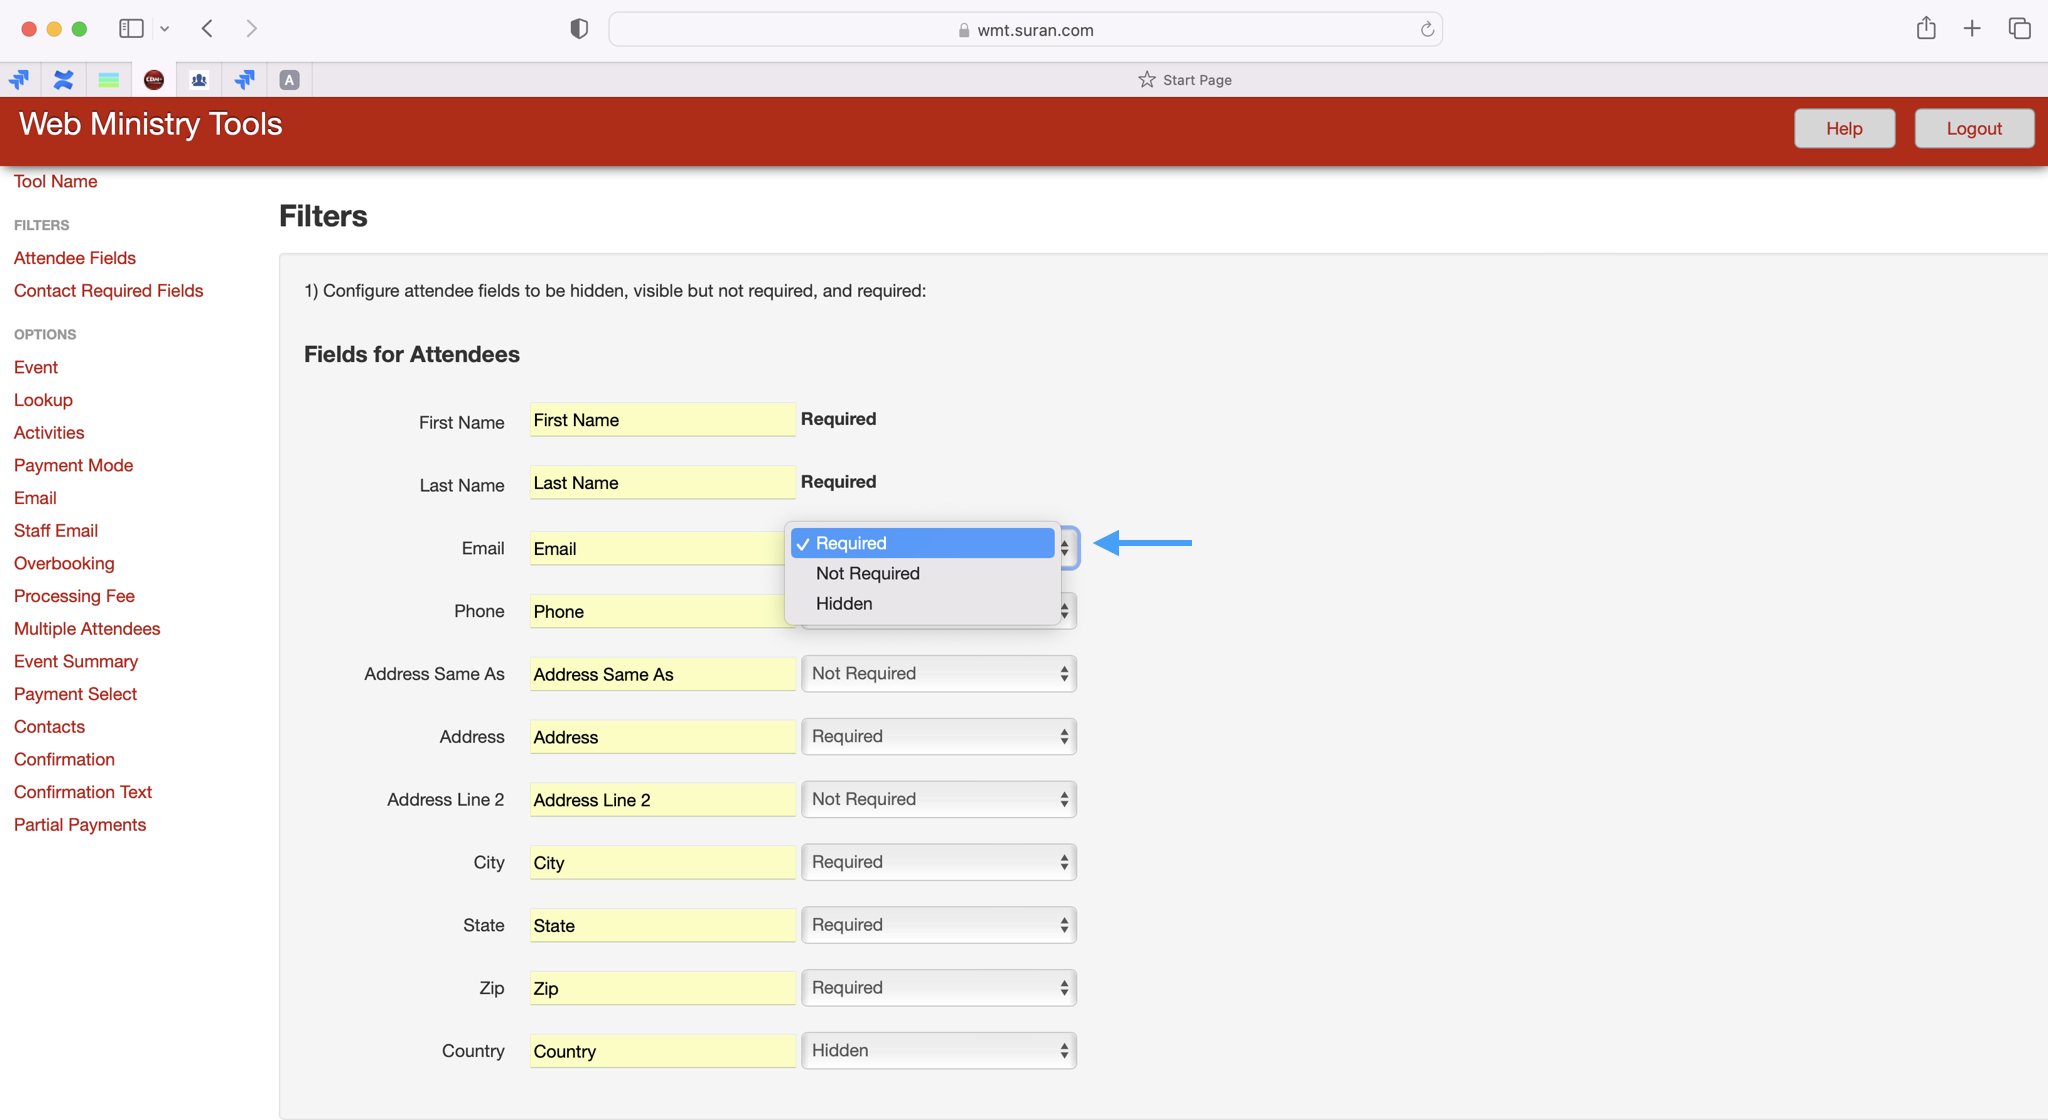
On the next page, you will be able to customize your event tool to get the information that you need from your registrants. Under the Filters section, you can first decide what information you want to gather from each registrant. First and Last name are automatically required but you can use the drop-list boxes to select which other fields you want to be required, not required, or hidden.
-
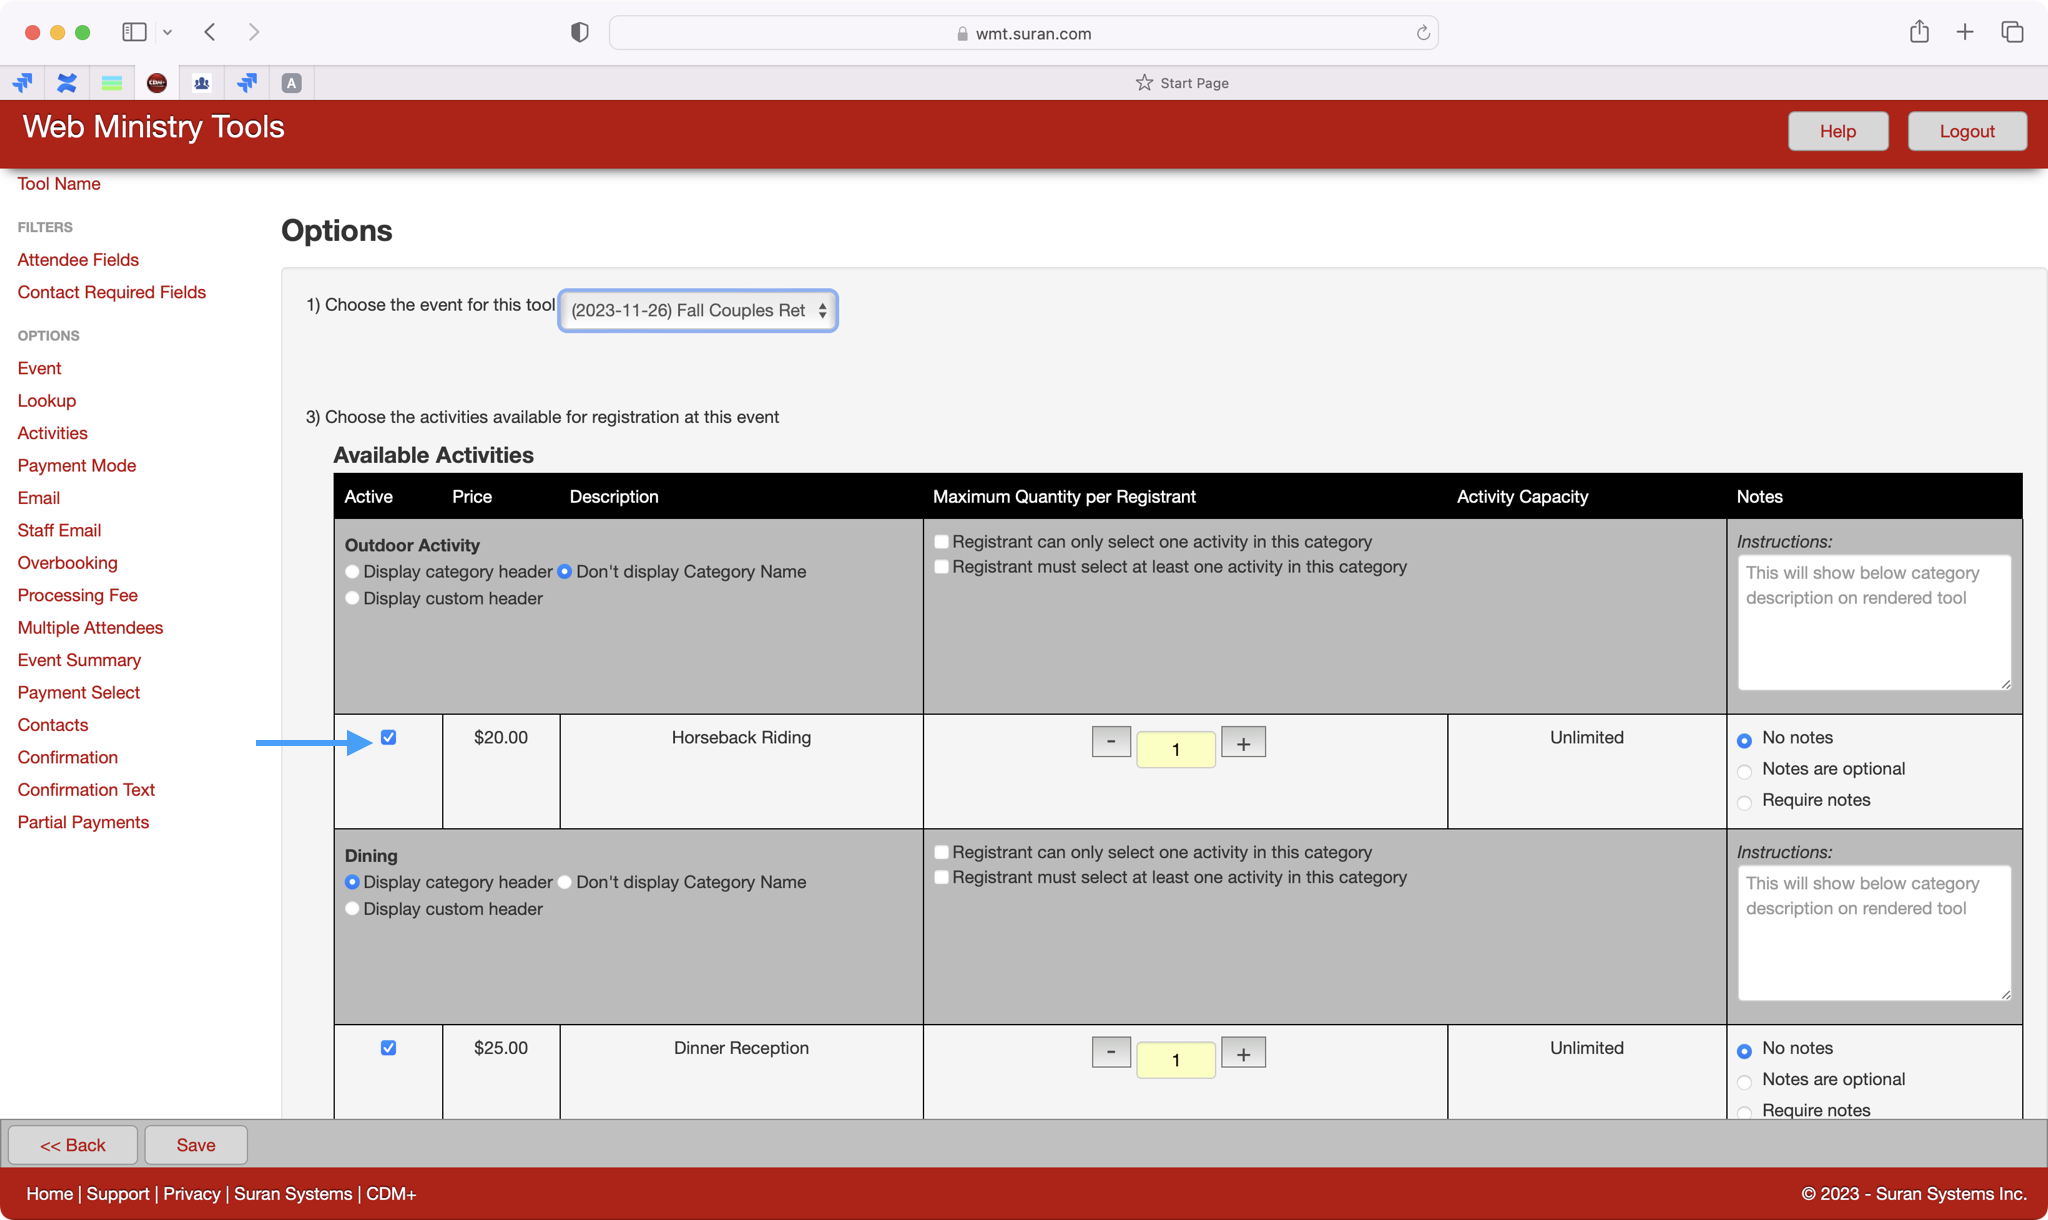
Next, you'll scroll down to the Options section. For step one in this section, you will tie this tool to the Event record in CDM+. Use the drop-list box to select your event.

-
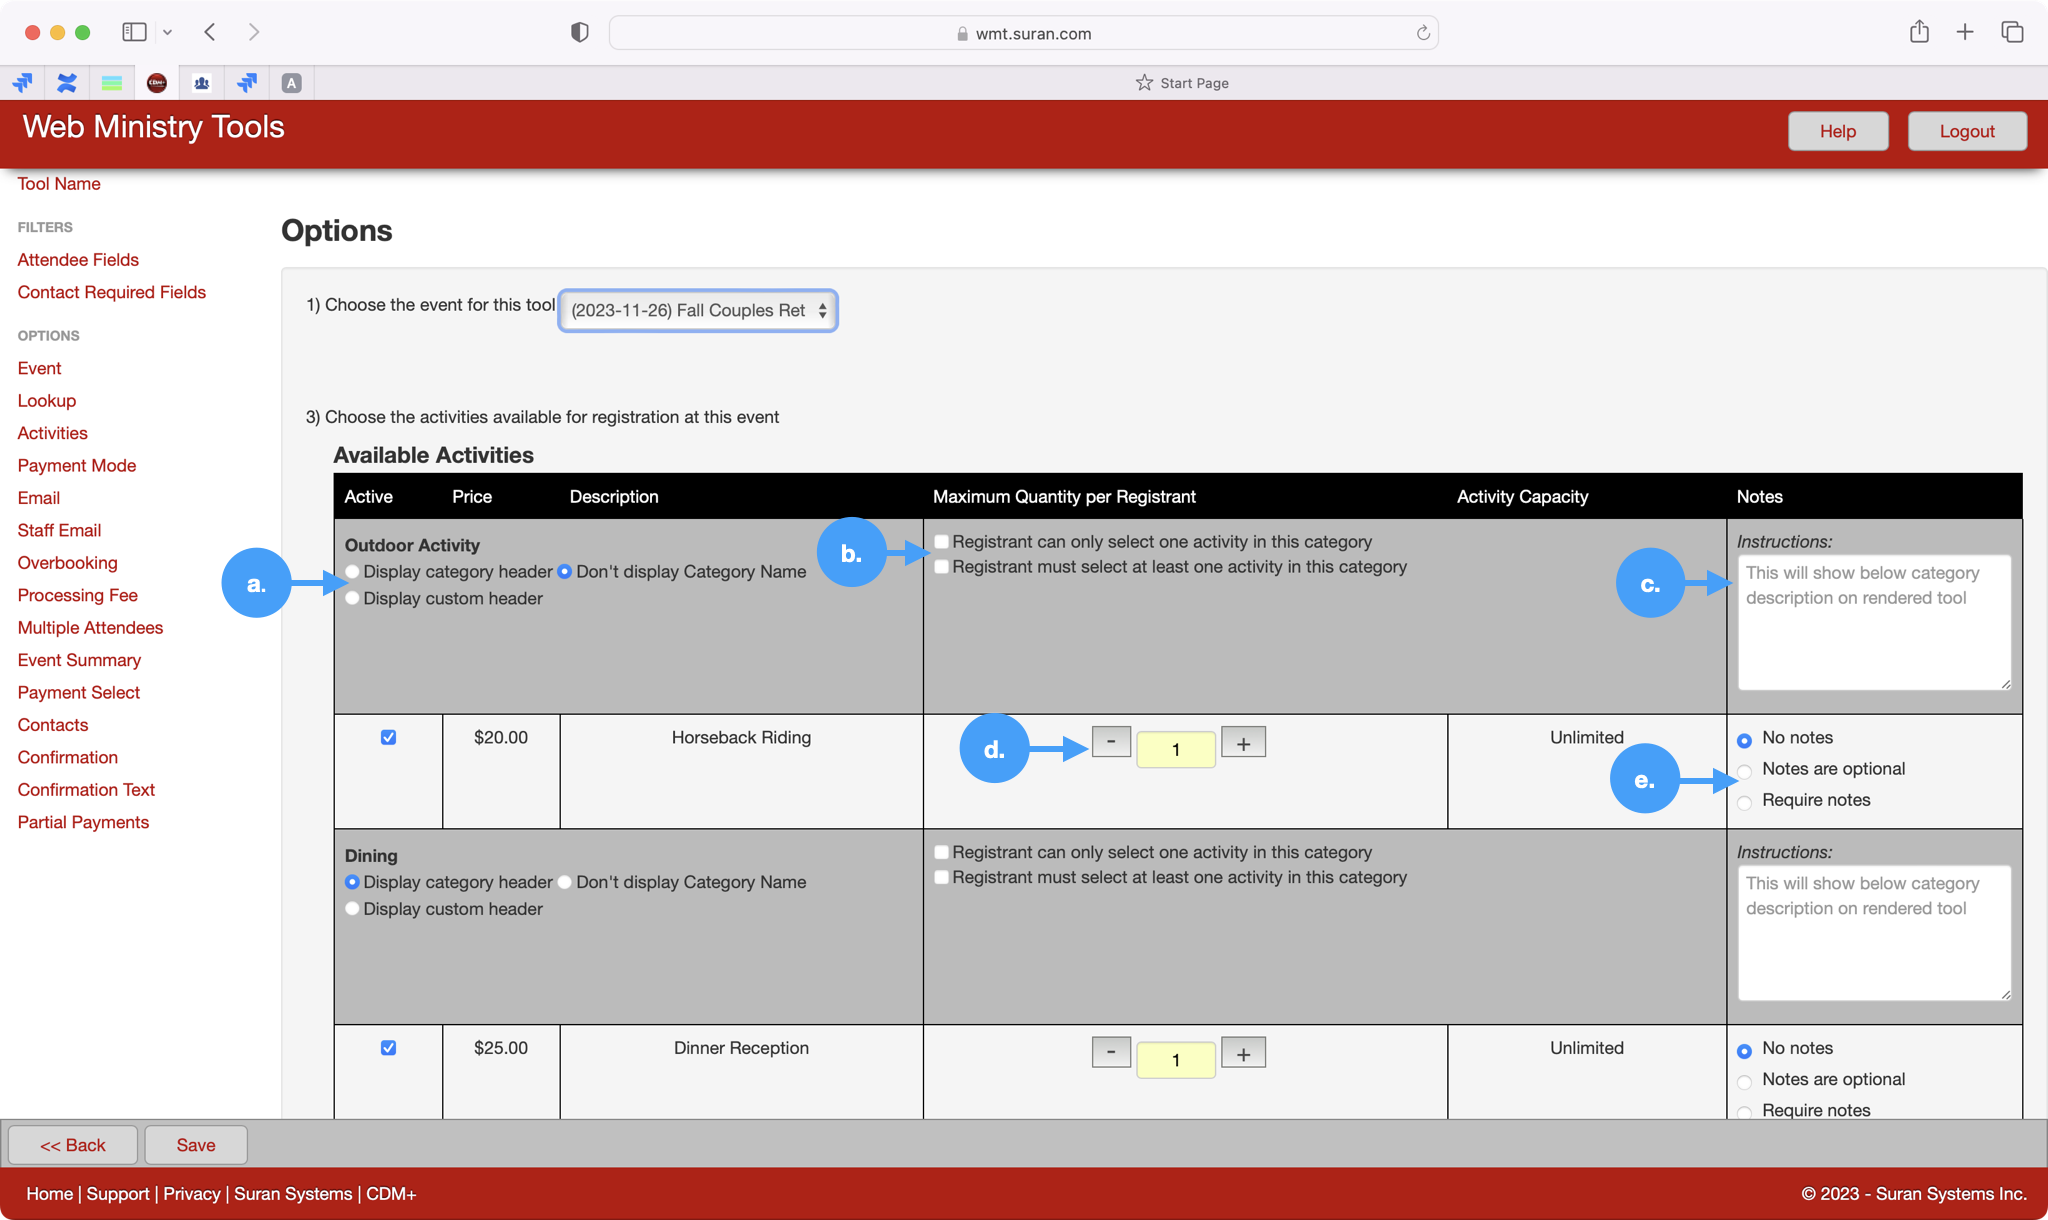
After you select your Event record, you will see the Activities populate that you created for this event. You have many options for how you want your Activities to be displayed. First, if you want an activity to be visible as an option for your registrants, make sure the box to the left of the activity is checked. You can check or uncheck this box at any time depending on your need. For example, you may want an activity visible at first but then if the activity gets full or you had an early bird special you no longer want displayed, you can uncheck this box so that option is no longer visible.
-
Some other options you can decide for your activities include:
-
If you want to display the category header.
-
If a registrant can only choose one activity per category and/or if they must choose an activity before continuing with their registration.
-
You can add helpful instructions for each activity category.
-
If there is a quantity limit a registrant can select when adding an activity to their ticket.
-
If you will require notes for that particular activity that a registrant must enter before continuing. This comes in handy if you have used an activity to ask a custom question and need to know their response.
-
-
Keep scrolling and you'll see an option to rename the verbiage, "Activity" to something else if desired.

-
Next, if you want to accept payment via electronic payment, put a check in this box on Step 4. You'll have the option to select which forms or payment you wish to receive further down on this page.

-
On step 6, you'll have the opportunity to add emails for those you want to be notified every time someone registers for an event. You can add as many emails as you'd like separating them out with a comma.

-
Step 8, allows you to be able to add a processing fee amount for this transaction. Please note that this is a blanket amount that is added to the total. For example, if you add a processing fee of $5.00, whether someone is registering one person or ten people at at time, they will still be charged just the one $5.00 additional processing fee.

-
Step 9, allows you to choose if you want a person to be able to register multiple registrants in a single registration. Step 10 ask if you would like to Show or Hide the Event Summary Page.

-
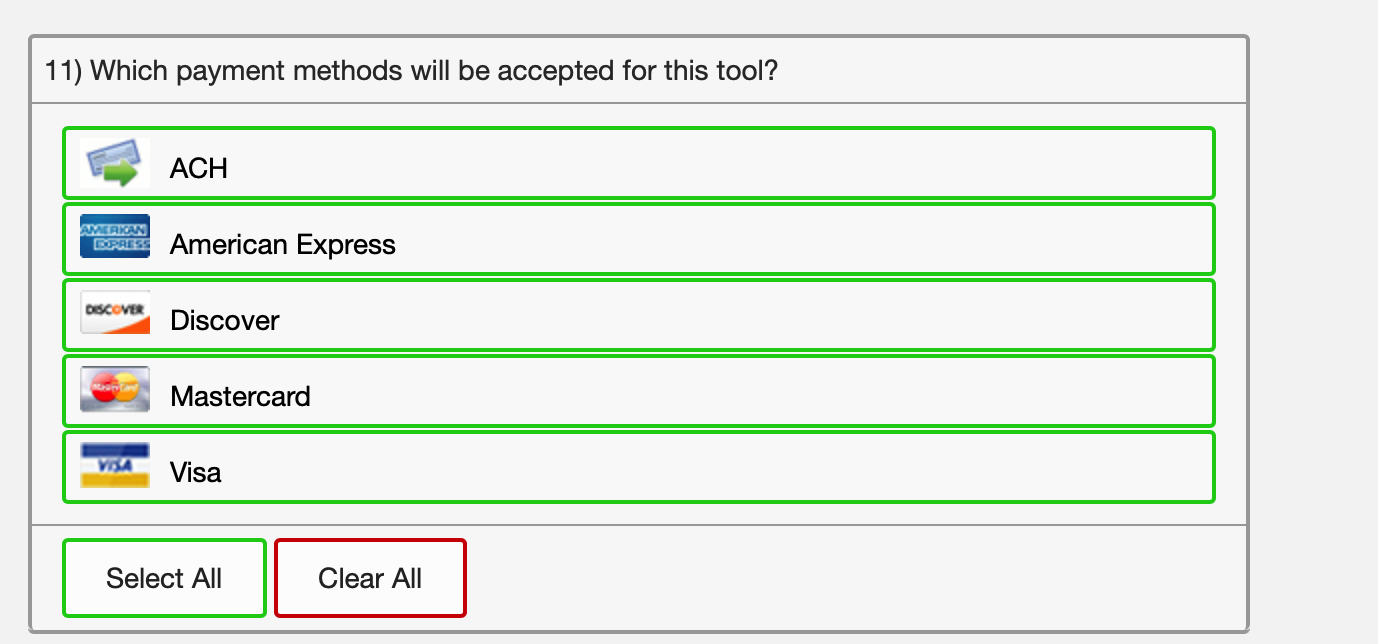
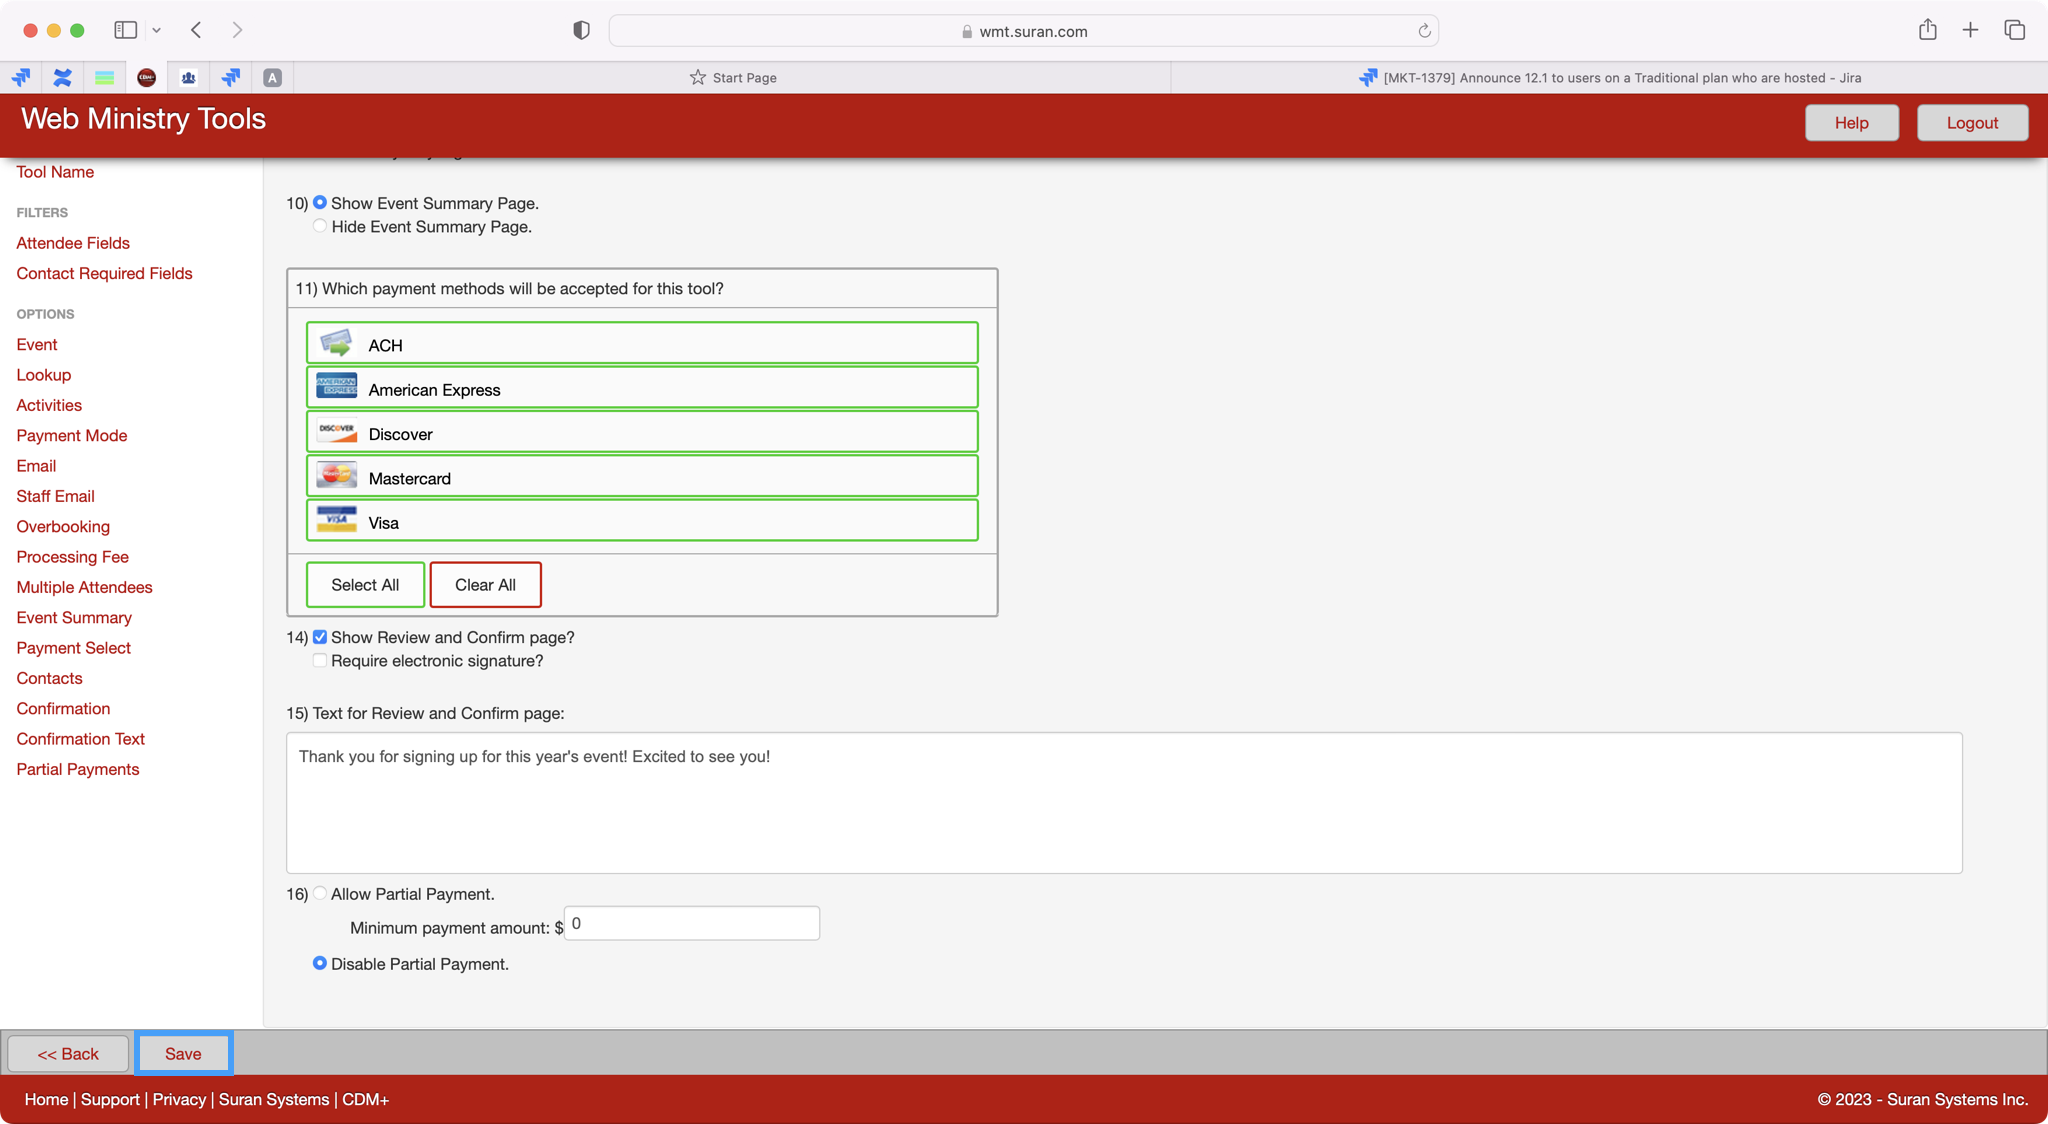
Step 11 allows you to decide what payment methods you want to accept.
-
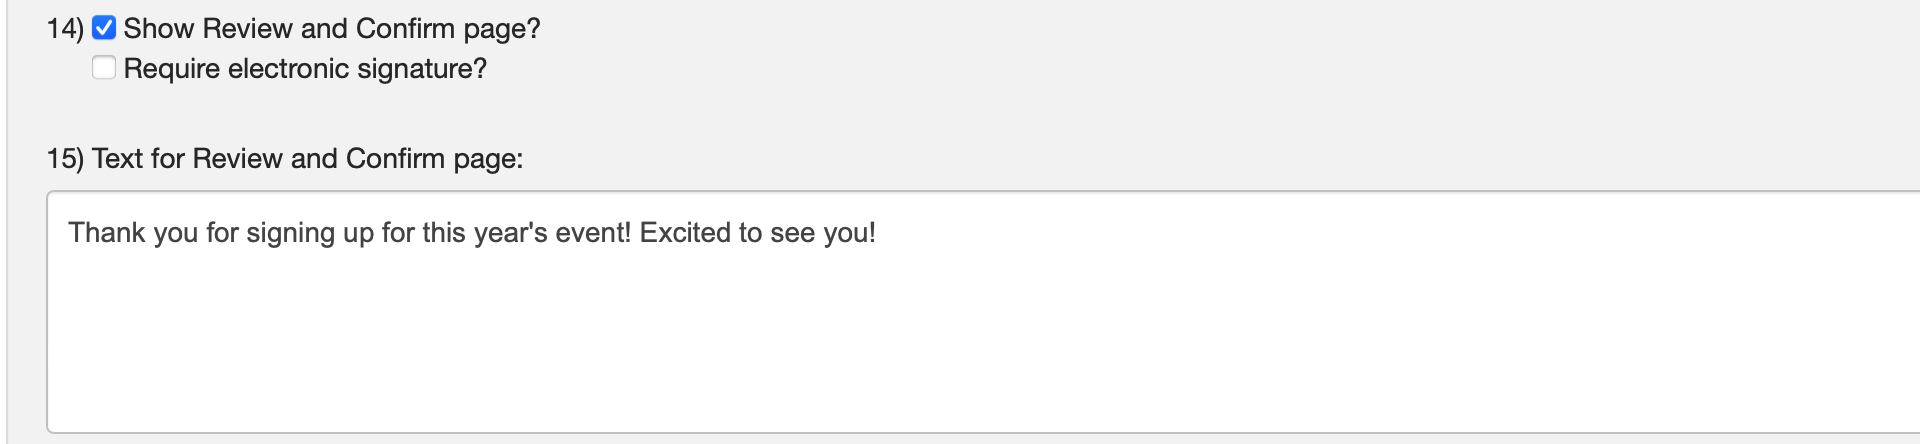
Step 14 allows you to decide if you want to show a Review and Confirm page and if you want to require an electronic signature. If you choose that you want to show a review and confirm page, you'll have the option on step 15 to add text that your registrants will see before submitting their registration. This is a great place to give any last minute instructions or simply say thank you to those who will be attending.
-
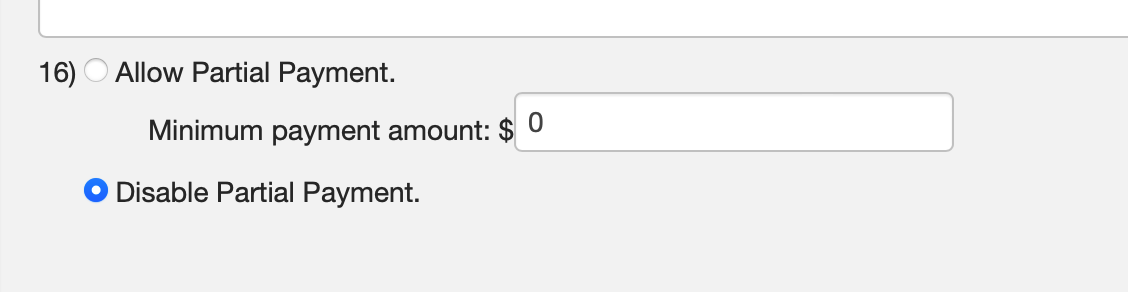
Lastly, you can decide if you want to allow for partial payments.
-
Once you have made all of your selections, you can Save your changes at the bottom left-hand corner of the page.
-
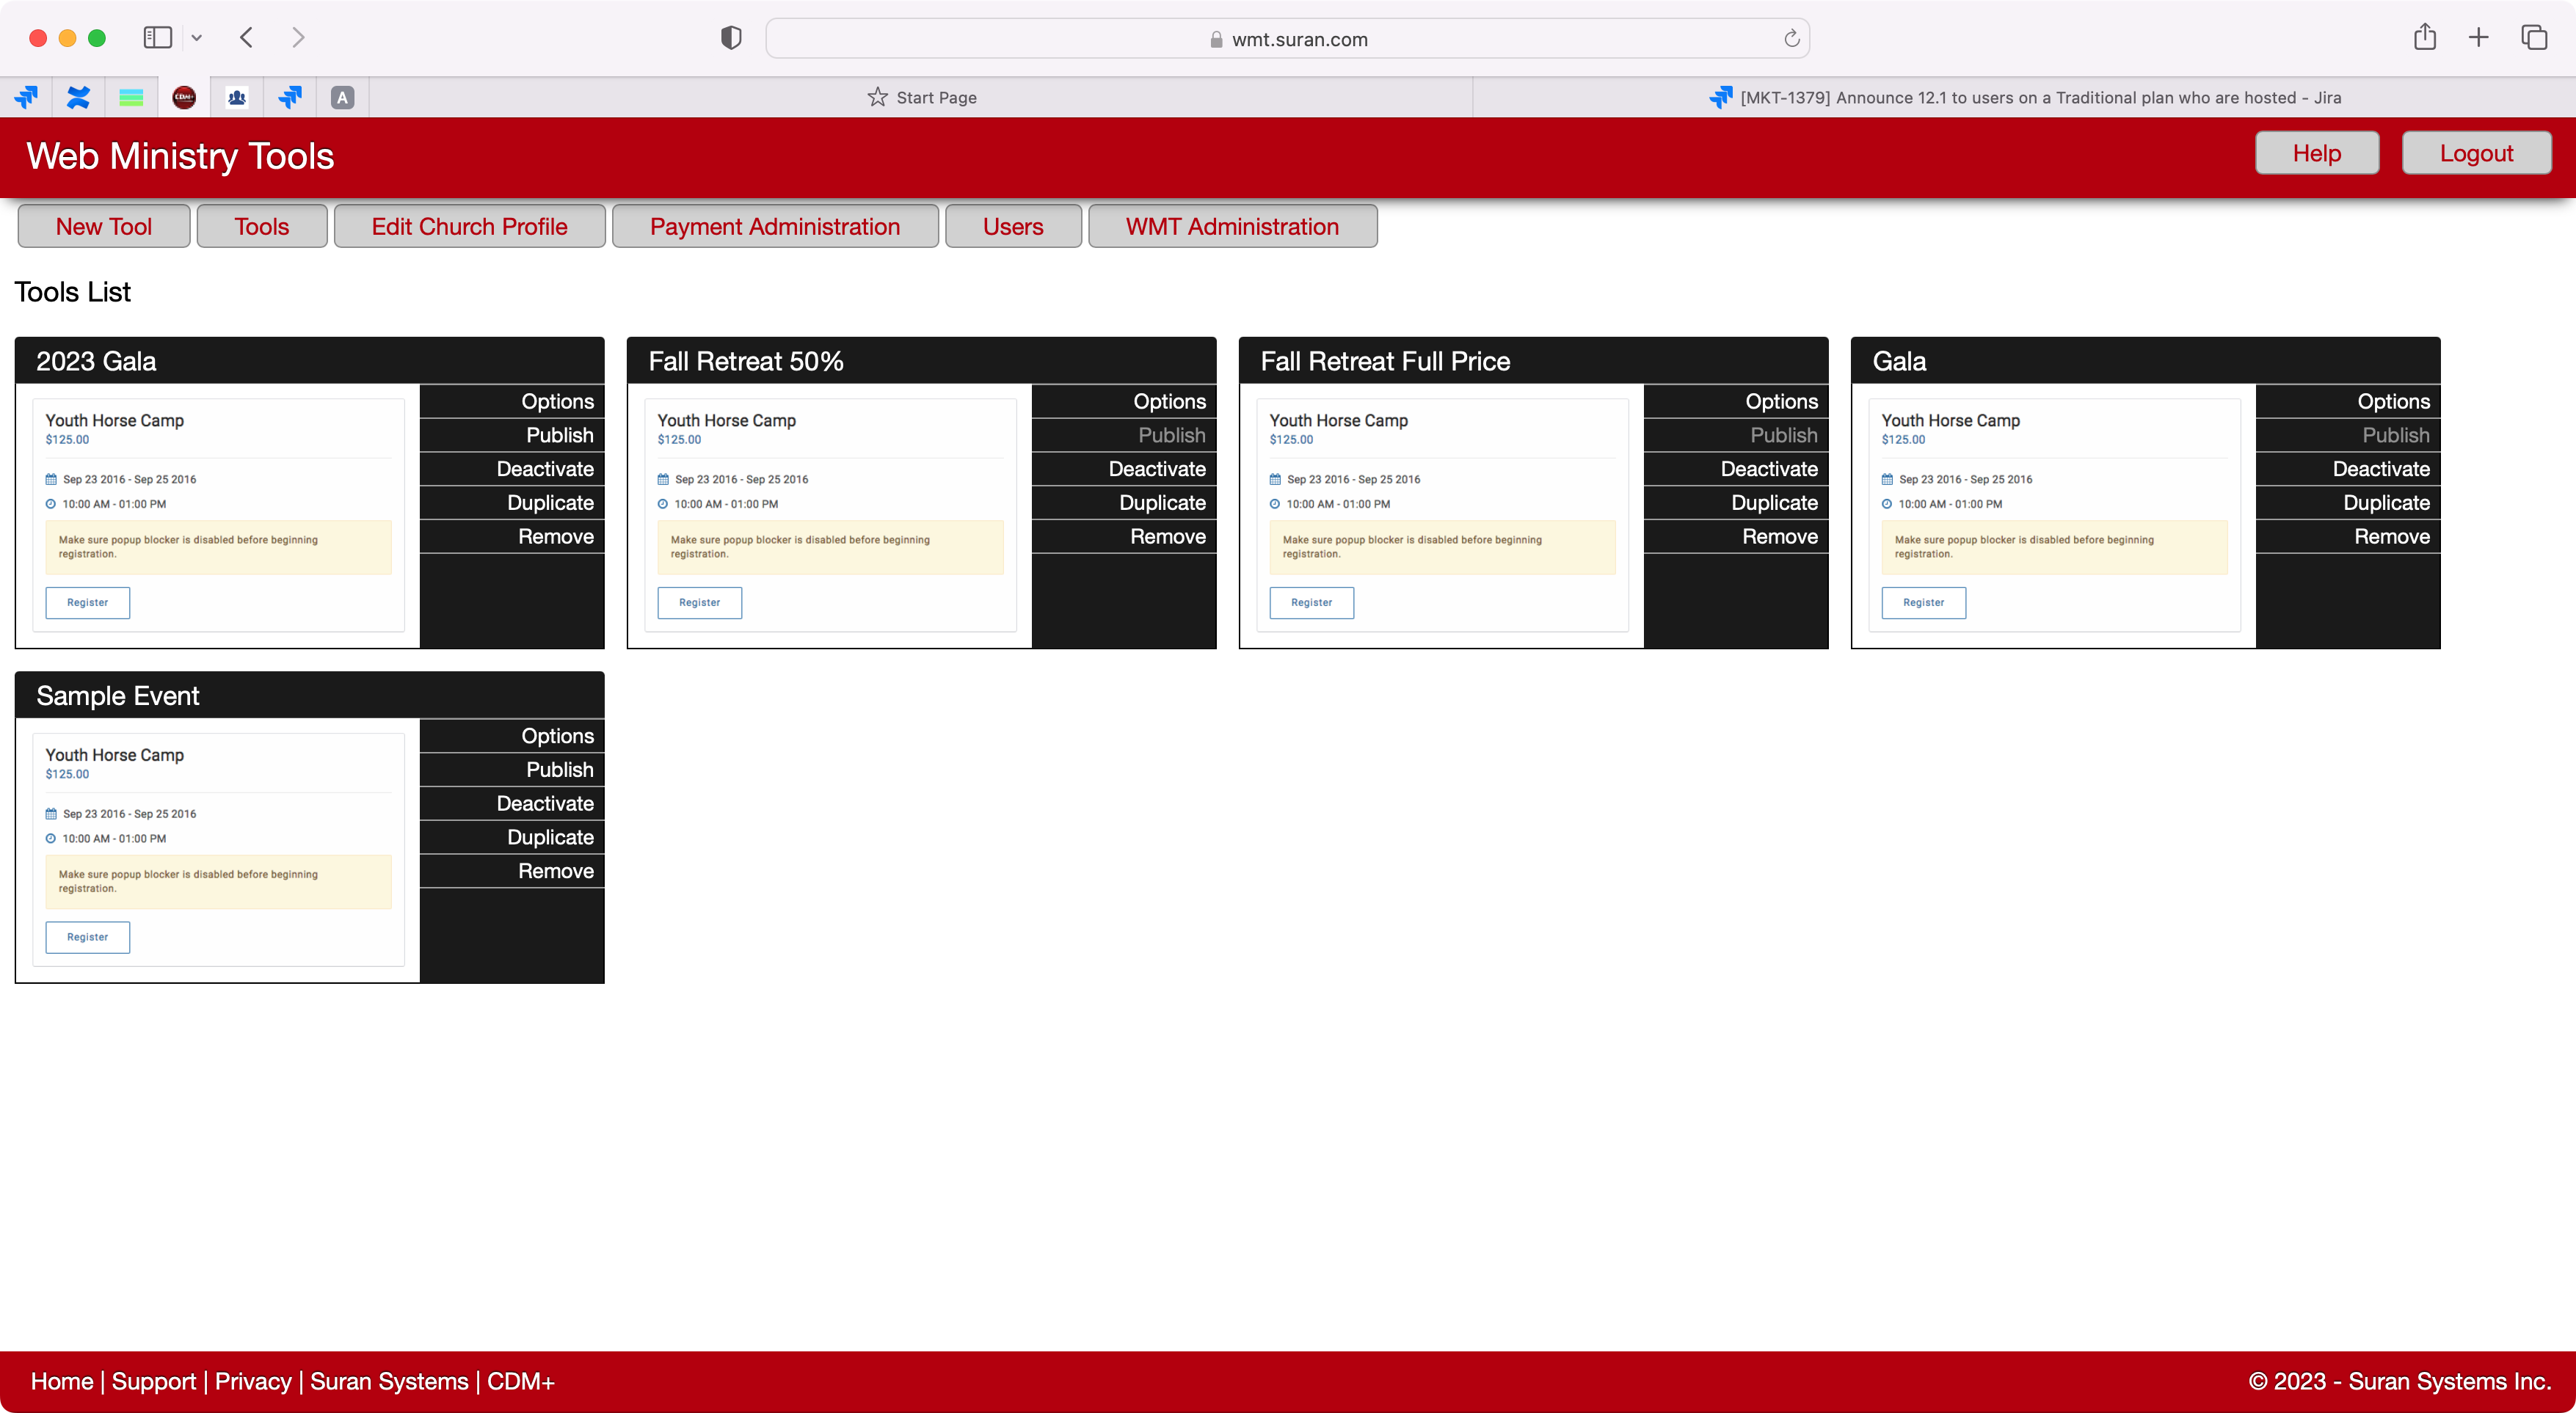
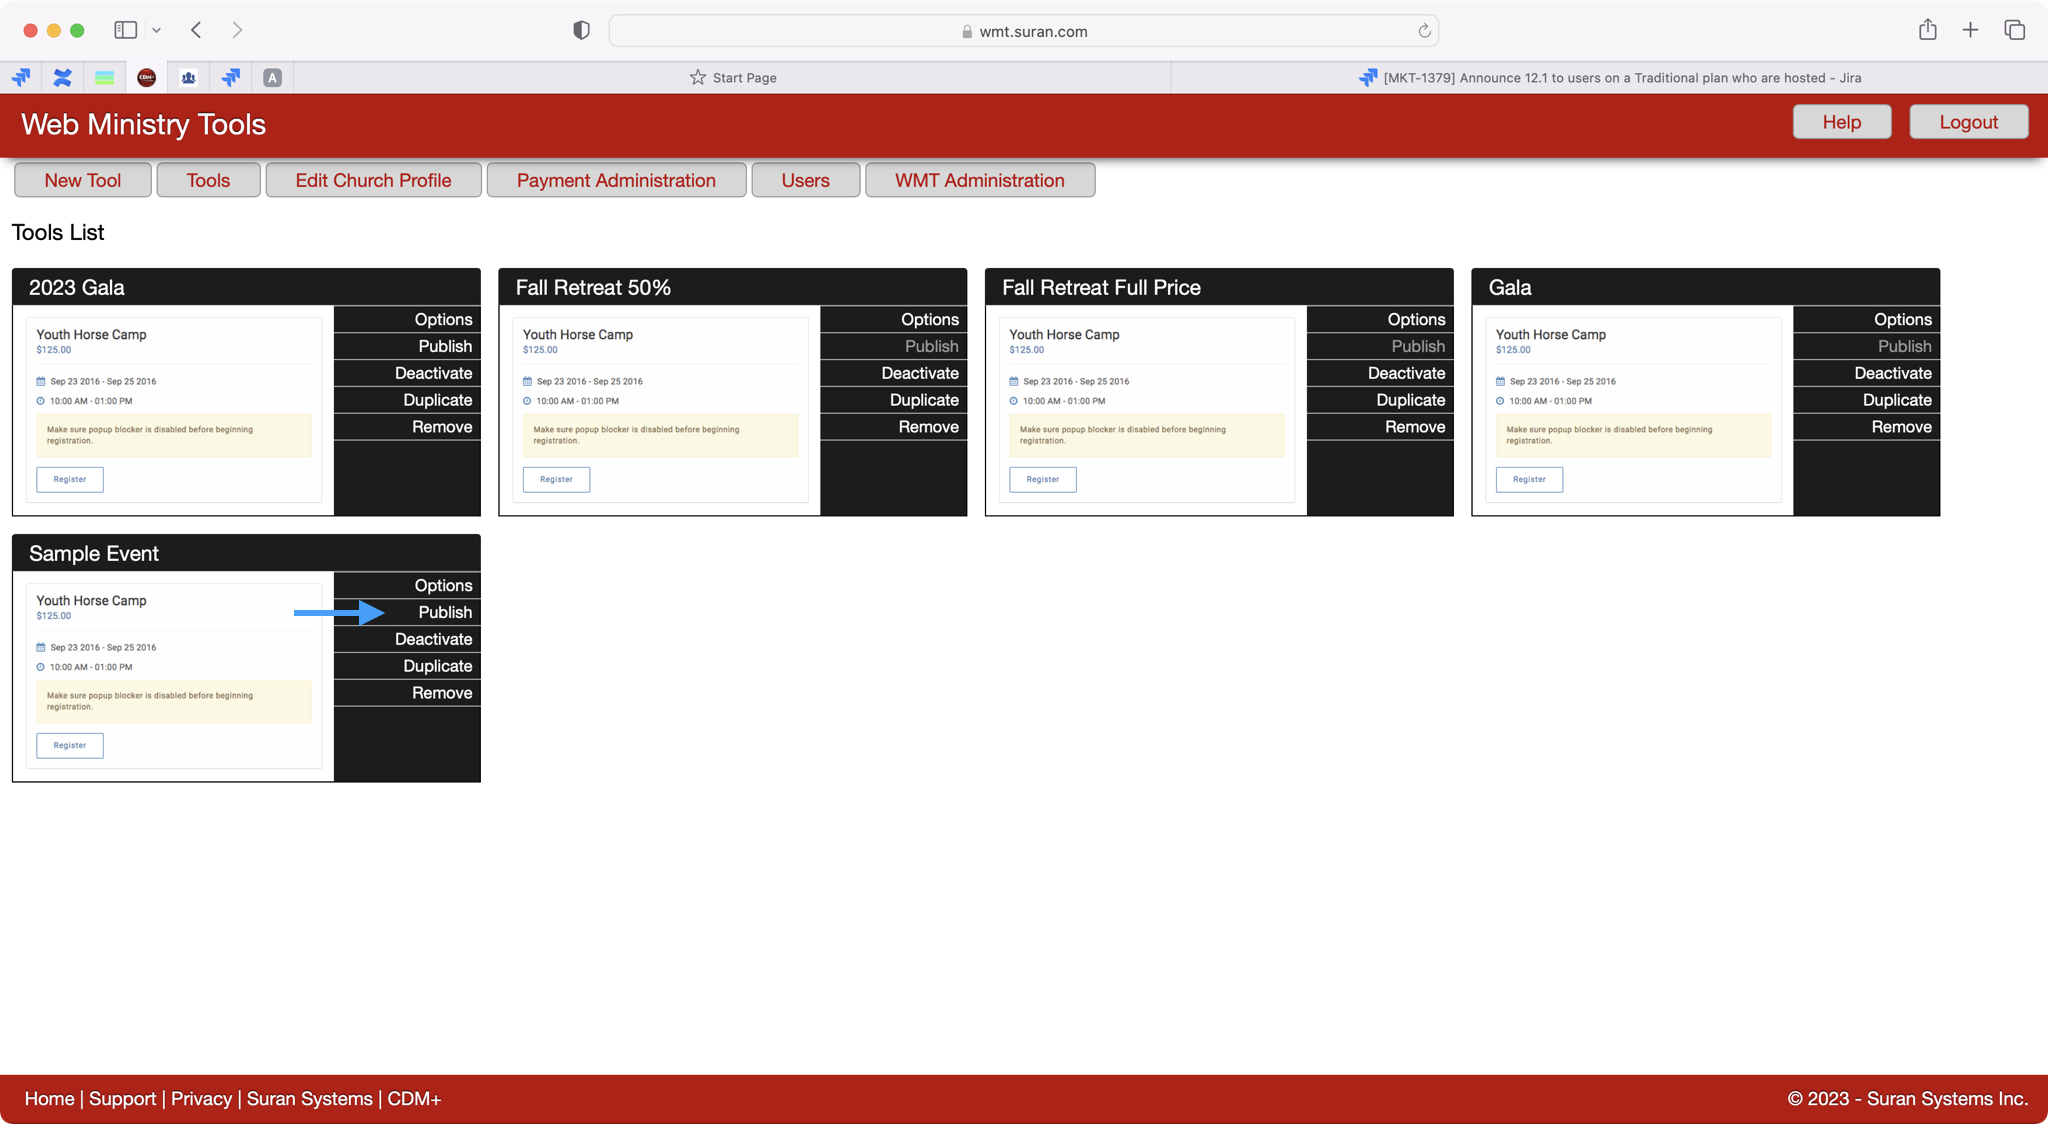
You'll then see your event tool listed on the Tool page. To get to your registration links, click on Publish.
-
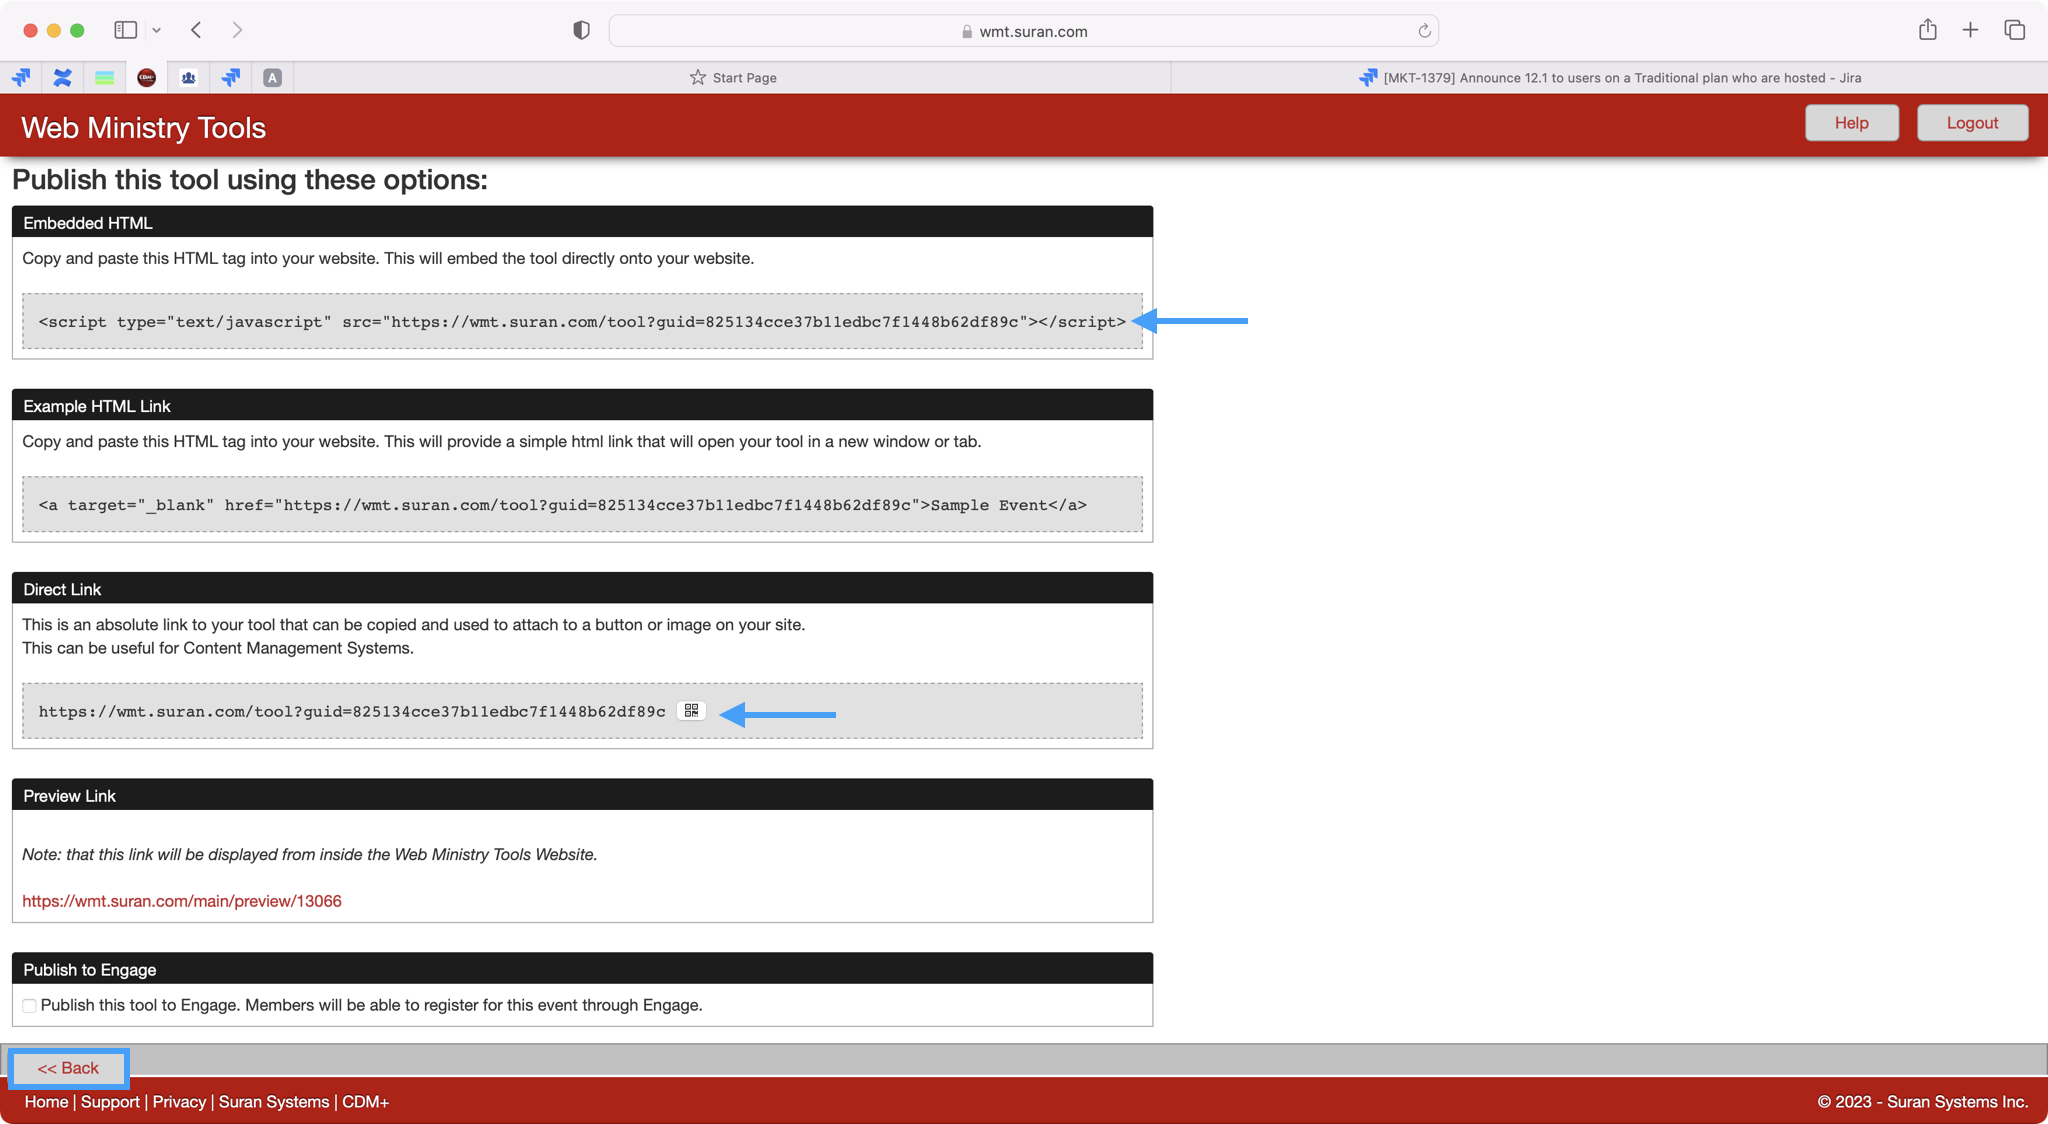
On the next page, you'll see where you can copy your embed script if you want to embed the registration page on your website, the direct link, and/or QR code that you can download for your event. When you have all the links that you need, you can click on Back on the bottom left-hand side to get back to the main page.
-
If you need to make any change to your event's option, click click on Options on your event's tool.