Whether you want to create a specific link for your giving page on your website or you want to highlight a specific fund for a special event, you can create different Giving Sets, to manage the giving links your donors interact with.
-
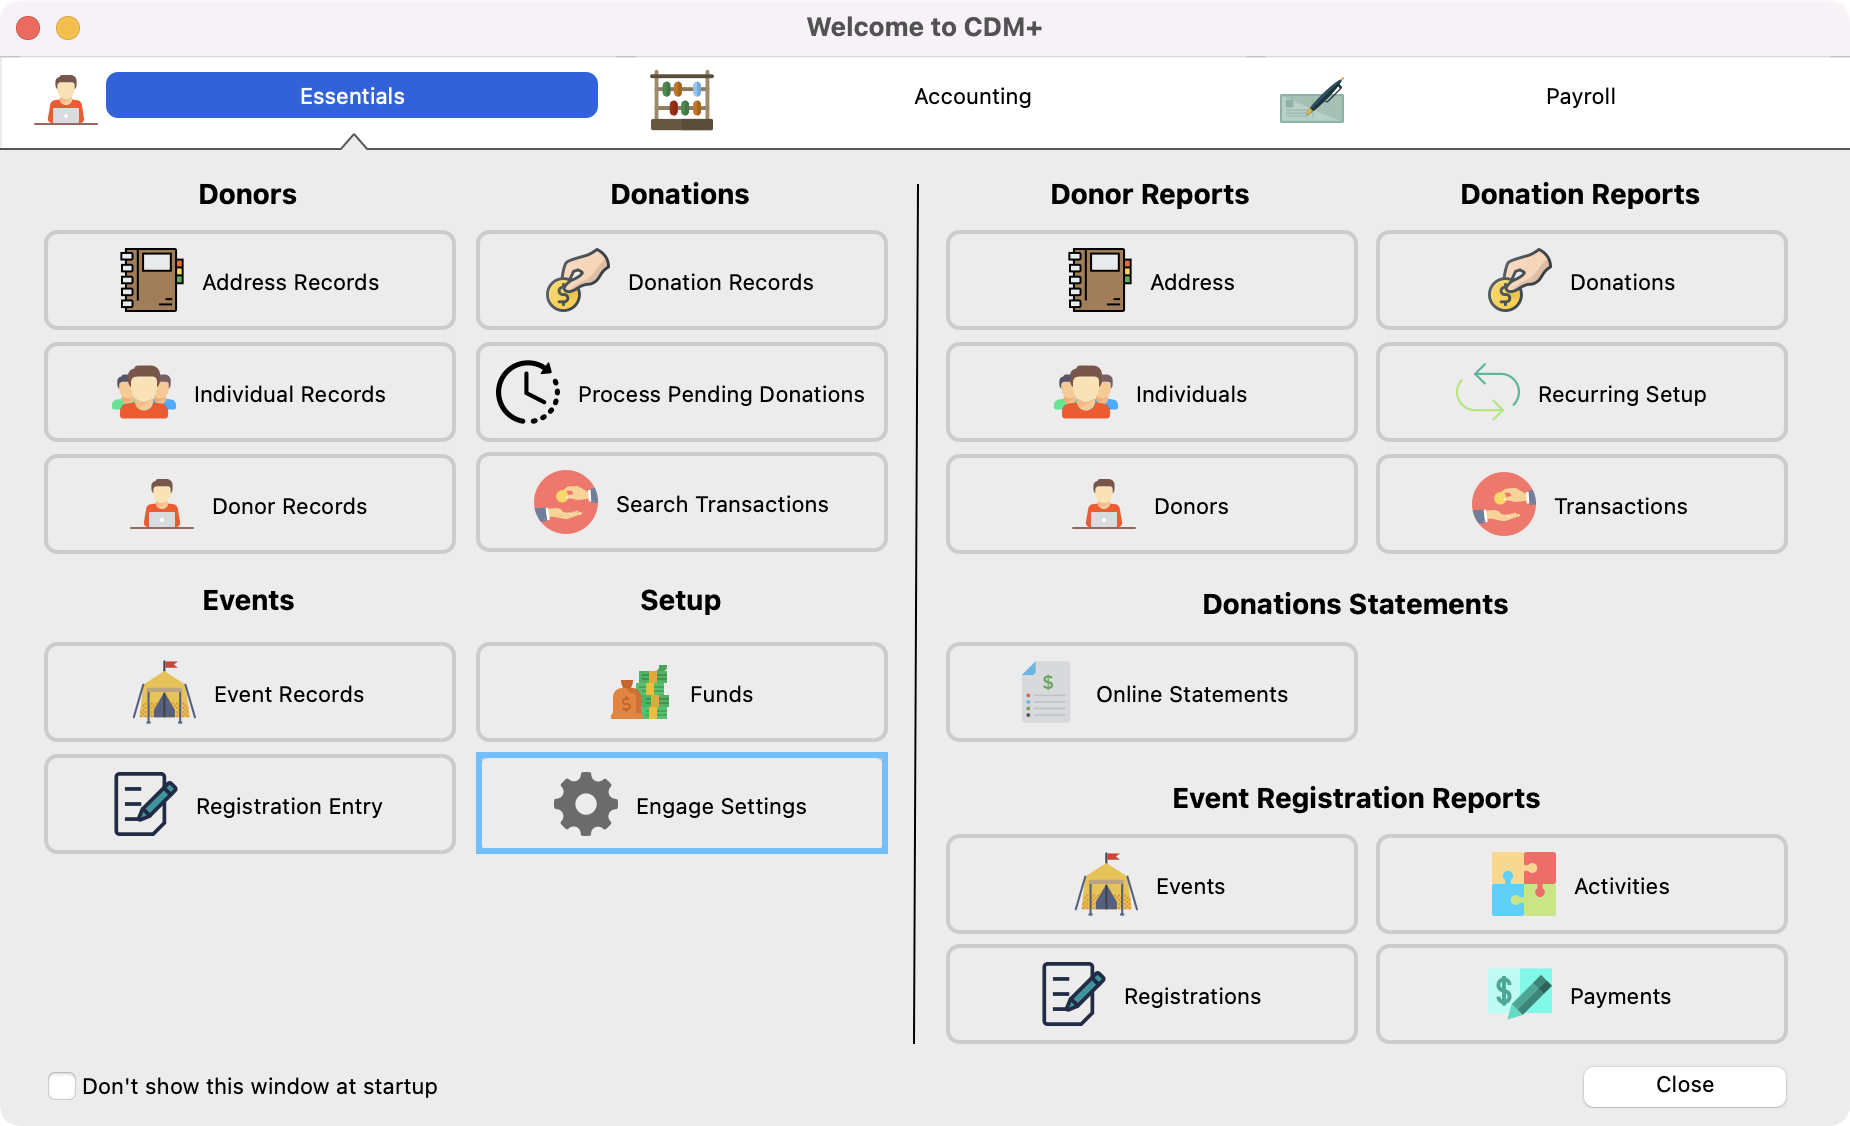
To create a giving set, from the Welcome to CDM+ window click Engage Settings.
-
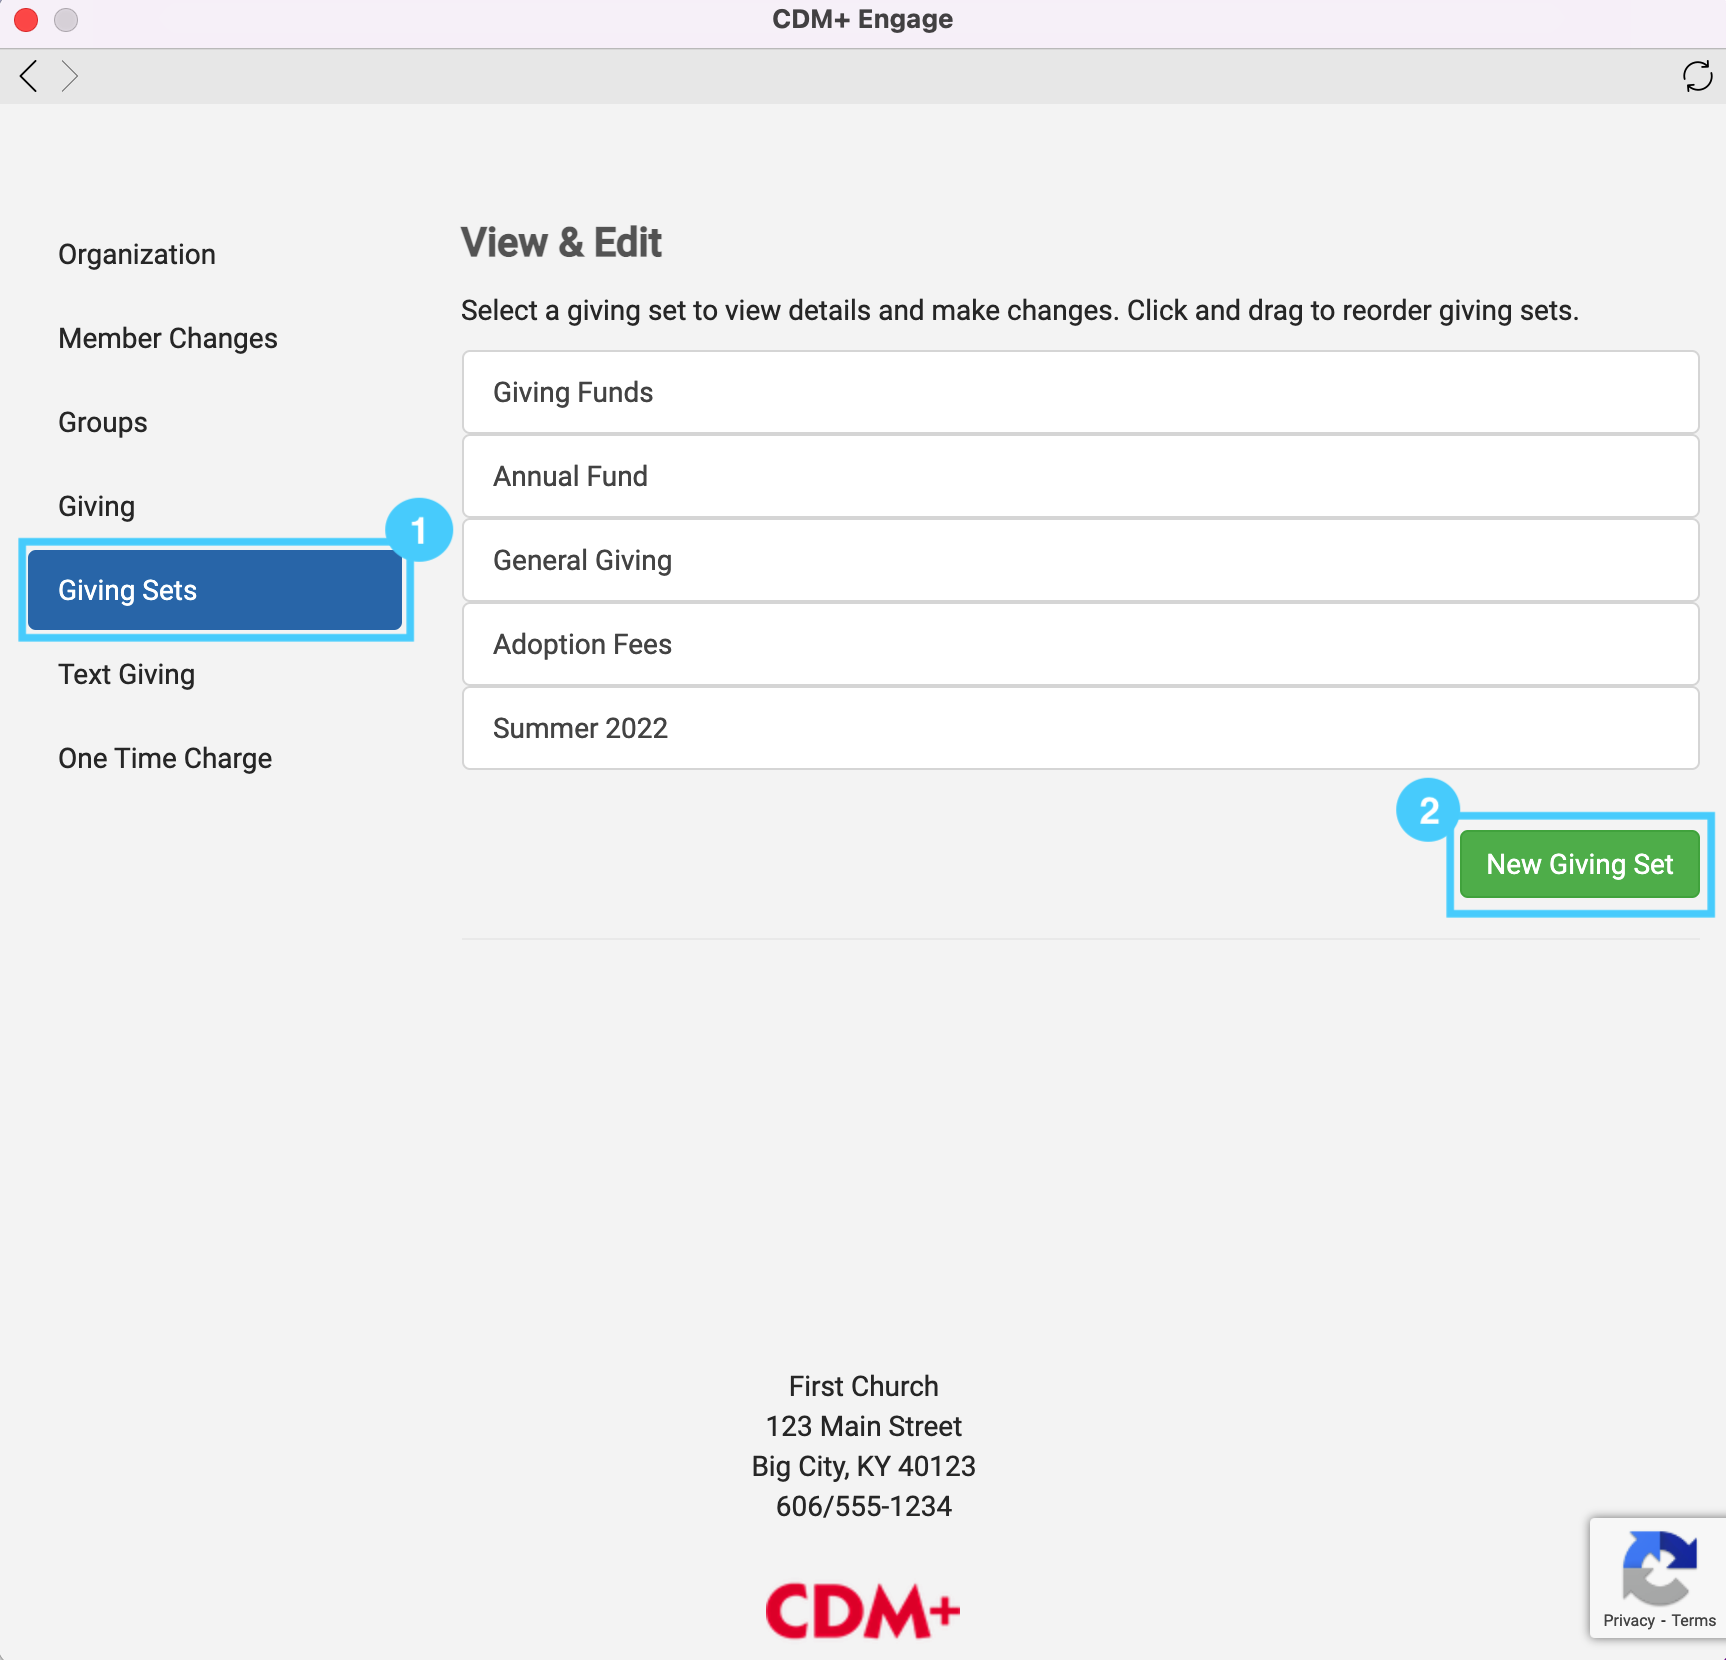
Next, click Giving Sets from the left-hand side menu and then click New Giving Set.
-
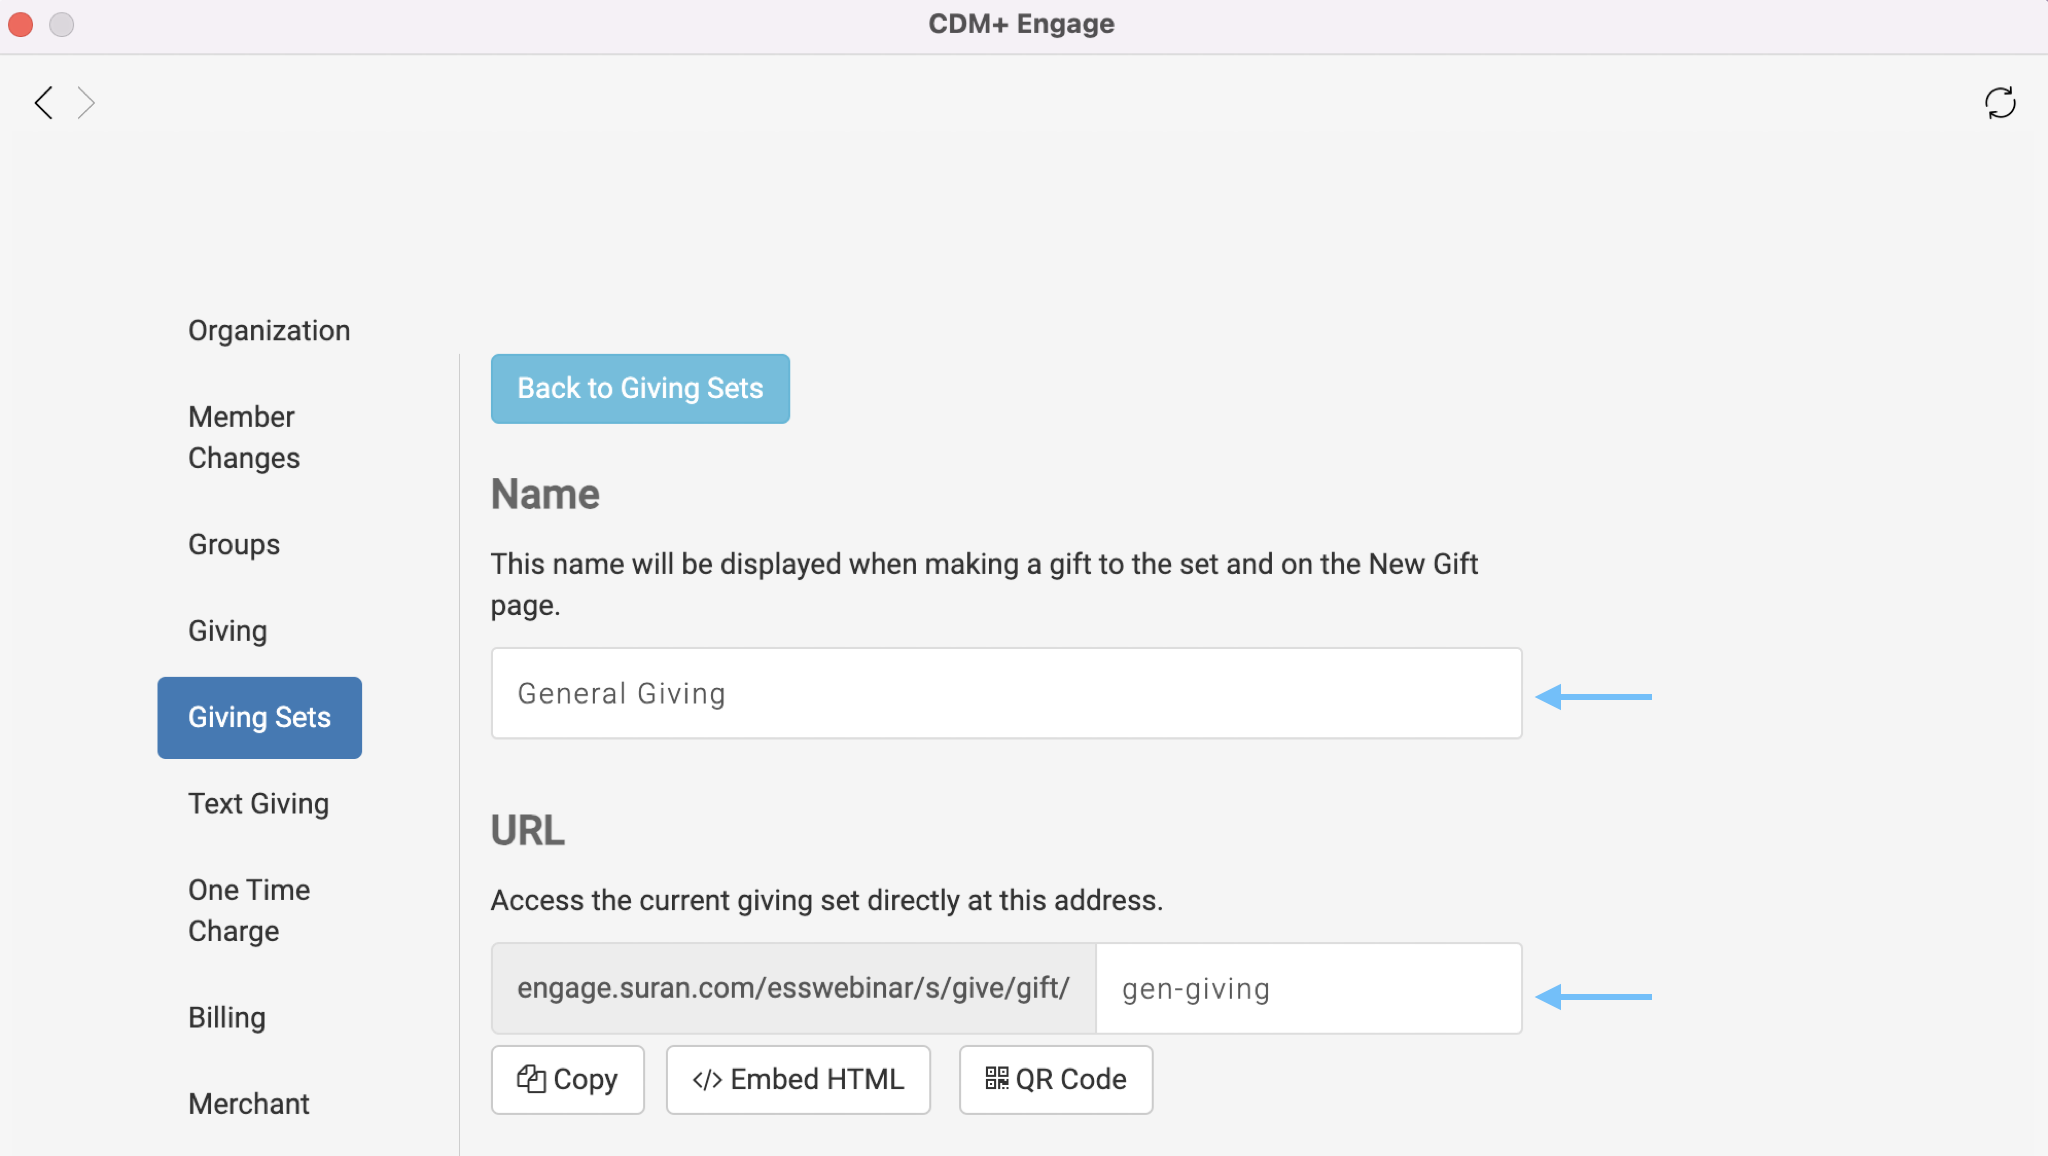
On the next page, you can name your giving set (which will be visible to your donors) and customize your URL.
NOTE: Existing bookmarks and links will break if you change the URL. If you have already published your
Engage URL be prepared to communicate the new URL to anyone who might have your previous URL saved.
-
On the same page, scroll down to where you see Funds. You can choose to add all the Funds in your Fund List by clicking on the Add All Funds button.

Or you can click the drop-down arrow next to the Add Fund field to add only the funds that you wish to appear on your link.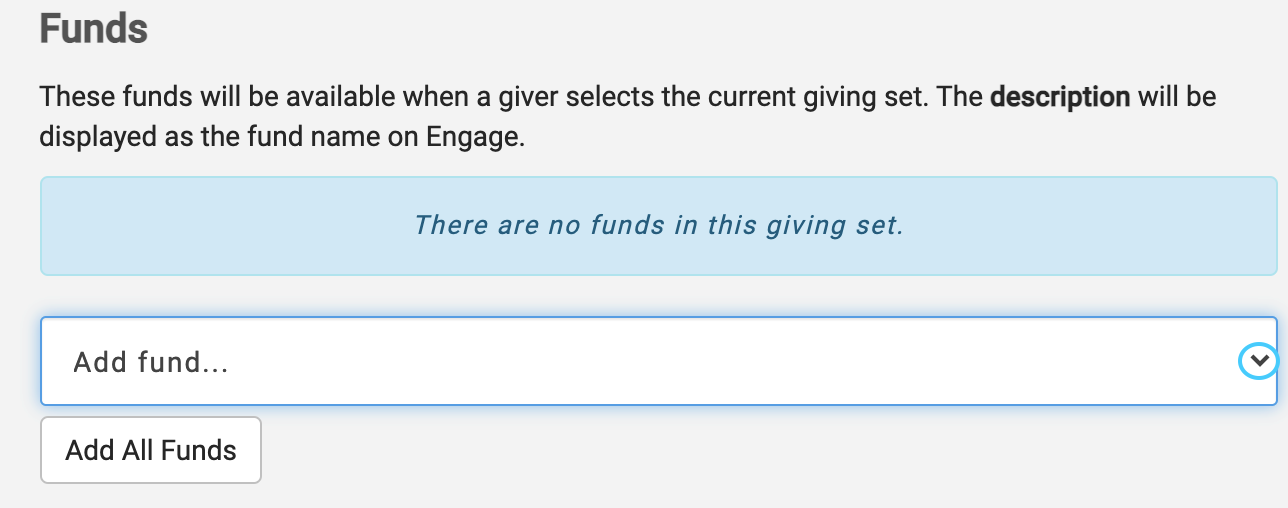
Then, just click the fund you want to add.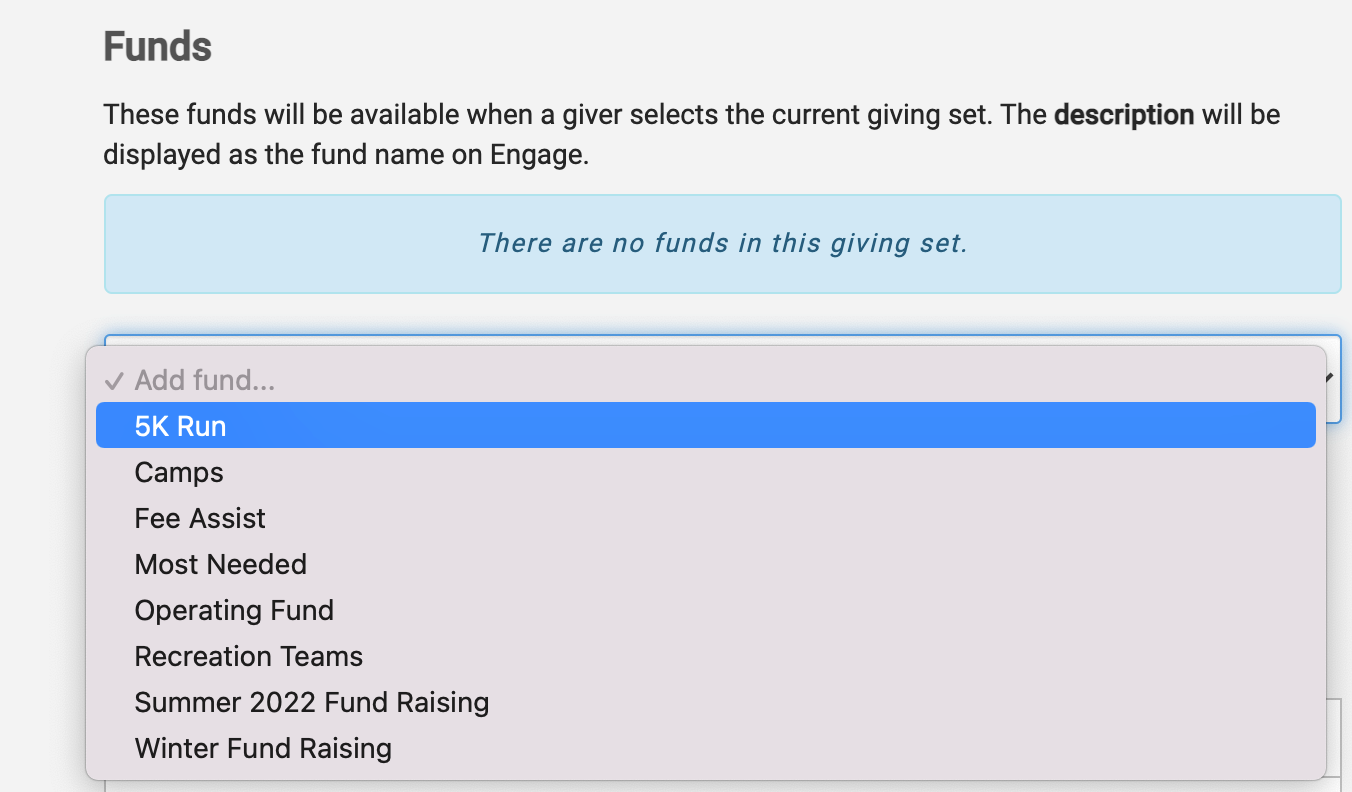
You will then see the fund added to your link.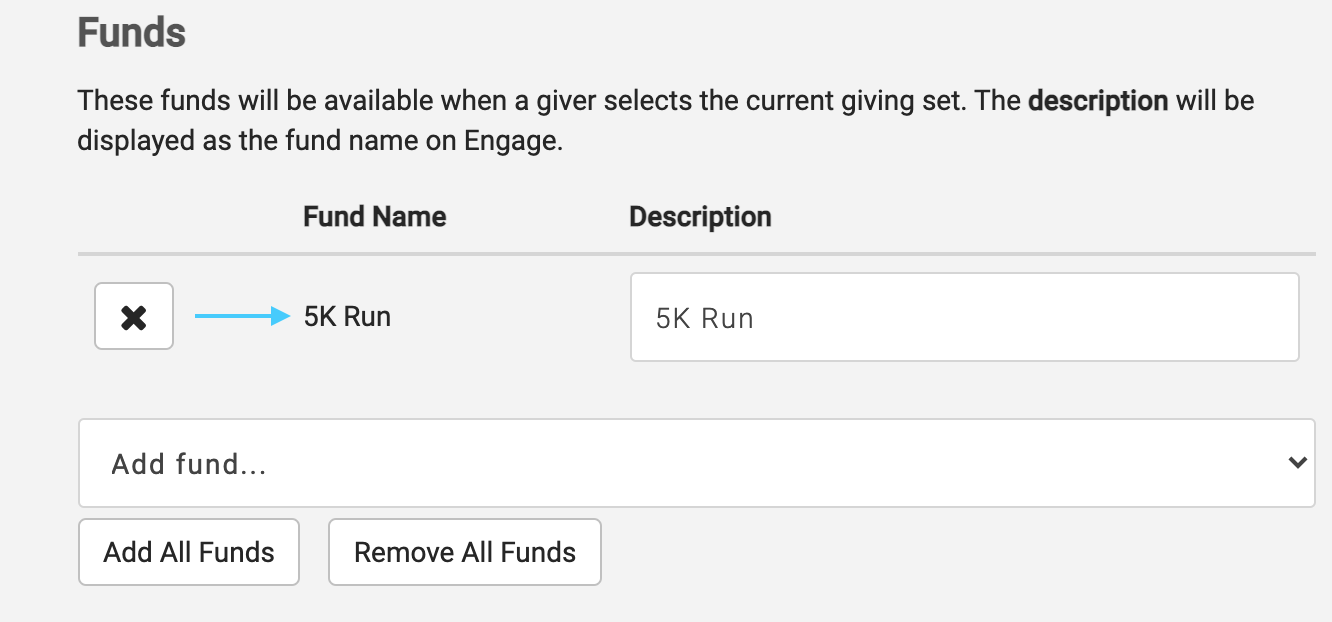
You can add as many funds as you wish to your link. The funds will appear in the same order that they are listed in your fund list. Click here to see how you can manage your fund list.
-
Next you can choose if you want to publish this set to the New Gift Page. The New Gift Page is a separate link that you can use which list all of the sets you’ve published to this page.

-
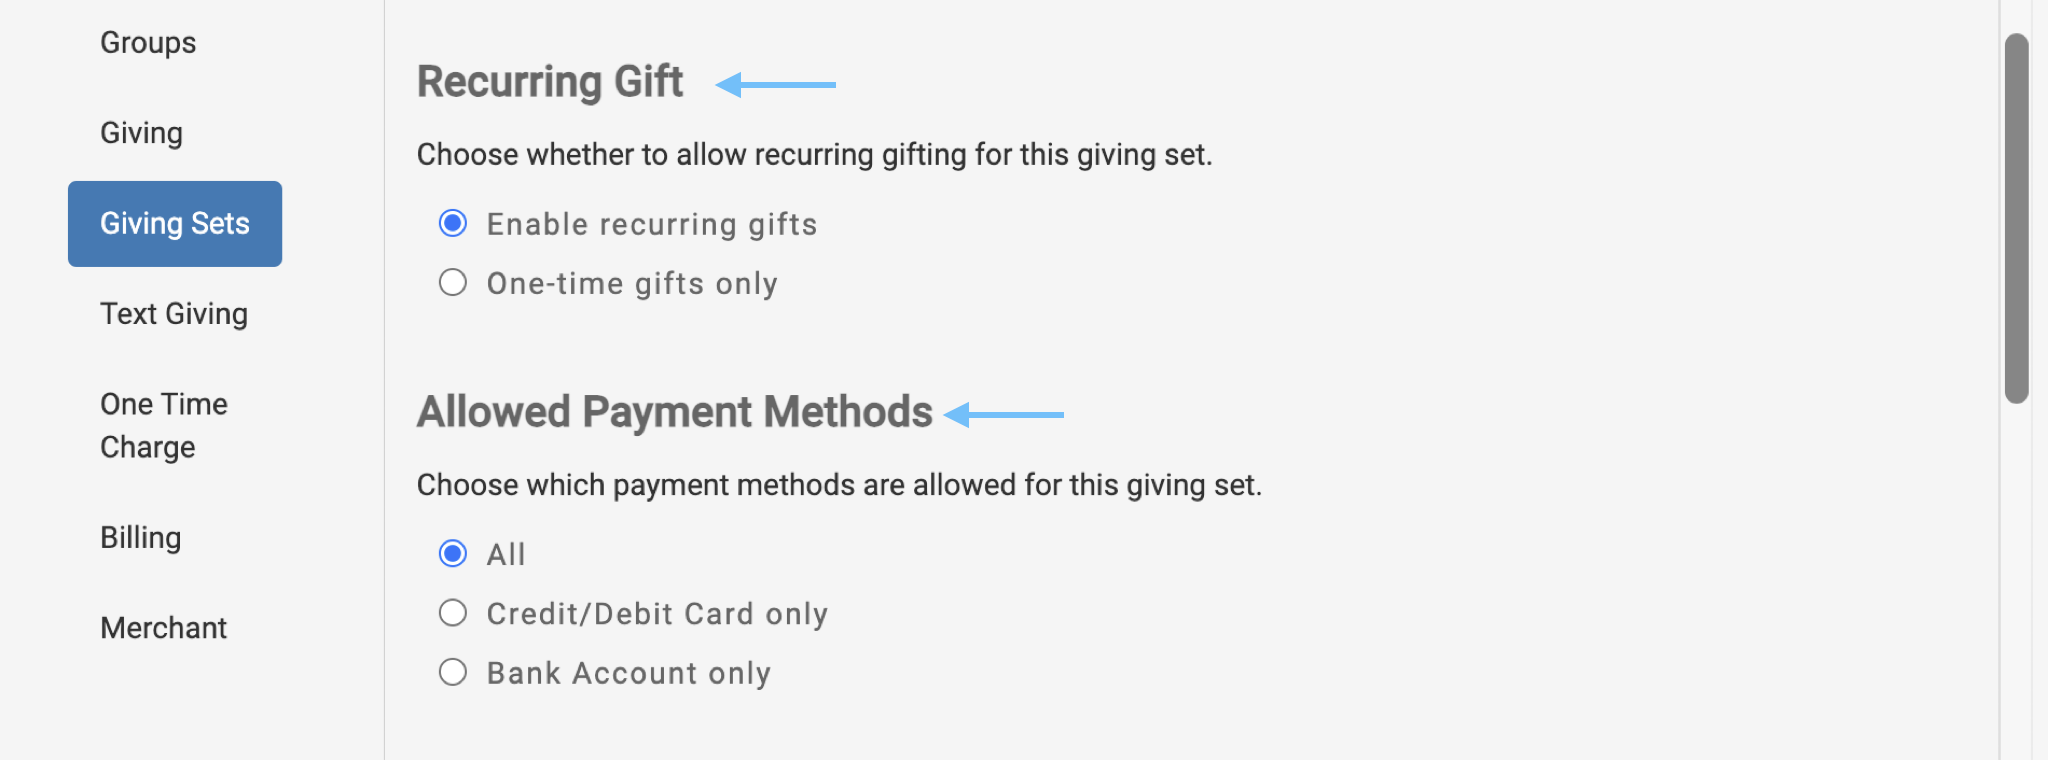
Scroll down a little further and you can choose if you want to allow recurring donations on this giving set or set it up to receive one-time gifts only. If you choose Enable recurring gifts, your donors will be able to choose either a recurring or one-time donation. You can also decide if you want to allow All payment method, Credit/Debit only, or Bank Account only.
-
Next, you can customize this giving set by adding a custom Banner Image. Click Upload and select a file you want to use.

-
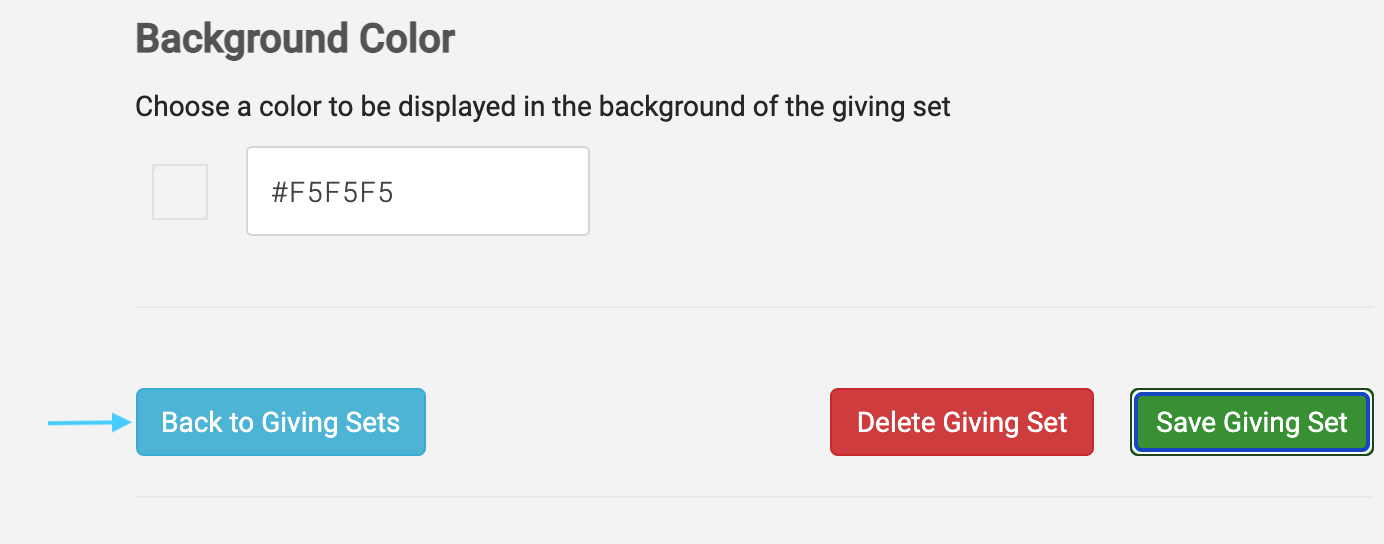
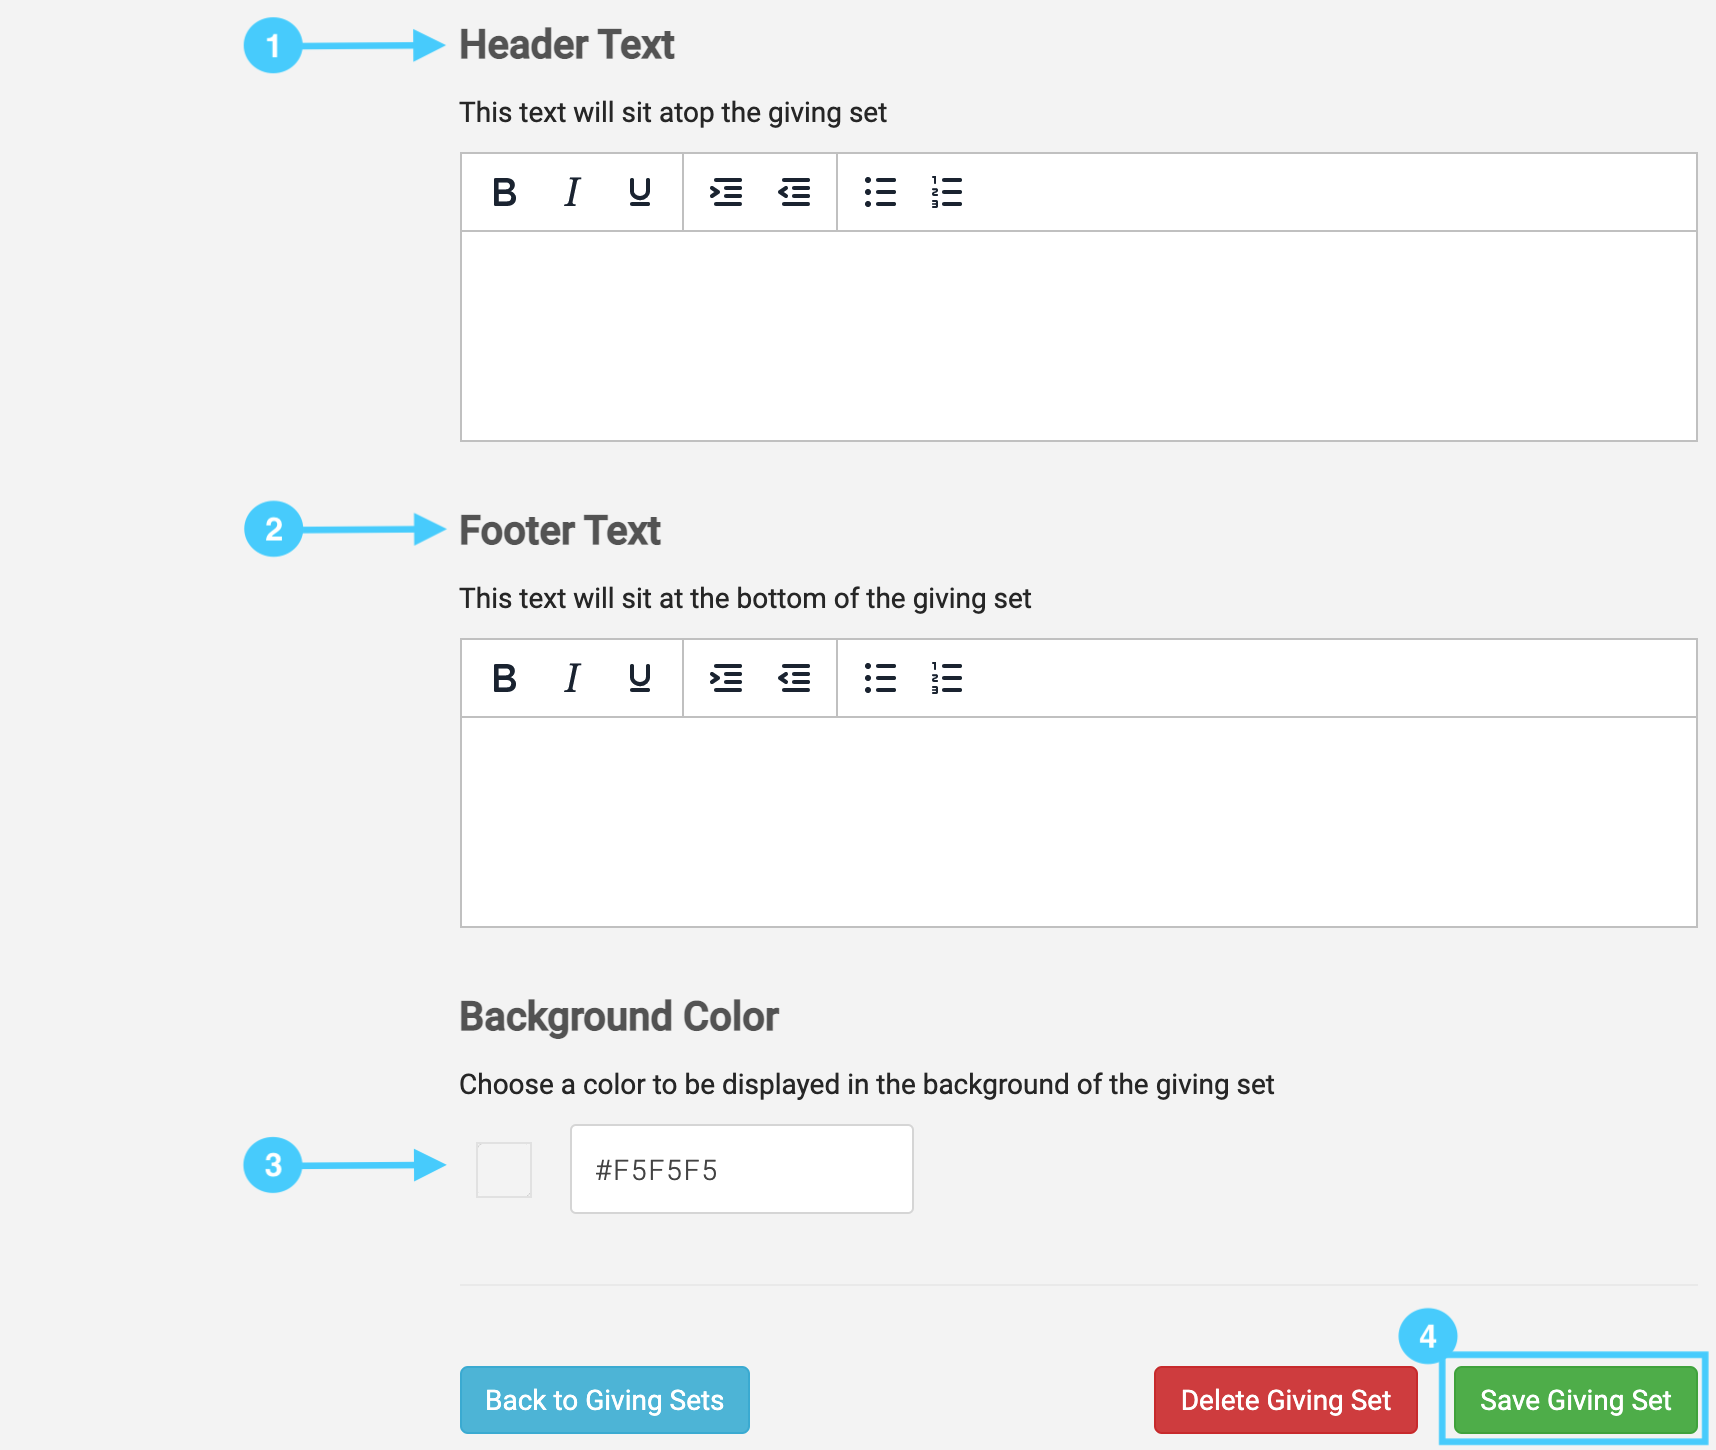
Lastly, you can add custom header and footer text that will appear at the top and bottom of your giving form. This is a great place to provide instructions to your donors or to simply say thank you. You can also change the background color of your form. When finished, click on Save Giving Set.
-
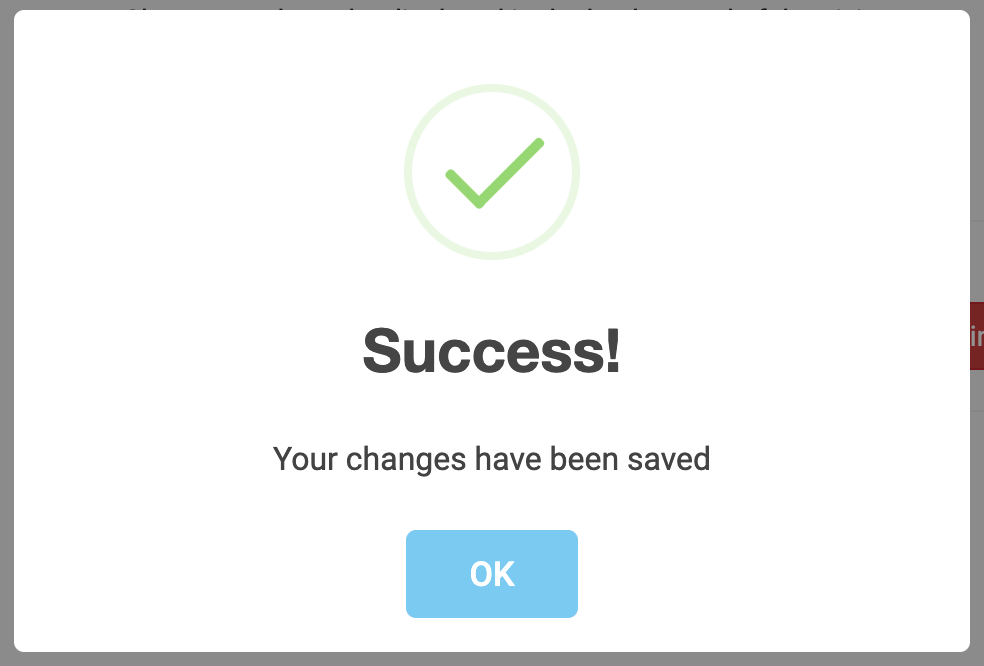
Next, you will see a pop-up box that lets you know you have successfully created your link and your changes have been saved.
-
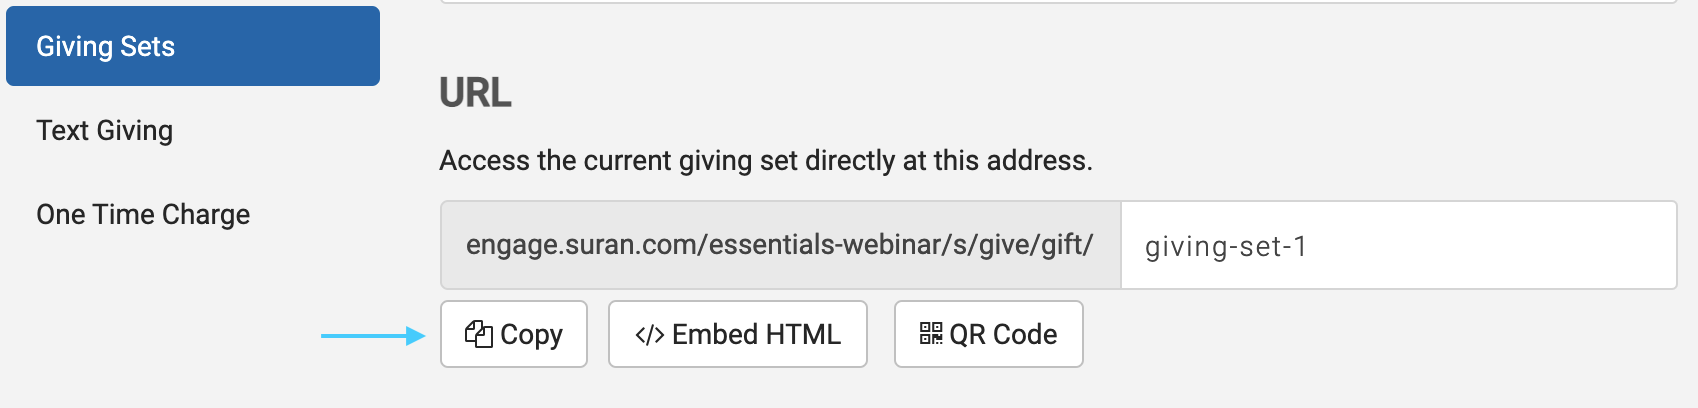
You can then scroll back up to the URL section on the page and decide if you want to copy your link, embed your link, or download the QR code to send this link to your donors.
-
When you are finished, simply scroll down to the bottom of the page and click Back to Giving Sets.