How to use Deposit ID to Reconcile your Bank Statement
Please ensure that you are the owner of the report set that you are trying to change. Click this link https://help.suran.com/stm/how-to-become-a-report-set-owner-104440307.html for step by step instructions to make this change if necessary.
When using the Donation or Transaction Custom Listing and Export reports to reconcile your bank statement, you will want to use the Deposit ID field to identify which donations are in each Deposit. You can add this field to any existing report or to a new report.
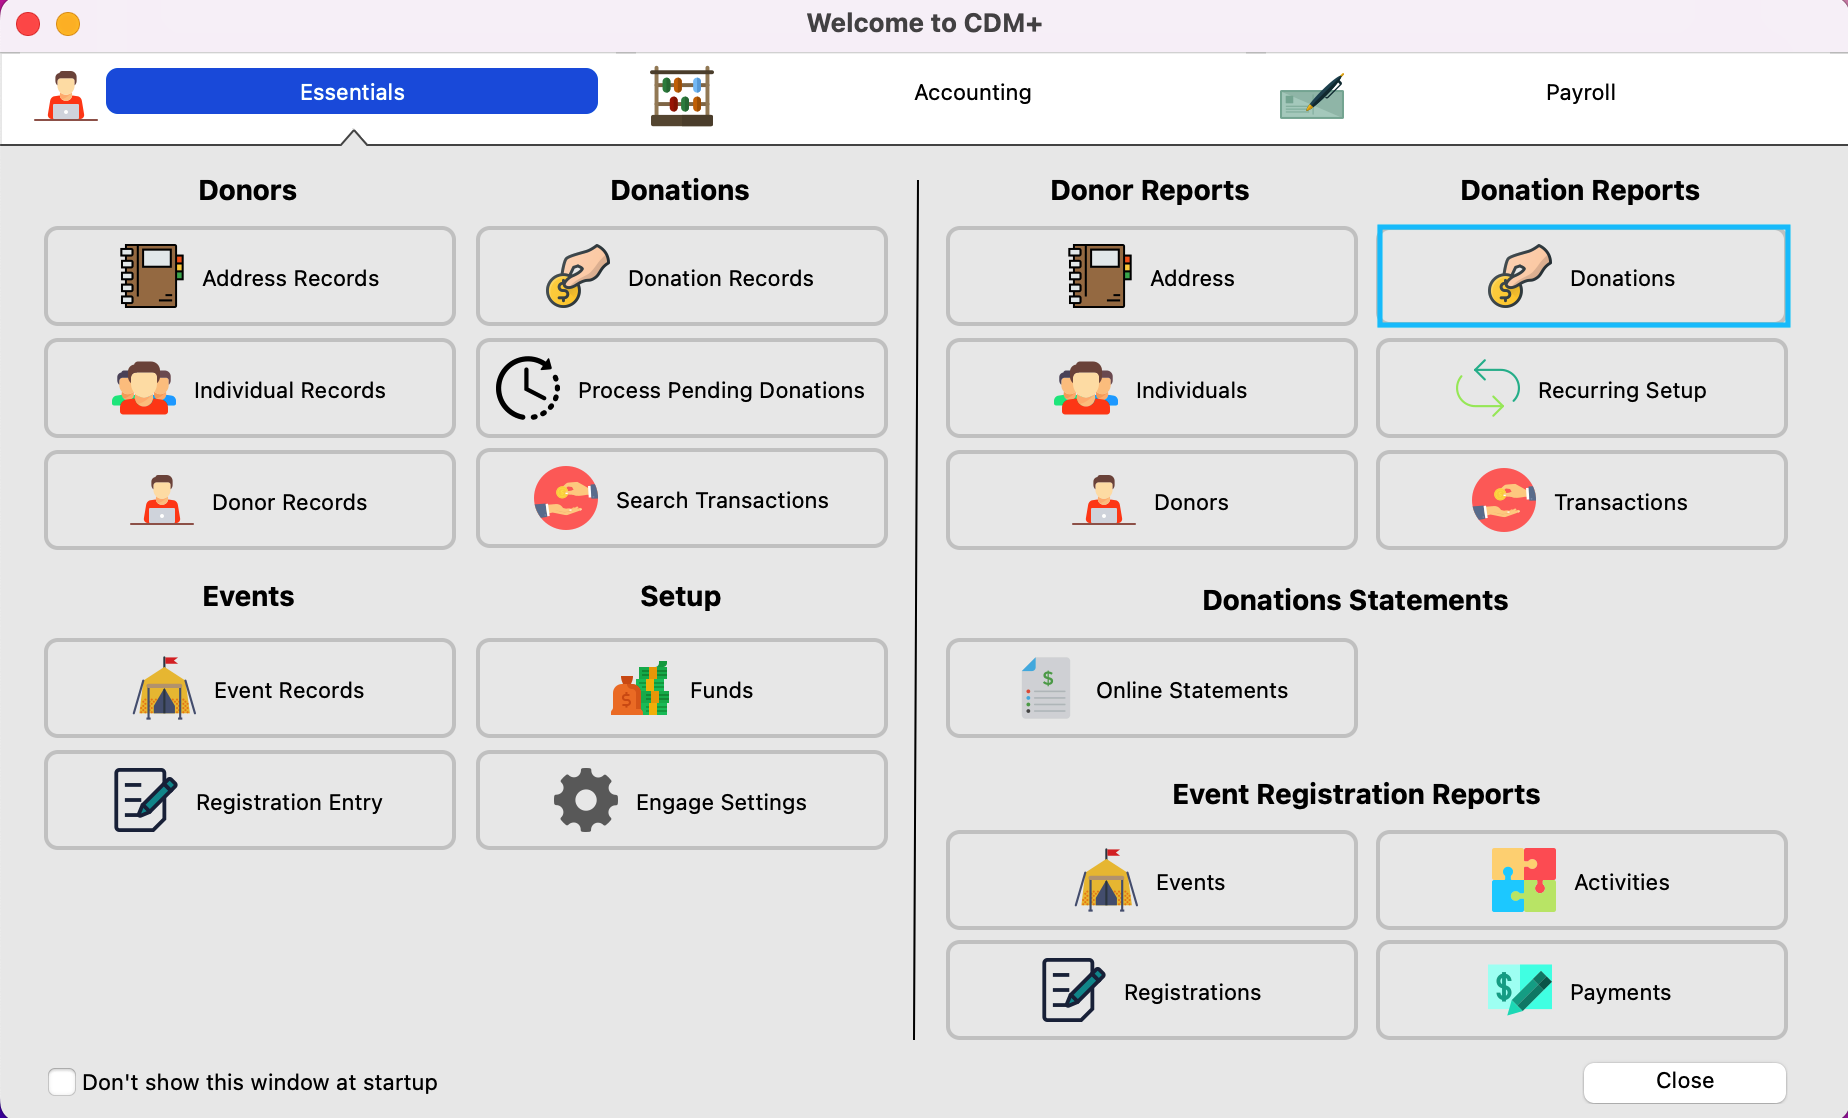
From the Welcome to CDM+ window, click on Donations or Transactions from under Donation Reports.
Use the Donation reports when you need to see more details concerning the actual donation such as the breakdown of the donation by fund, donor details, etc. Use the Transaction reports if you need to track both donation and event payments and don't need the detailed breakdown of the donation but want to view the transaction as a whole.
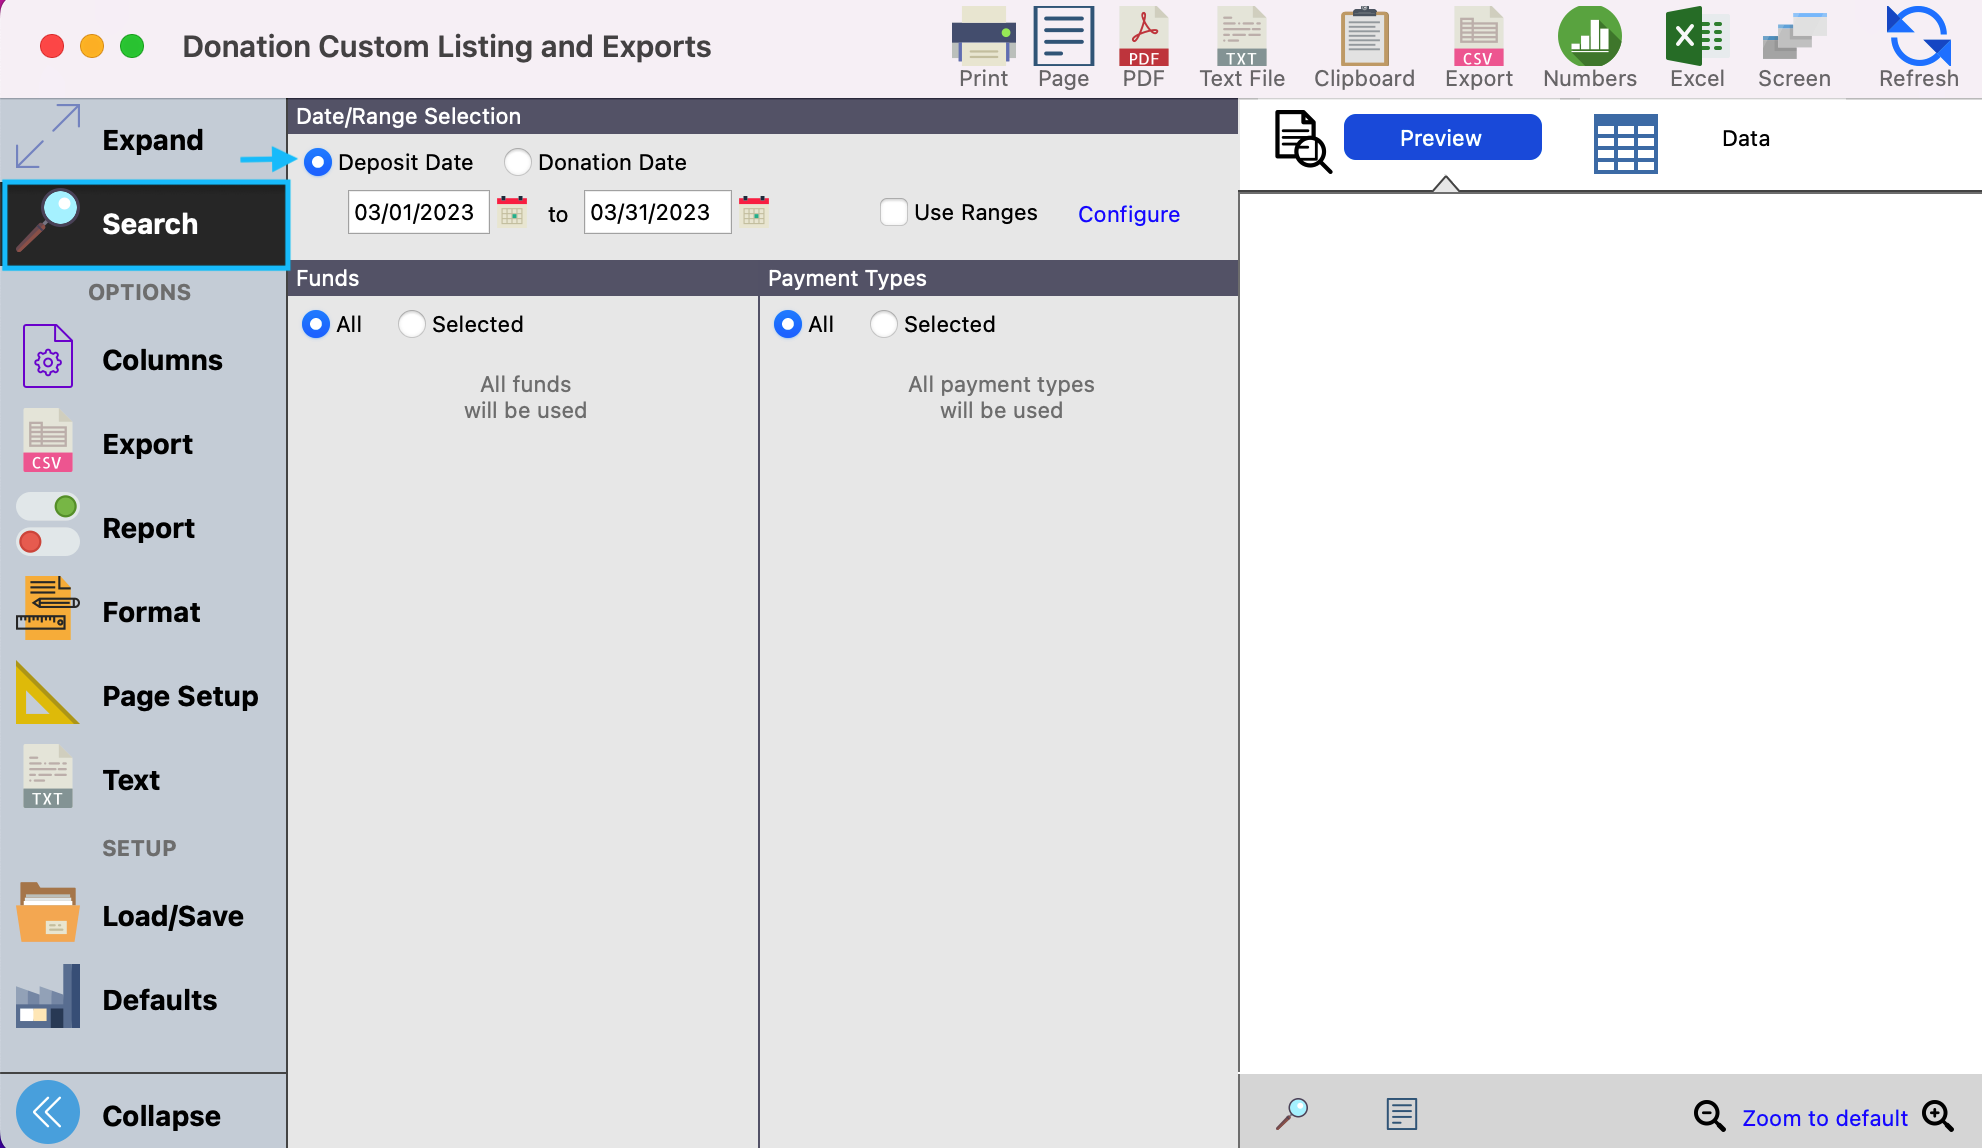
In the next window, under Search, input your search criteria. If wanting to reconcile your bank statement, make sure to search by Deposit Date.
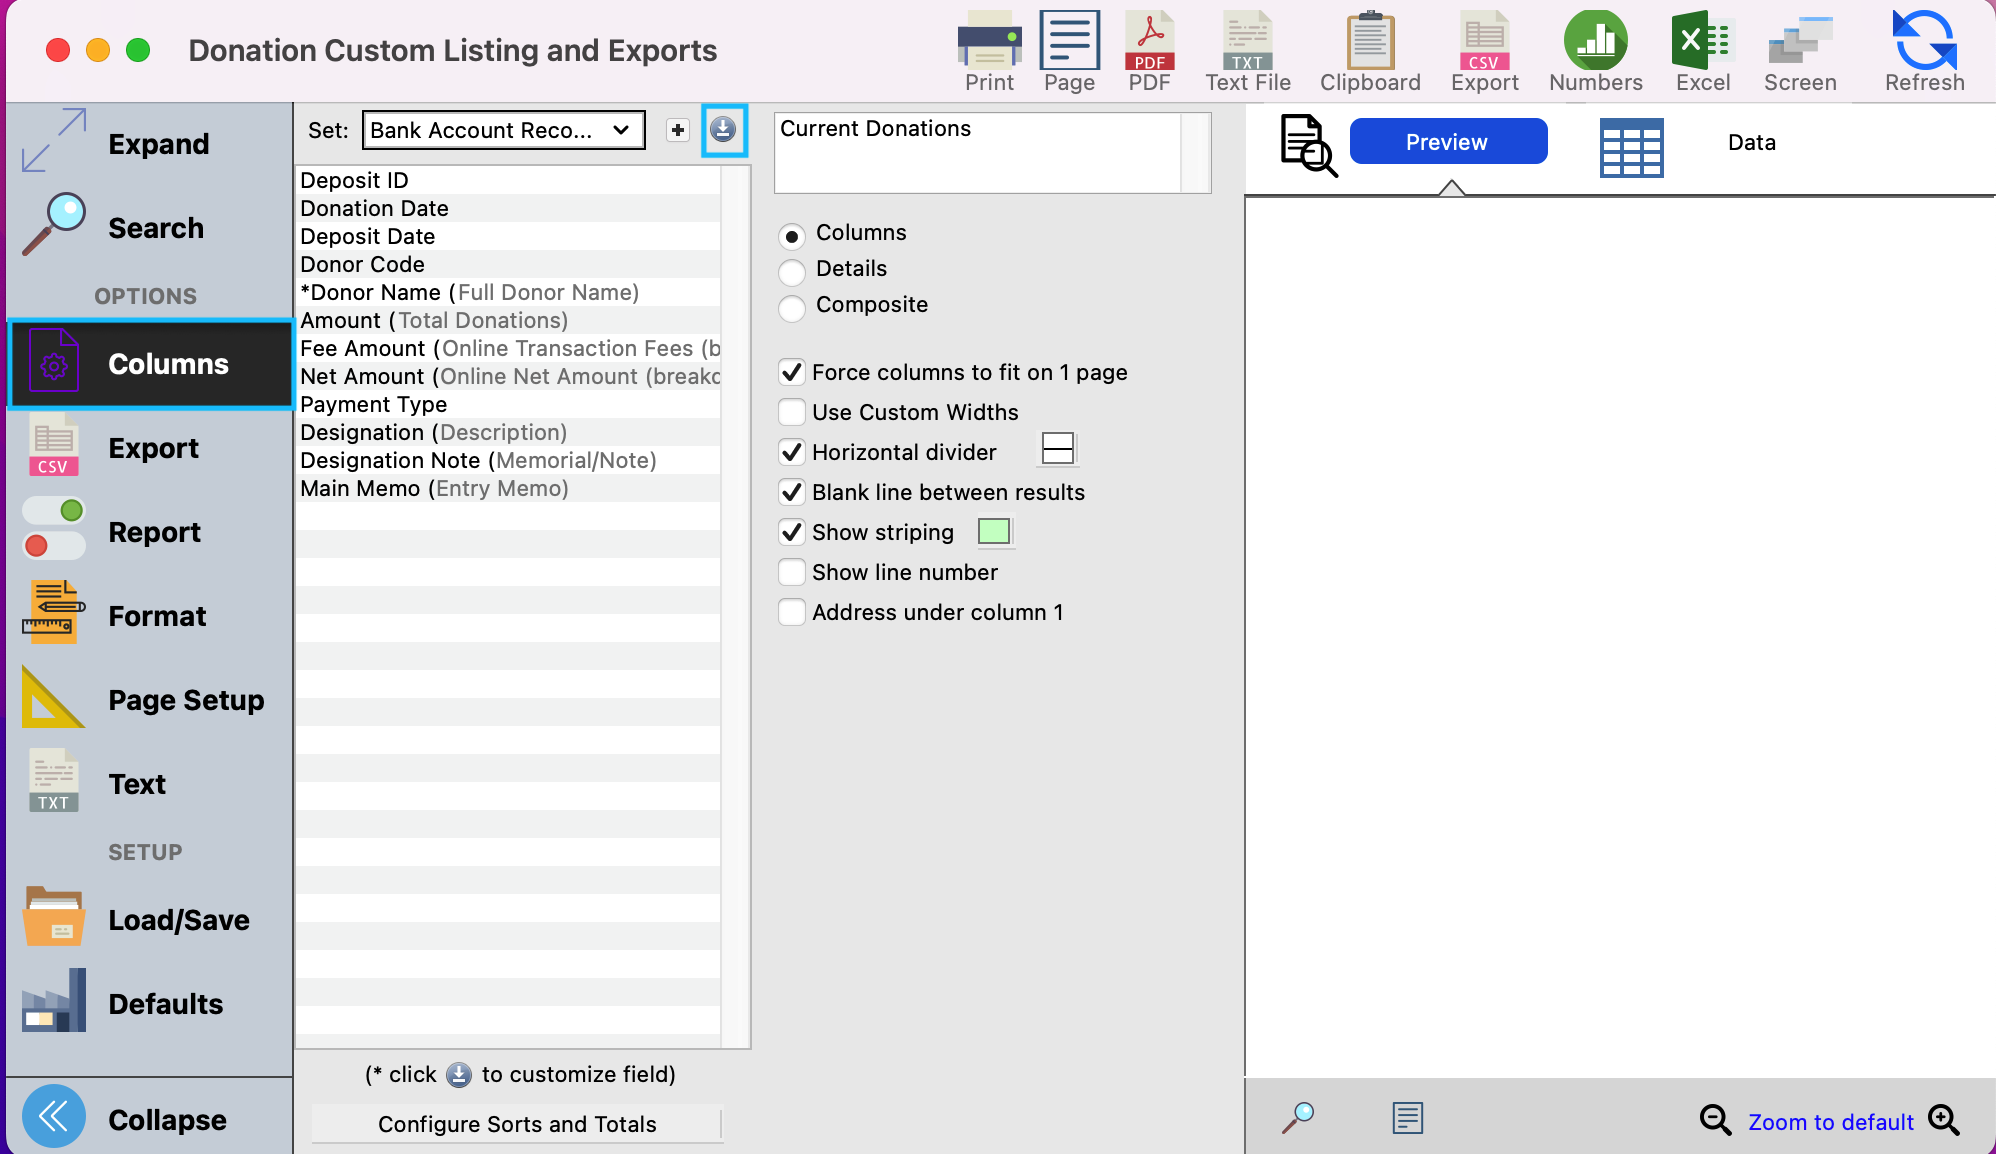
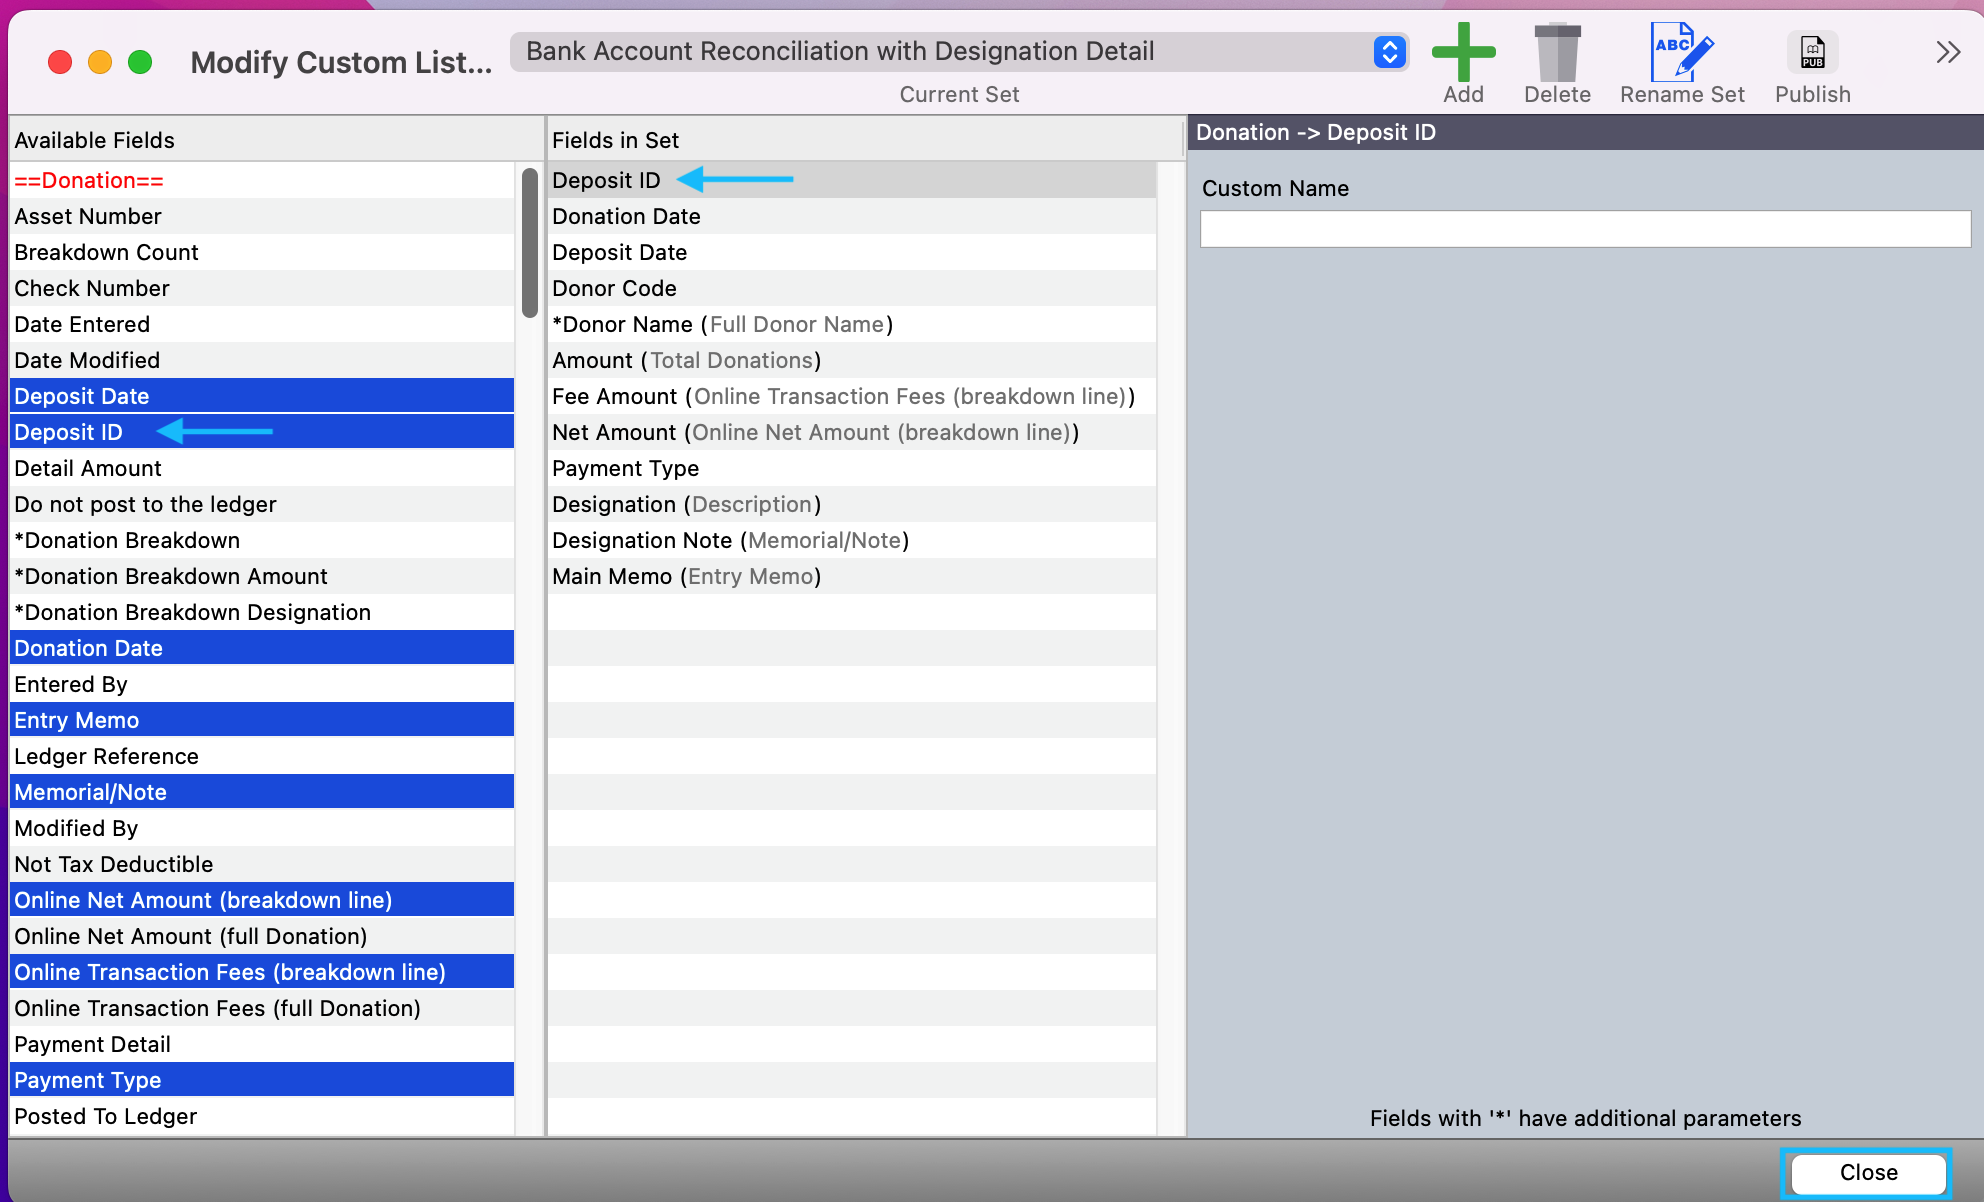
Next, click on Columns from the left-hand side menu. To add the Deposit ID field to your report, click on the blue circle with the down arrow.
- In the next window, double click on the Deposit ID field to bring the field to the "Fields in Set" column. You can also click to drag this field to where you want it in your report. Close this window.
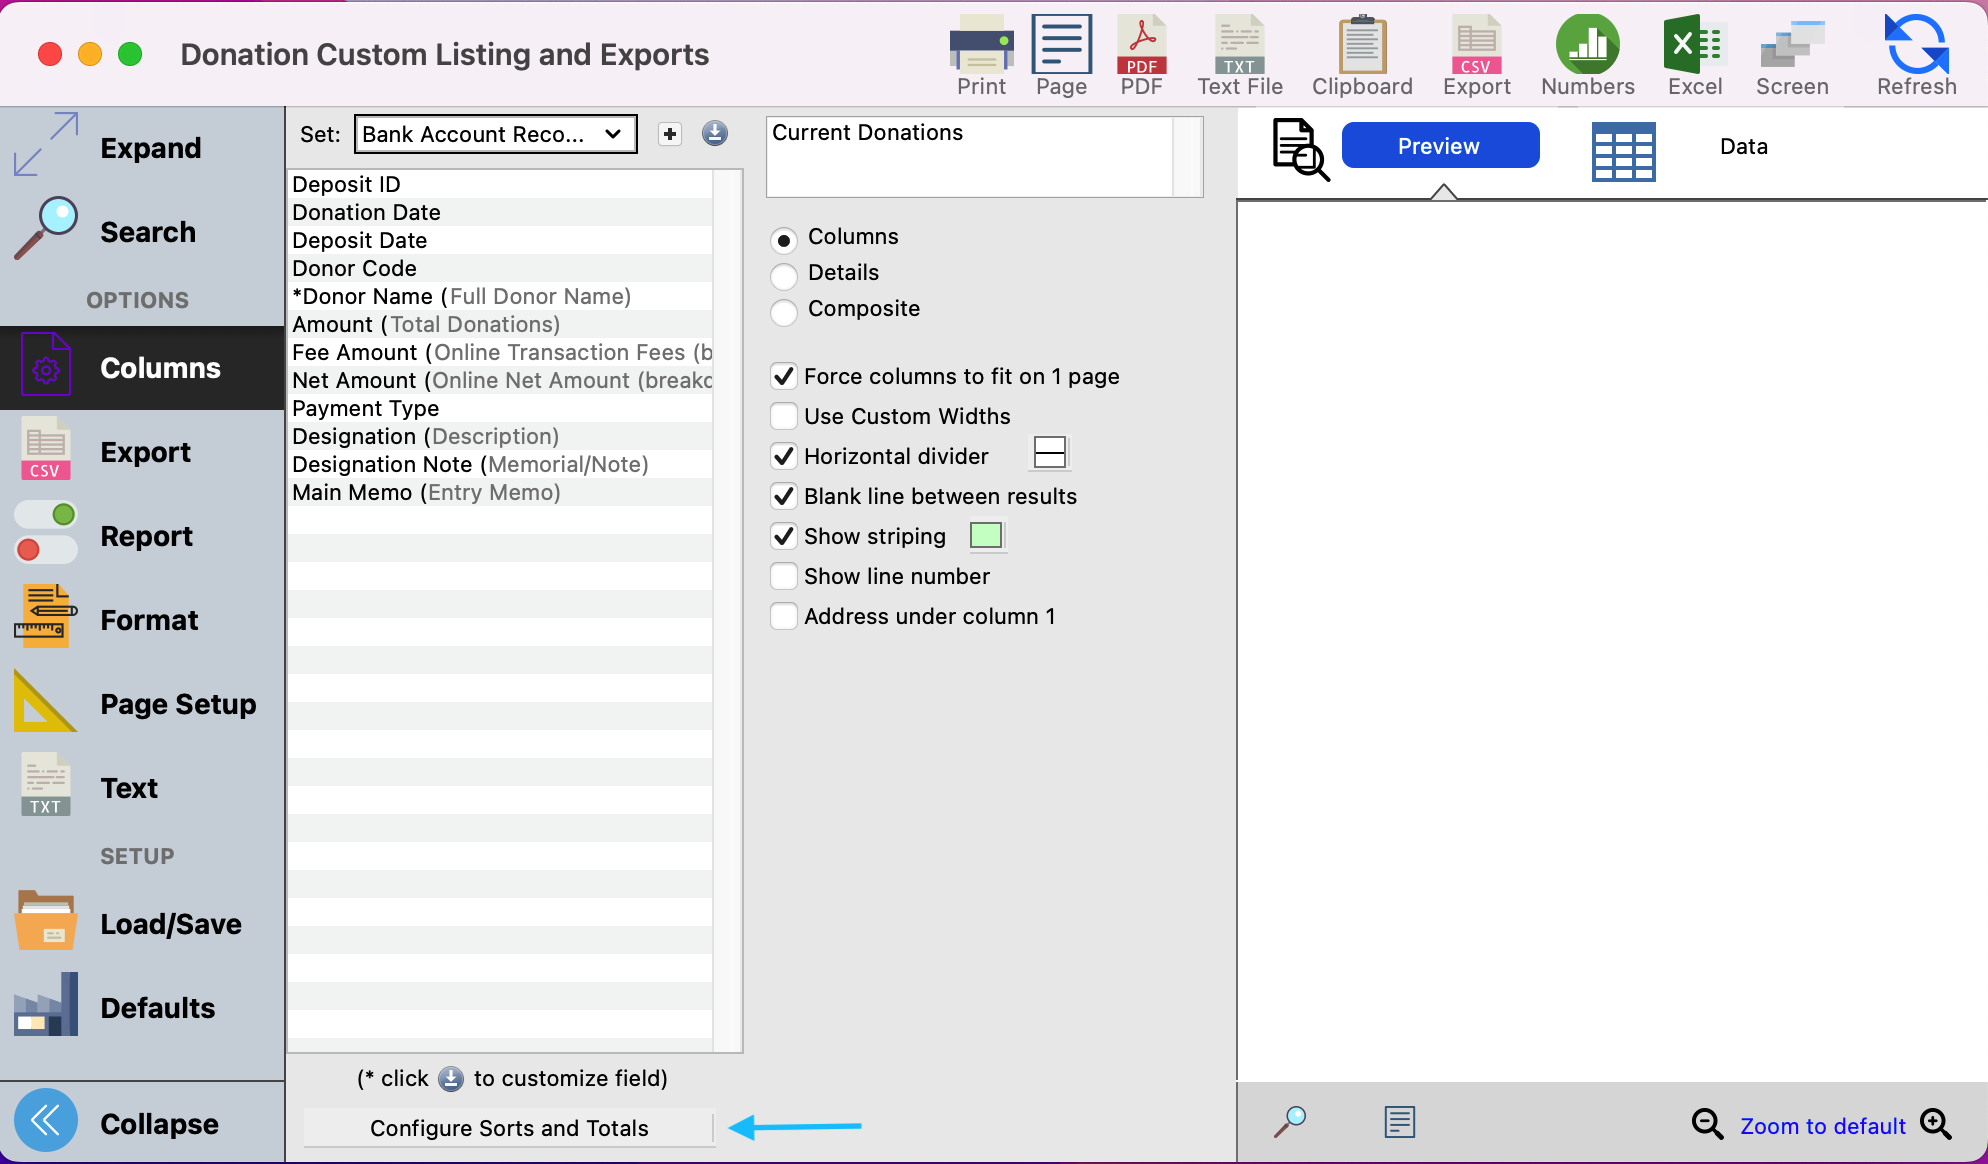
- Next, click on the Configure Sorts and Totals.
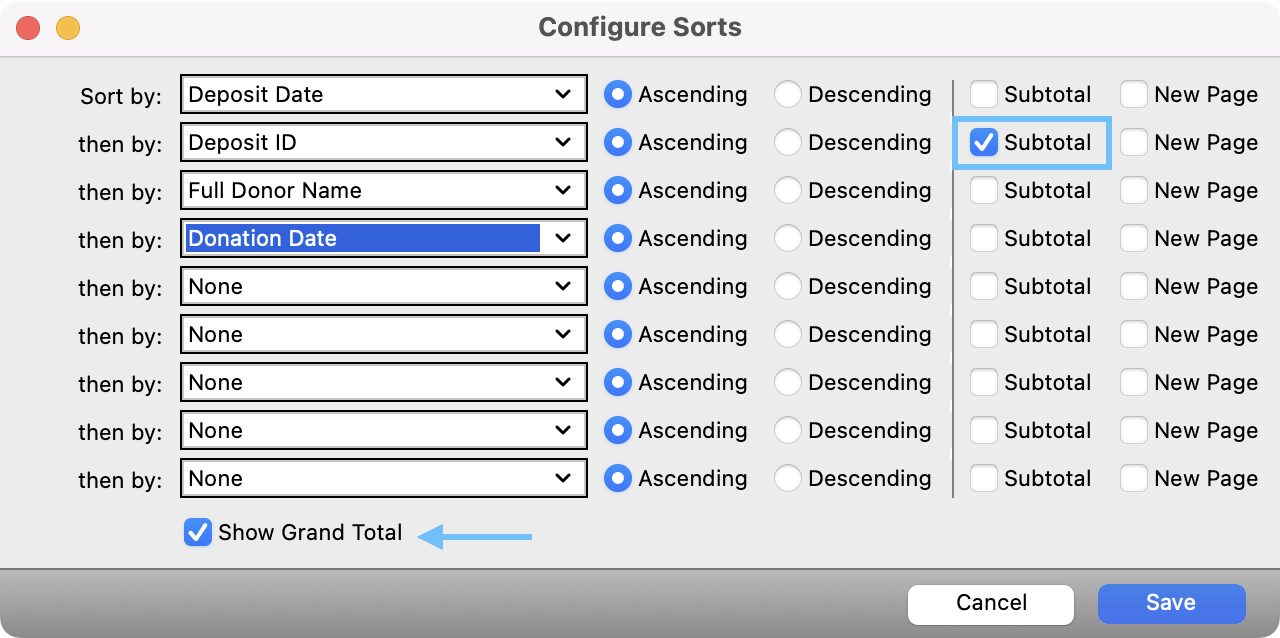
- In this window is how you can choose how your data is organized.
Our recommended sort options would be:
a. Deposit Date- this will put your report in chronological order.
b. Deposit ID- make sure to choose to subtotal by this field so you can easily cross reference against your bank statement.
c. Full Donor Name- this way if a donor gives to more than one fund, you'll see their donations listed next to one another.
d. Donation Date- this helps to put the transactions in chronological order under the Deposit Date. - You can also choose to click the box that says, "Show Grand Total" which will give you a total for the date range you selected. Then, save your changes.
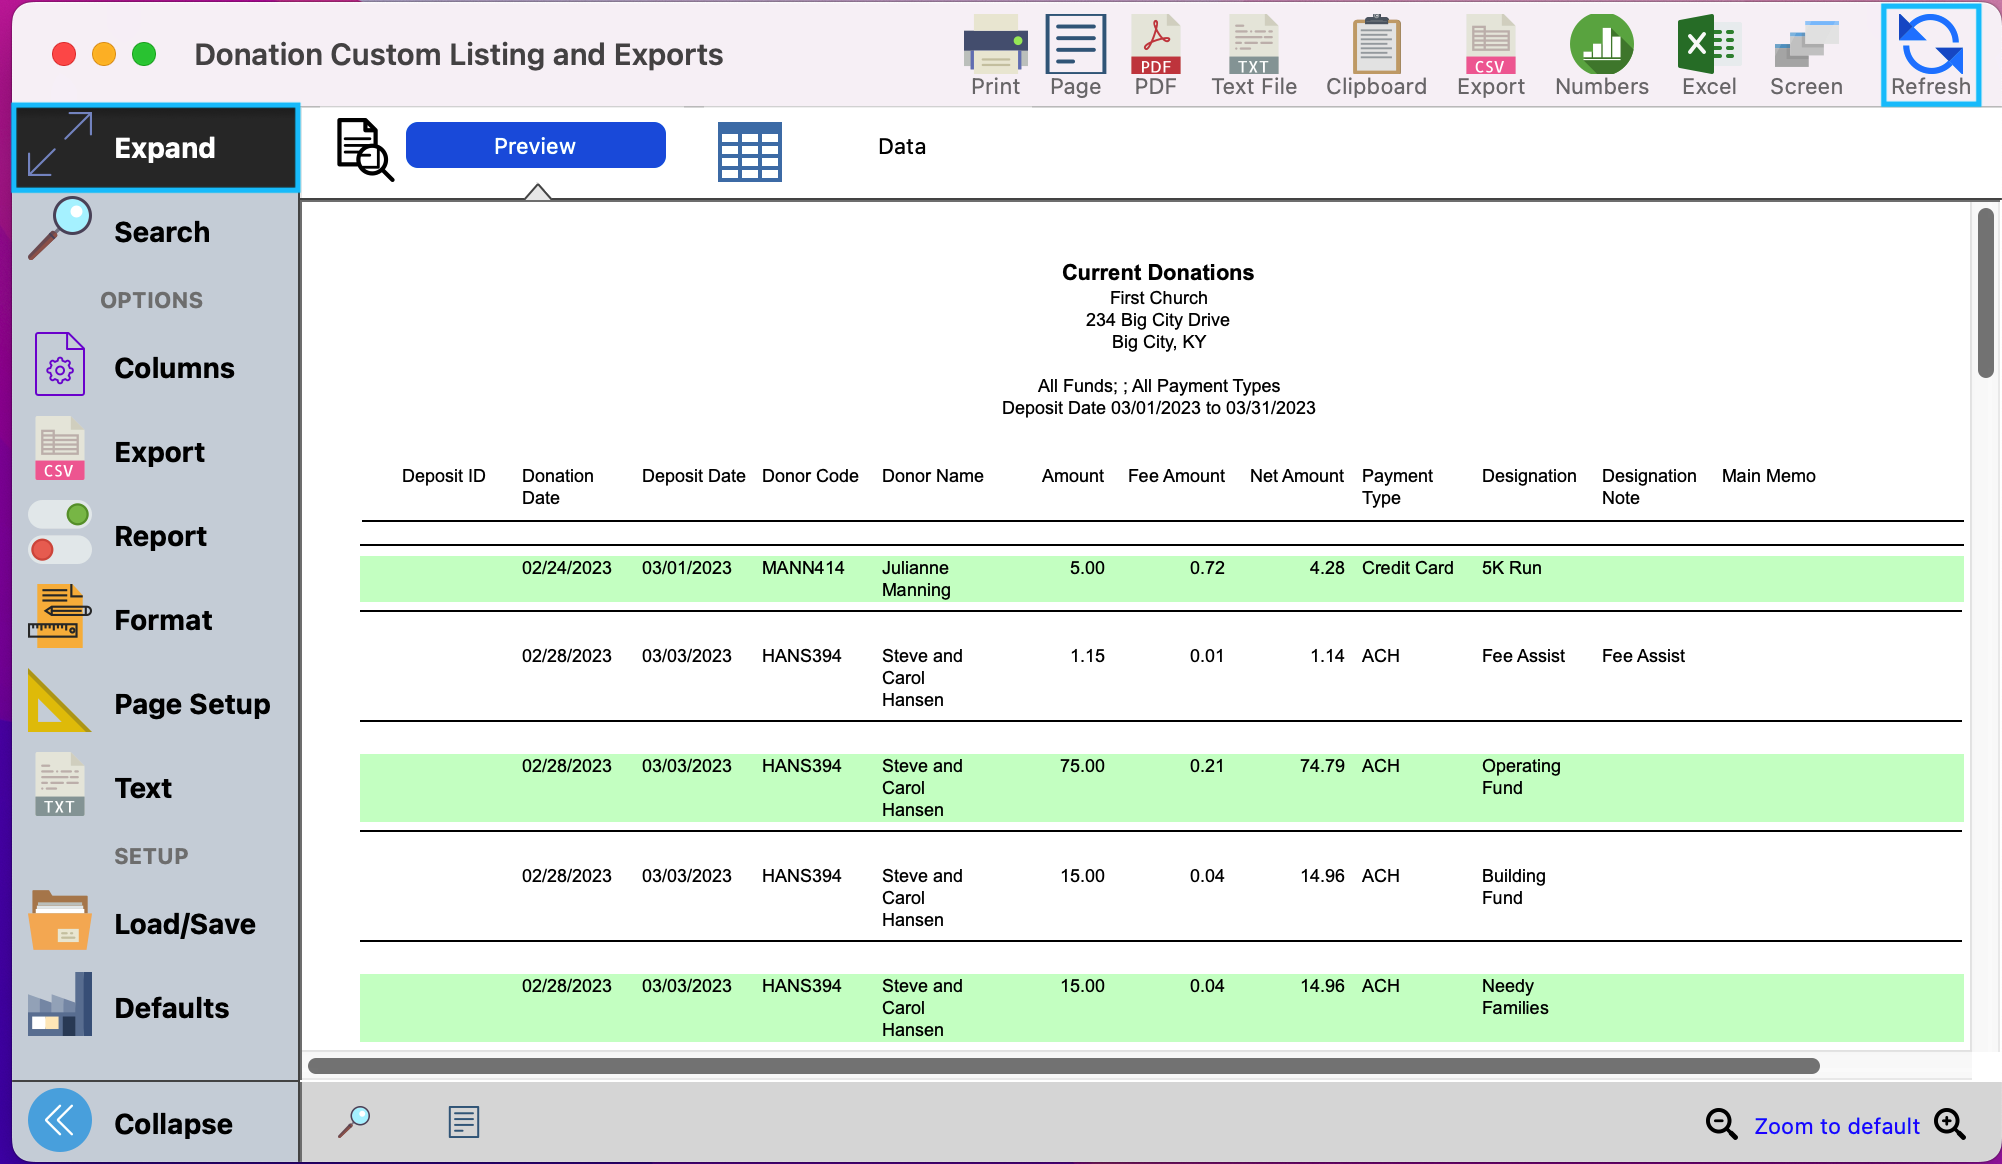
- Then, simply click Refresh and Expand to see a preview of your report or export the report as you wish.
